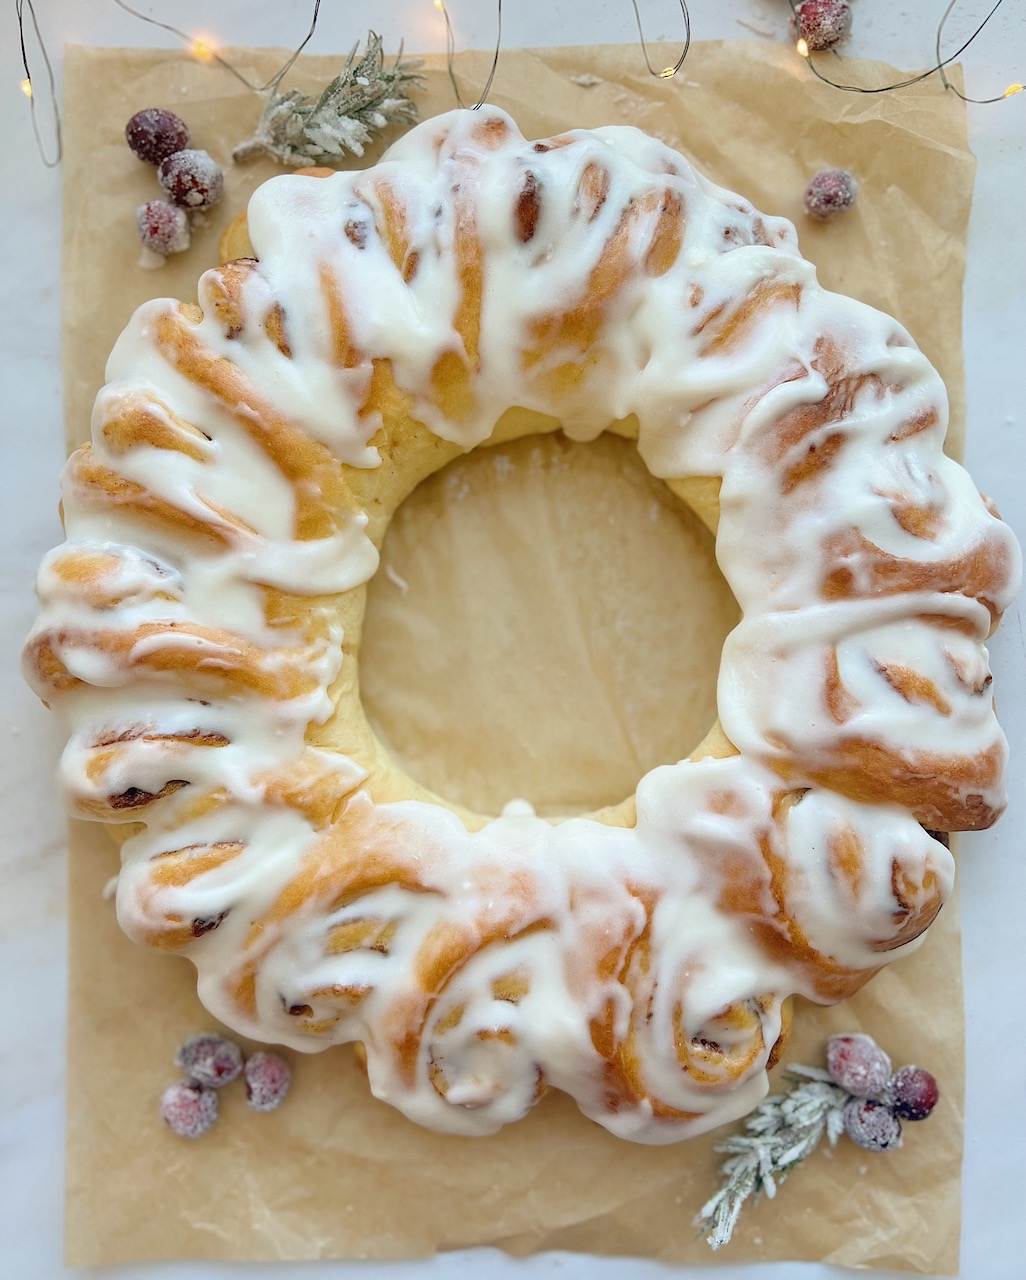
Christmas Morning Cinnamon Roll Wreath
Christmas morning cinnamon rolls just got even better! These delicious fluffy, pull-apart cinnamon rolls, shaped in a festive Christmas wreath make the ultimate Holiday treat! Everyone will love pulling off their own piece as you gather around the table devouring this Christmas Morning Cinnamon Roll Wreath in your jammies!
Why you will love this recipe
Really, what’s not to love?! I’m always up for making fun shaped breads and this one really hits the mark for the Holidays! I love that you can lay it out beautifully on your table, almost as a centerpiece. It just invites everyone to sit down and chat around the table while pulling apart and munching on the cinnamon rolls, piece by piece.
Any time a food invites us to slow down, gather and enjoy, I’m all in, just like when we make this Homemade Gingerbread House! Like my Norwegian Kransekake, this cinnamon roll wreath can be easily garnished with some fun and festive sugared cranberries and rosemary! It looks so pretty! I do this with lots of Holiday treats like my Spiced Gingerbread Cake Loaf and Nutella Star Bread!
For this cinnamon roll wreath, I’m using my favorite – Master Roll Dough. You can also find my classic Homemade Cinnamon Rolls recipe too! We’re making the exact same recipe, but with a few adjustments during the shaping phase.
Ingredients
There are some unique ingredients in this recipe that makes it so delicious! Each serves an important role in how this dough and these cinnamon rolls will turn out.
- Bread flour: Most bread recipes will use bread flour. It has a higher protein content (11-13%) than an all-purpose flour. Higher protein flours also mean a higher gluten flour – yielding a bread with a strong crumb structure.
- Powdered milk: In baked goods it provides a creamier flavor and helps yield a more golden brown color when baked. Look for powdered milk that is fine in texture. If you are looking for a non dairy option, try using a milk powder substitute like coconut, soy or rice powder.
- Instant Yeast: It can be added directly to your recipe without having to proof first. It’s a strong, fast acting yeast that will allow these sweet rolls to rise super fluffy. I like to use BellaRise instant yeast or SAF instant yeast
- Eggs: Eggs in bread help to create a fluffy, big rise. They are perfect for these rolls, since it’s meant to be soft and fluffy.
- Potato Flakes: Potato flakes in bread make the crumb more moist and tender. They also extend the shelf life of homemade bread.
- Butter Flavor Shortening: Vegetable shortening has a high melt point, allowing it to create more steam in the dough when baked. This produces a lighter, airy texture bread. The butter flavor gives it a more rich, butter flavor. If you can’t find the Butter Flavor Shortening, use plain shortening – it will still turn out amazing! I often get asked if you can substitute butter flavored shortening…You can swap it out 1:1 for more butter – however, this recipe really is so good with the butter flavored shortening!
- Cinnamon and brown sugar mixture: mixing these together before sprinkling on top of the dough helps give a more even distribution for the filling.
- Cream Cheese Frosting compliments the slight spice from the cinnamon perfectly! Find my Cream Cheese Frosting HERE.
Mixing the cinnamon roll dough
I love baking with this dough! It’s such a pillowy, soft dough that’s so easy to work with! I use it in several other recipes like Crescent Dinner Rolls, Orange Rolls and S’mores Sweet Rolls! You’ll see it is so easy to mix up and use.
You will need to use some type of a stand mixer to make this dough. Use the dough hook attachment.
- In the bowl of your mixer, combine the warm water, powdered milk, potato flakes, sugar, salt, yeast. Whisk them together by hand – this helps to break up the powdered milk and potato flakes and gets all of those ingredients incorporated before adding the heavier ingredients.
- Add the eggs, butter and shortening. Add 3 cups of the flour (about half) and mix on low, just until all of the ingredients are combined and smooth.
- While the mixer is on low, gradually add two cups of the remaining flour, 1/2 cup at a time, mixing well after each addition. This is where getting to know your dough comes into play. You’re looking for the dough to clean the sides of the bowl as it’s mixing. It should be concentrated around your dough hook and cleaning the sides of the bowl. Once you get it to this point, stop the mixer and lightly tap on the dough with your finger. If it feels soft, but not wet and sticky, it’s ready to knead. Return to mixing it on low and allow your mixer to knead it for 5 minutes.
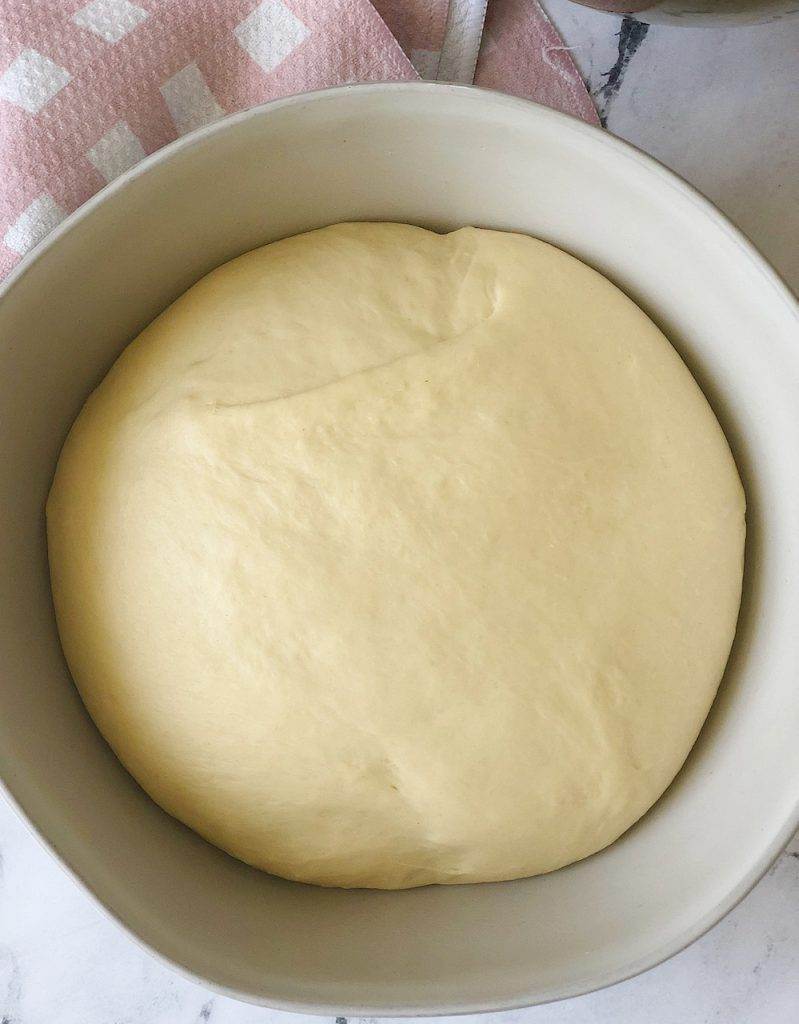
- Place your dough in a large, greased bowl. Cover it and let it rise until it doubles in size, about 60-90 minutes depending on the temperature of your kitchen.
Shaping your Cinnamon Roll Wreath
After rolling up your cinnamon roll, grab your kitchen shears and get ready to make some Holiday magic!
- Step 1: Cut 1-inch pieces at a 45-degree angle, cutting only 3/4 of the way through the roll. Each roll will have about 15-18 cinnamon rolls. *Make sure the roll is seam side down when you do this.
- Step 2: Line a baking sheet with parchment paper and place a 4-inch oven safe bowl or ramekin in the center. Arrange the roll around the ramekin with the cut side facing outwards. The ramekin will ensure that you get a perfectly round center for your cinnamon roll wreath! Fan the rolls out, laying them slightly on top of one another. Use your scissors to make the cuts a bit deeper if needed when spreading the cinnamon rolls out. *Watch my video above to see this in detail.
- Step 3: Let the cinnamon roll wreath rise a final time. It should rise until it increases in size about 50%. During this time, cover the cinnamon rolls with a clean towel or plastic wrap. And preheat your oven. Typically an oven needs a good 30 minutes to fully preheat (use an oven thermometer like this one for more accuracy!). This final proof will be faster than the first rise, and likely take about 30-45 minutes, again depending on the temperature of your kitchen.


Baking the Cinnamon Roll Wreath
Bake on the center rack of your oven. The edges should be golden brown. If you’re uncertain your cinnamon rolls are baked, insert an instant read thermometer – it should read around 195°F. Once you remove the baking sheet from the oven, place it on a wire cooling rack. Let it cool for 20 minutes before removing the ramekin from the center. Then, remove the ramekin and you’re ready to frost!
Frosting & Serving
I love using my Cream Cheese Frosting for these cinnamon rolls! Add an extra Tablespoon of milk if you want a more creamy icing. Frost your Cinnamon Roll Wreath while it’s still a bit warm, this will make the frosting slightly melt and run into the grooves and crevices of your cinnamon rolls. This is a perfect way to reveal all of those beautiful cinnamon swirls!
Make ahead options
If you’re serving this Cinnamon Roll Wreath in the morning, you can prepare some of the steps ahead of time. Here are a couple of options:
- This first option is my preferred method. Make the dough the night before. Place it in a large bowl, cover it with plastic wrap (I LOVE using these plastic bowl covers for this job!). Put it in the refrigerator overnight. The cold temperature will slow down the rising process until you’re ready to roll it out the next morning. Let the dough sit out about 15 minutes before rolling it, allowing it to warm up a bit. Shape as usual and let rise one more time – again, this last rise only takes about 30-45 minutes. *If you are refrigerating this dough, use it within 24 hours – any longer than that and it will begin to alter the flavor to more of a yeasty taste.
- The second option is to shape the cinnamon roll wreath the night before and refrigerate. This can be really convenient if you’re serving it first thing in the morning. Preheat your oven and take them straight from the refrigerator to the oven. This is my second choice of the two…mainly because sometimes the rolls can overproof overnight, even in the refrigerator. If you notice your rolls are shrinking and collapsing after being baked or have a yeasty flavor, you’ve most likely over proofed them. Make a note, and next time reduce the proof time. Even though I prefer the first option, I have successfully proofed this cinnamon roll wreath in the refrigerator overnight. The message here – do whichever works best for your baking and serving schedule.
Want to master bread making?
Baking with yeast may seem intimidating and confusing, but I promise it doesn’t have to be! The more you practice, the easier it gets! I love to help bakers get amazing results in bread and baking through my Baking Academy classes. These pre-recorded videos help to take a lot of the guess work out of working with yeasted doughs! They are perfect for visual learners!
There is so much information out there that can make bread making so confusing, causing you to maybe hold back from tackling lots of recipes you want to make. My classes make it easier for you to understand how and why baking with yeast can be so rewarding!
Other recipes you’ll love
Cinnamon Roll Wreath
Ingredients
Dough Ingredients:
- 2 cups warm water (about 115°F)
- ¼ cup nonfat powdered milk
- ½ cup boxed potato flakes (aka instant mashed potatoes)
- ½ cup granulated sugar
- 1 Tablespoon plus 1 teaspoon instant yeast*
- 1 ½ teaspoons salt
- ¼ cup unsalted butter softened to room temperature
- ½ cup butter flavored shortening
- 2 large eggs
- 5-6 cups bread flour
Filling Ingredients:
- ¼ cup salted butter melted
- ¾ cups dark brown sugar
- 4 Tablespoons ground cinnamon
Frosting:
- Frost with my Cream Cheese Frosting adding 1 extra Tablespoon of milk to thin it out
Instructions
Prepare the dough.
- In a large bowl, combine warm water, powdered milk, potato flakes, sugar, yeast and salt. Mix well with a wire whisk. Pour into the mixer bowl and secure the dough hook attachment to your mixer.
- Add the butter, butter flavored shortening and eggs. Add 3 cups of the bread flour. Mix for about 30 seconds until ingredients are incorporated. Stop the mixer and scrape down sides of bowl with a spatula.
- Turn mixer on low and add 2 more cups of the bread flour, 1/2 cup at a time. After adding the 2 cups of flour, let dough continue to mix for about 1 minute. Stop and scrape the sides of the bowl as needed. If dough is not mostly cleaning sides of the bowl, add more flour 1/4 cup at a time until it cleans the sides of the bowl. Stop the mixer and check the dough by gently pressing your finger into it. If the dough does not stick to your finger, it should be ready to knead. *When in doubt, it’s always best to go lighter on the flour. You can always add more flour, but you can’t take flour away. Too much flour in your dough will give you dry, dense rolls.
- Knead on low speed for 5 minutes.
- Remove dough from mixer and place in a greased bowl. Cover with a clean kitchen towel and let rise until doubled in size, about 60-90 minutes.
Prepare the filling.
- Melt ¼ cup salted butter in microwave safe dish and set aside. In separate bowl combine the brown sugar and cinnamon.
It’s time to roll.
- Divide dough into two 28-30-ounce portions. If you don’t have a scale, you can eyeball it. Round each portion to an oval shaped piece of dough by pulling and tucking it under. This will make it easier to roll it out into a rectangle.
- Flour your work surface and roll dough out to a rectangular shape, about 10 inches by 18 inches.
- Spread half of the melted butter on the dough, leaving an inch border on the top side of the rectangle. Sprinkle about 1/4 – 1/3 cup of brown sugar on top of the melted butter, continuing to leave the inch border at the top edge. Leaving this border will help in sealing the dough shut when rolled up.
- Start with the long side closest to you, and working from left to right begin to roll dough up. You can tug and pull as you go which will tighten the roll and make more swirls.
- Once it’s all rolled up, pinch the seam shut.
- Using kitchen scissors, cut 1-inch pieces at a 45-degree angle, cutting only 3/4 of the way through the roll. Each roll will have about 15-18 cinnamon rolls. *Make sure the roll is seam side down when you do this.
- Repeat with second ball of dough or see Notes for other options to use this dough.
- Line a baking sheet with parchment paper and place a 4-inch oven safe bowl or ramekin in the center. Spray the outside of it with nonstick spray. Arrange the roll around the ramekin with the cut side facing outwards. The ramekin will ensure that you get a perfectly round center for your cinnamon roll wreath! Fan the rolls out, laying them slightly on top of one another. Use your scissors to make the cuts a bit deeper if needed when spreading the cinnamon rolls out. (Be sure to watch my video showing this in more detail)
- Let the cinnamon roll wreath rise, covered until it increases in size about 50%. This should take about 30-45 minutes, depending on how warm your kitchen is.
Bake
- Preheat oven to 350°F. Bake on the center rack for 16-20 minutes, until edges are golden brown. Internal temperature should read 195°F. Once you remove it from the oven, place on a wire cooling rack. Let it cool for 20 minutes before removing the ramekin from the center.
- Frost with my Cream Cheese Frosting, adding about one extra Tablespoon of milk to make it a bit runnier. Frost the cinnamon roll wreath while it’s still slightly warm – this will make the frosting melt a bit, revealing all of the beautiful cinnamon swirls.
- Serve by either pulling apart each roll or cutting with a serving spatula. Store any leftovers, covered for up to 3 days.
Video
Notes
- This recipe makes two cinnamon roll wreaths. If you are only wanting to make one, you can use the rest of the dough for Crescent Dinner Rolls, Orange Rolls or another one of my sweet roll recipes. It’s the best dough!
- This first option is my preferred method. Make the dough the night before. Place it in a large bowl, cover it with plastic wrap. Put it in the refrigerator overnight. The cold temperature will slow down the rising process until you’re ready to roll it out the next morning. Let the dough sit out about 15 minutes before rolling it, allowing it to warm up a bit. Shape as usual and let rise one more time – again, this last rise only takes about 30-45 minutes. *If you are refrigerating this dough, use it within 24 hours – any longer than that and it will begin to alter the flavor to more of a yeasty taste.
- The second option is to shape the cinnamon roll wreath the night before and refrigerate. This can be really convenient if you’re serving it first thing in the morning. Preheat your oven and take them straight from the refrigerator to the oven. This is my second choice of the two…mainly because sometimes the rolls can overproof overnight, even in the refrigerator. If you notice your rolls are shrinking and collapsing after being baked or have a yeasty flavor, you’ve most likely over proofed them. Make a note, and next time reduce the proof time. Even though I prefer the first option, I have successfully proofed this cinnamon roll wreath in the refrigerator overnight. The message here – do whichever works best for your baking and serving schedule.
I plan to make only one wreath. The cream cheese frosting recipe seems to make a lot more than I need. Can I halve the recipe?
Yes, you definitely can half the cream cheese frosting recipe.
Hi Heather,
Any subs for the eggs?? (vegan)
I haven’t tested it, but you could try liquid egg substitute. Let me know if you try it.
Hi! Can the powdered milk be replaced with real milk? Maybe subbing 1/4 cup of warm water for milk?
Yes, absolutely. Just make sure you use the milk as portion of your liquids. So if you’re going to use 1/4 cup fresh milk, you’ll replace 1/4 cup of the water. Make sense? Also make sure your milk is lukewarm, about 90°F.
Thank you!
This brings back memories from when I lived in PA. I used to make what was called Swedish Bread ring. Everyone loved it. Thanks for bringing back my memories of baking this and will definitely make it again. Love all your recipes.
That’s so sweet Phyllis. So happy you enjoyed it. Merry Christmas!
Good morning, can this be made w sourdough starter?
Yes it can. Replace the instant yeast with 1 cup active starter. Reduce the water and flour amount by how much you are adding with your starter. You may need more or less flour in the recipe to achieve the right texture. Rise times will be longer – keep an eye on it. LEt me know how it turns out for you.