Easy Sourdough Bread Recipe
This easy sourdough bread recipe is so approachable, it’s perfect for both beginners or experienced sourdough bakers!

The fairly moderate hydration level of 74% makes this dough easy to mix and shape. It bakes up super fluffy with the perfect crispy crust! You’ll appreciate the option to bake same day or cold proof your loaves overnight. This is sure to become your new favorite, everyday sourdough bread recipe!
(This post contains affiliate links. I receive a commission on purchases made from affiliate links, at no cost to you.)
What makes this sourdough bread recipe easy
- Mix by hand, all in one bowl.
- Most of the preparation time is rest time.
- Since it is made mostly of bread flour, there is very little dough development needed.
- A moderate hydration level makes the dough easy to handle.
- Flexibility with the flour types.
- Flexibility on the timeline – make same day sourdough or put it in the refrigerator to bake anytime the next day.
It’s so easy – whether you’re a beginner or seasoned sourdough baker, you’ll love this easy sourdough bread recipe.
If you love baking with sourdough, you’ll also love my Sourdough Banana Bread and Pumpkin Discard Muffins with Maple Icing. And I also have sourdough options in the notes of so many of my bread recipes like my Cheddar Jalapeno Stuffed Bread, super yummy Ham and Cheese Filled Rolls, and my classic Parker House Rolls.
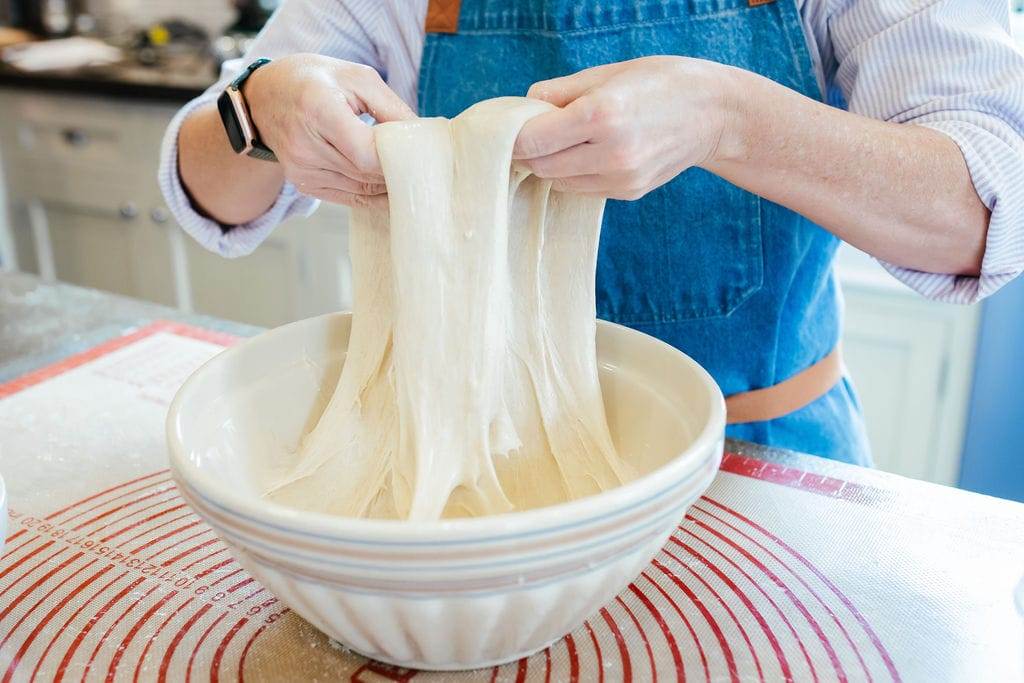
Beginner Sourdough Bakers
If you are newer to sourdough baking, I know it can seem overwhelming. Believe me – years ago, before we had millions of videos at our fingertips, I set out on a journey to learn how to make sourdough. It took me a good couple years to sort through the conflicting information and methods until I got a loaf I could be proud of.
Luckily, there are many more educational tools available to us now.
I developed my Basic Sourdough pre-recorded class to give you the information I spent hours sorting through and testing myself. It’s the perfect class to take if you don’t know how to begin, or if you are unhappy with the results you’ve had so far. In this class, you’ll learn to make amazing sourdough, from How to Create a Sourdough Starter to baking a loaf you can be proud of. I walk you through it all, in a pre-recorded video that you can watch on your own timeline, and you’ll have life-time access to the content!
Once you understand the concepts behind sourdough, it all just clicks! Sourdough baking is really one of the most simple, natural, and rewarding ways to make bread!
Now let’s start making our bread!
Ingredients for Easy Sourdough Bread

- Ripe sourdough starter – Use your starter when it’s at its peak. This means it’s bubbly and thick.
- Water – Using filtered water is recommended, but not necessary. I use room temperature water, which is about 76°F.
- Combination of 3 flours – whole wheat flour, medium protein bread flour, and high gluten/protein bread flour
- Fine sea salt – I love to use Redmond’s Real Salt. It’s all-natural and contains several trace minerals. Use my affiliate code THATBREADLADY for 15% off your order.
- Brown Rice Flour – This gluten-free flour is perfect for dusting your proofing basket. It will keep the dough from sticking to the basket. Since it’s gluten-free, it will not get gummy as it rests against the dough for an extended period of time. Use this flour to also dust the top of your loaf before scoring. It won’t burn in the oven, as a regular flour would.
Flour Recommendations
Below you’ll find my preferences for white bread flours, but if you’re interested in more information about using whole grains, check out my post about Baking With Whole Grains.
We’re using three different types of flour here – which yields my most favorite results. If you’d like to simplify the recipe, you could use all one type of bread flour. However, you will need to adjust the water amount, slightly. Read on for more about flour choice.
The flour type and brand you use can really affect how your loaf turns out. Typically, you’ll see the protein content on the flour bag. If not, try looking it up on the brand website. There’s no universal percentage designating a bread flour to be medium or high. In general I consider a medium bread flour in the range of 11% to 12.4% and a high gluten bread flour in the range of 12.5% to 14% or above.
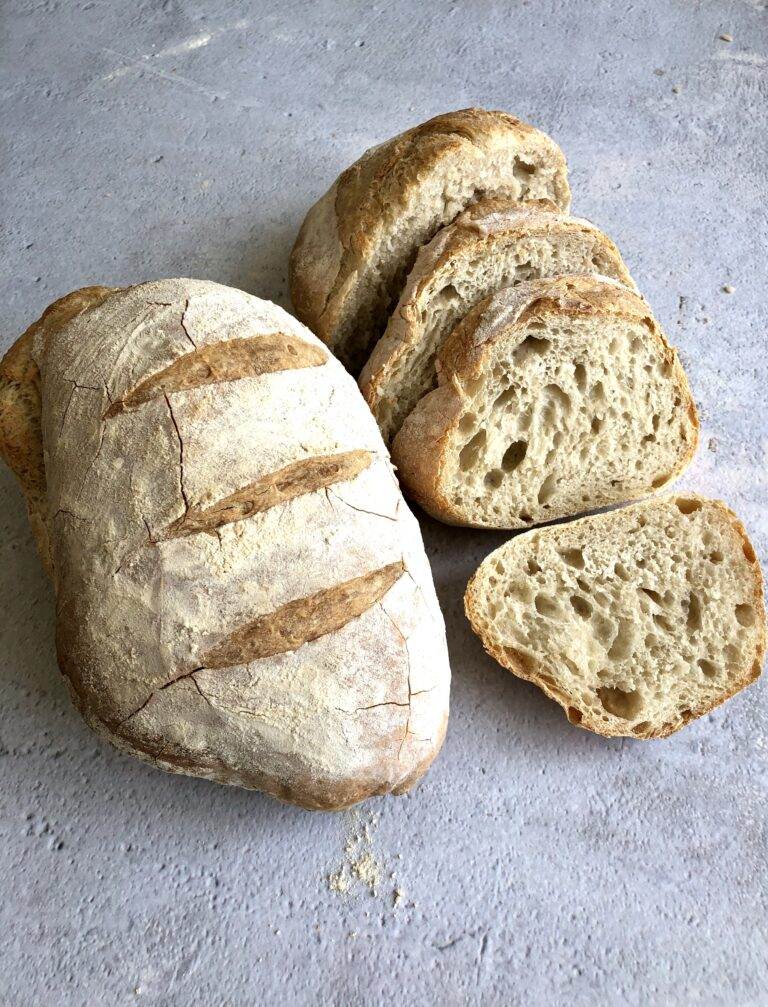
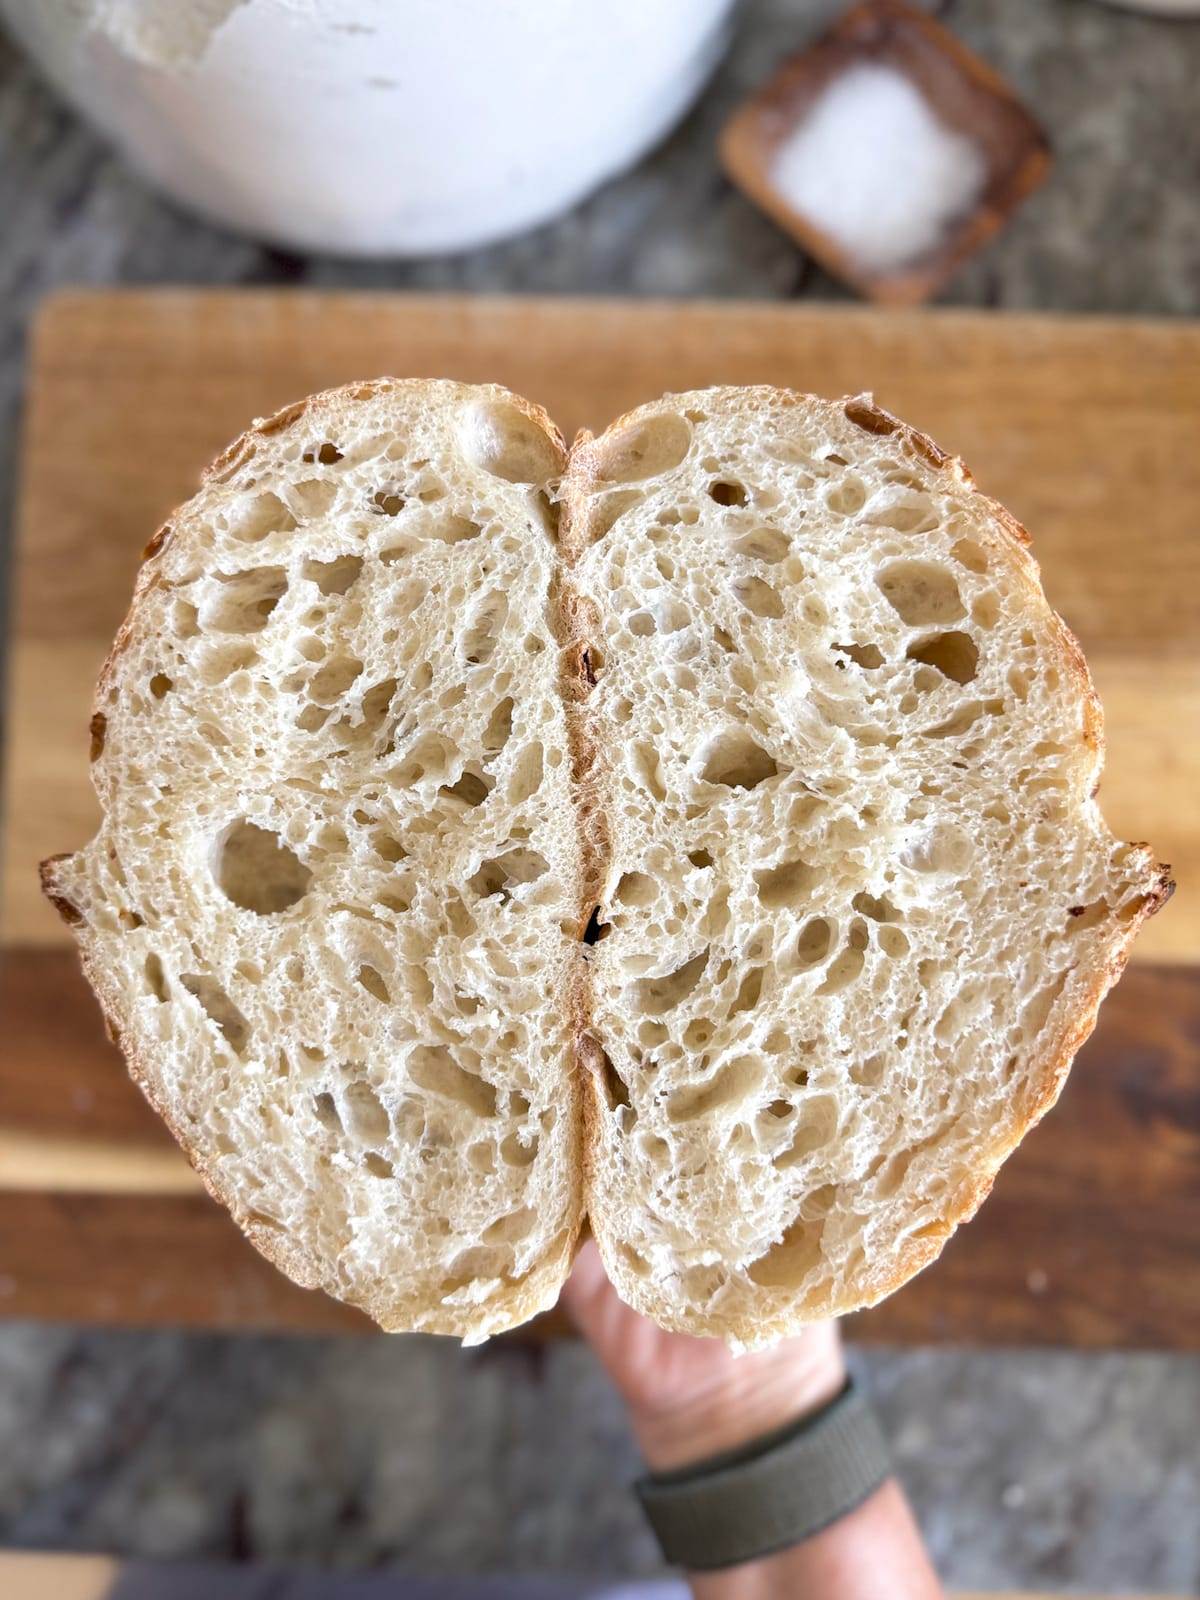
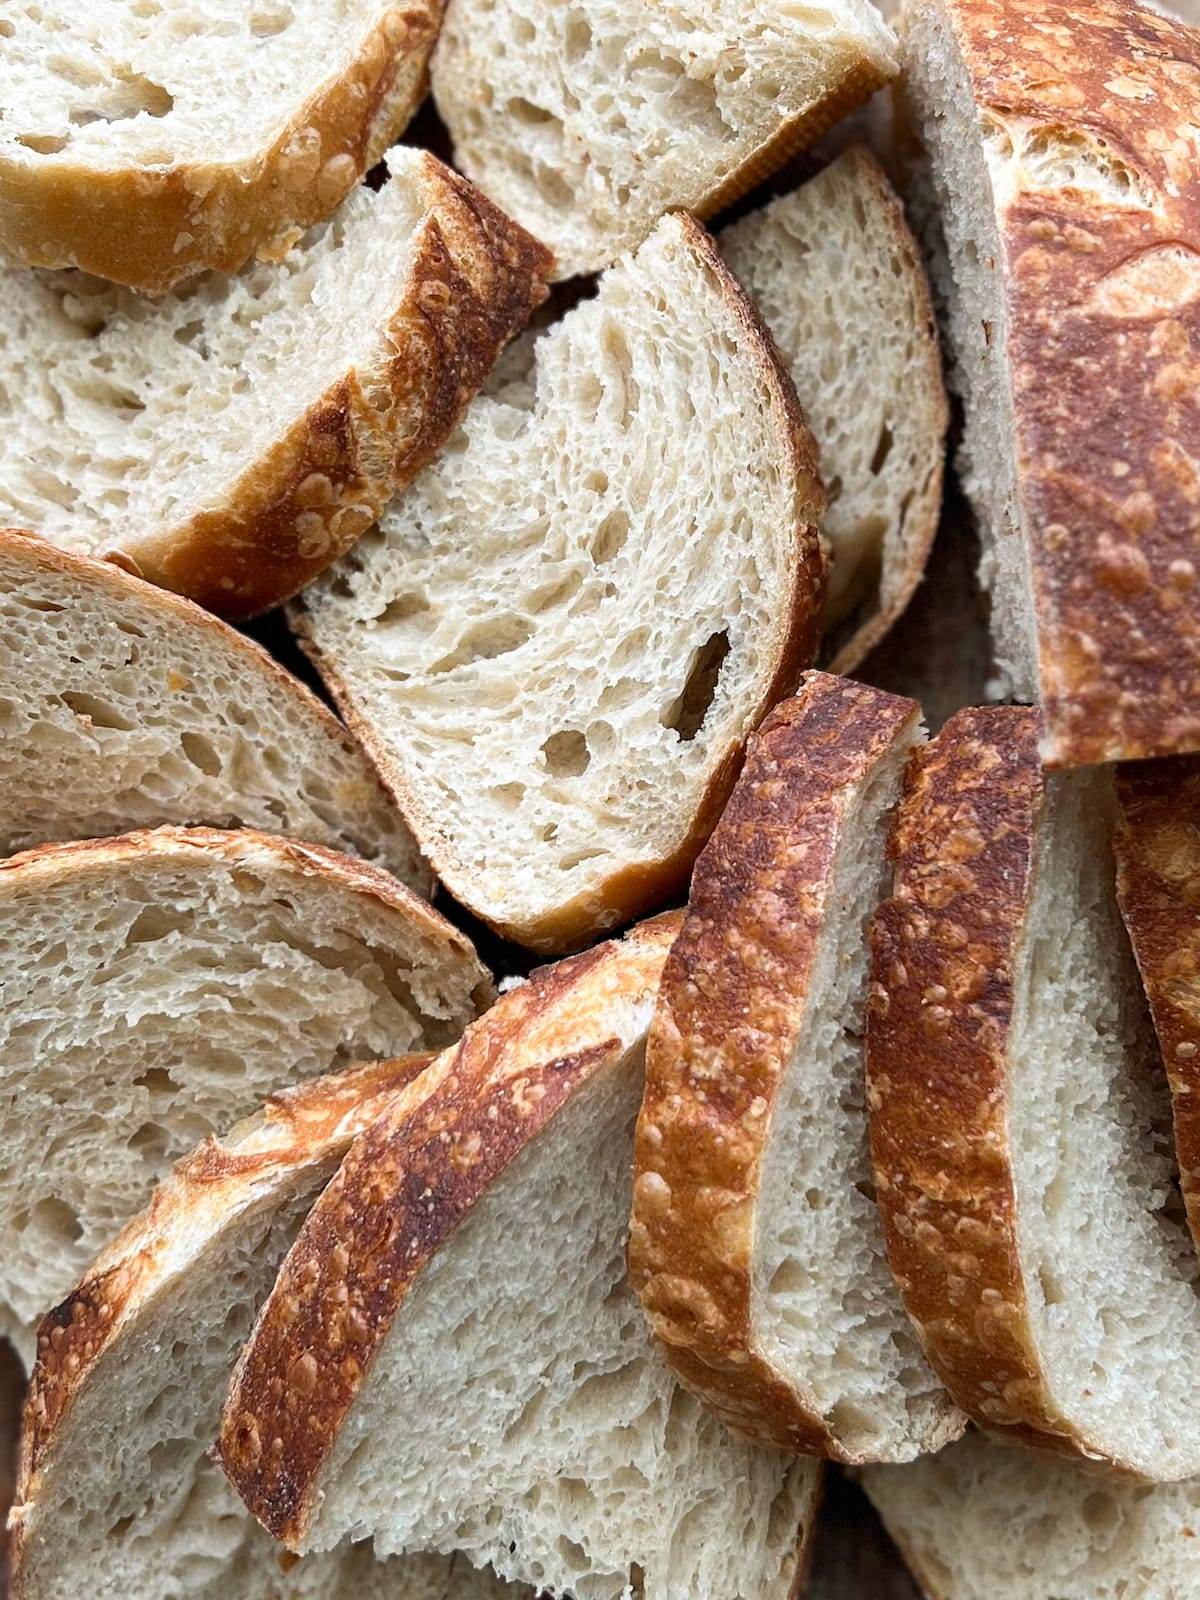
In my opinion, this combination of three flours yields a spongy loaf, with an open crumb, and a crust with the perfect amount of crispiness. Sourdough made with all high gluten bread flour can yield a loaf with an open crumb, but it can also be gummy, chewy and difficult to bite through the crust. I find combining it with a lower protein bread flour helps to give it a softer crumb and crispier, less chewy crust. Adding a small portion of whole wheat flour gives this loaf more nutritional value, extra flavor and beautiful color.
Brands I like to use:
- Medium Bread Flour: I often use the Central Milling Artisan Baker’s Craft Plus. I also love King Arthur all-purpose flour which has a slightly higher protein content than others at 11.7%.
- High Gluten / High Protein Bread Flour: I like using Central Milling Organic Hi Mountain High Protein Bread Flour. I also love King Arthur bread flour as well.
There are many other brands of good flours – always try to use unbleached flours. Sourcing local flours can also be beneficial to not only support your local farmers, but get the freshest flours and grains possible.
Baking Schedule
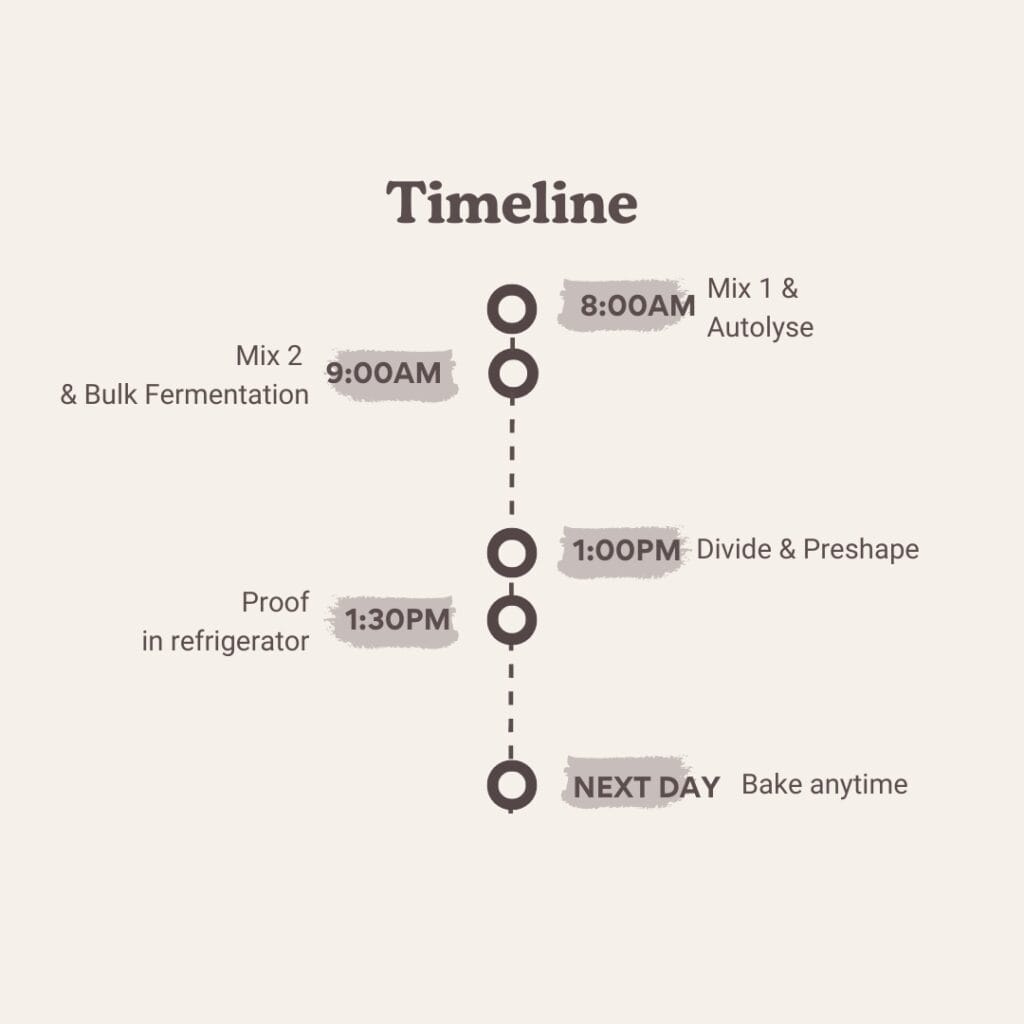
Use this timeline as a guideline for reference when making this recipe. Obviously, you don’t have to stick to the times on this chart, but it gives you an idea of how long each step will take.
If you are using your starter, instead of a levain, you’ll want to plan on starting Mix 1 at the time you typically feed your starter (it’s peak activity). For me, this is first thing in the morning.
You can adjust the timeline to fit your own schedule by using a levain (an offshoot of your starter). See the section, “Using a Levain,” towards the end of this post.
Mixing the Sourdough
1. Mix 1 / Autolyse
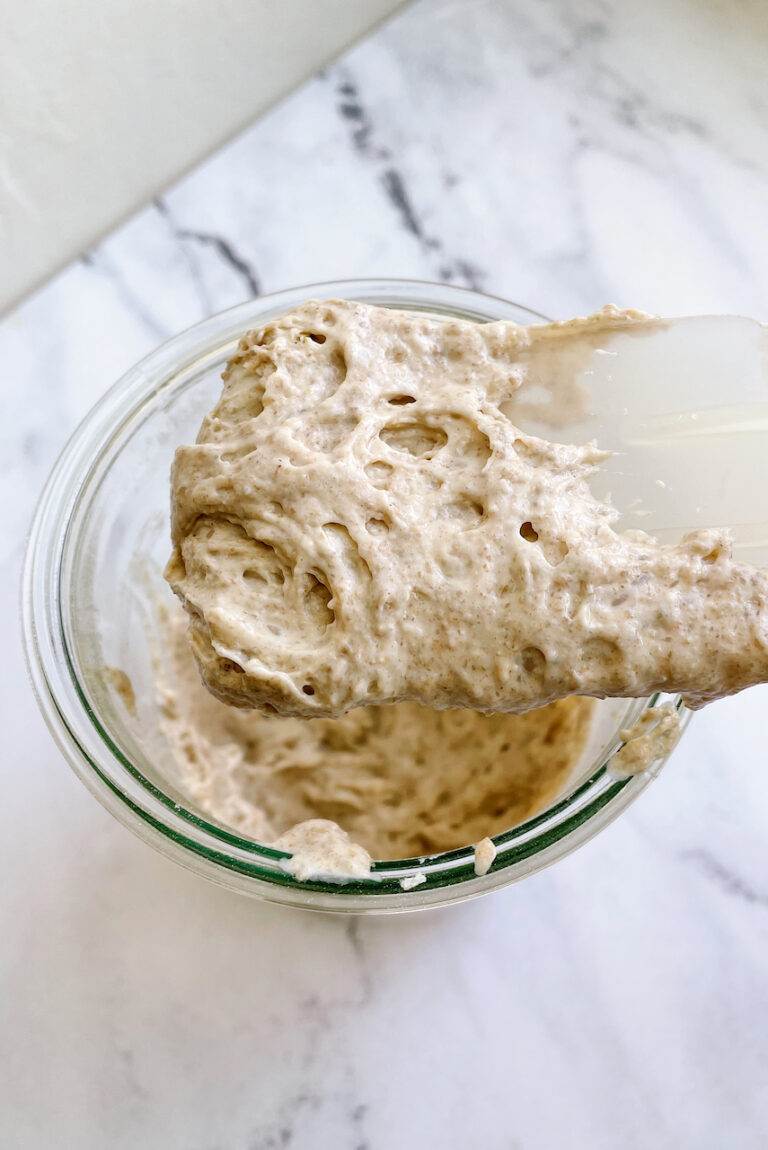
During Mix 1/Autolyse, you will combine all of the ingredients except for the salt and a small portion of the water. During this 45-minute autolyse, the flour will transform from a rough, shaggy mixture to a smooth, soft dough (see picture below). Autolyse allows time for the flour to hydrate. It’s also an important step which provides a dough with extensibility and elasticity – meaning the dough is easier to work with and will be able to hold its shape as it rises in the oven.
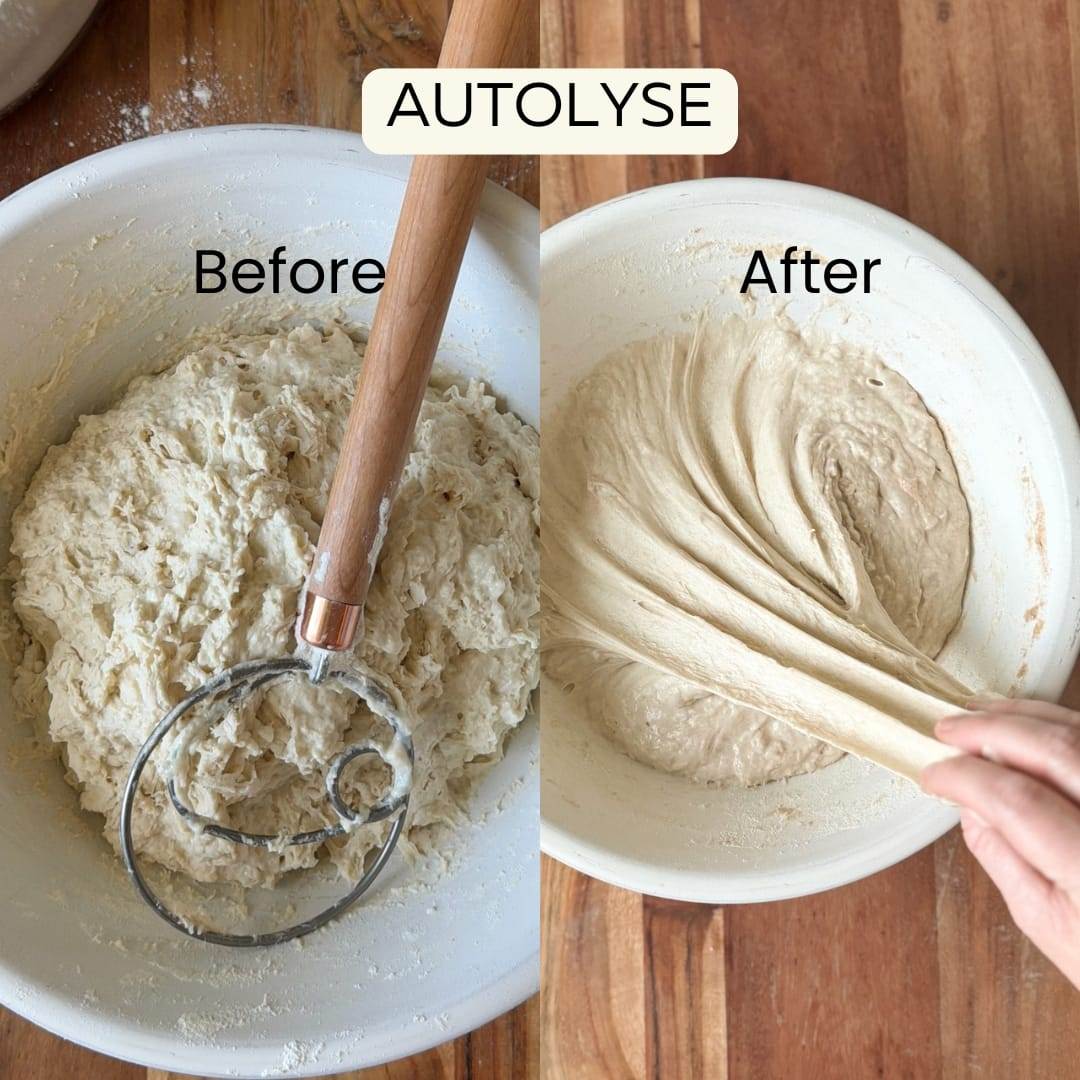
2. Mix 2
Sprinkle the salt on top of the dough. Drizzle the remaining 20 grams of water to help dissolve it. Work the salt and water into the dough with your fingers, pinching it until you no longer feel the salt granules. Once it has all come together, cover the dough and let it rest.
Now that the dough is fully mixed, it is officially the beginning of Bulk Fermentation.
3. Bulk Fermentation/Dough Development / Folds
During the initial period of Bulk Fermentation, you will be developing the strength of your dough through a series of stretches and folds. Since this is a fairly strong dough to begin with, three sets of stretch and fold should be sufficient to develop enough gluten strength.

To do this, look at the dough in your bowl as having four sides – north, south, east, and west. Take the north side of your dough, stretch it upwards and fold it over to the other end (south). Rotate the bowl a quarter of a turn and repeat stretching and folding the dough. Complete this motion on all four sides of the dough. Now you have completed Fold 1. Cover the bowl and let the dough rest for 40 minutes. You’ll repeat this two more times for a total of 3 series of stretch and folds.
You’ll be amazed at how the dough transforms from Fold 1 to Fold 3! It will change from a formless, shaggy, wet mixture, to a smooth ball of dough that holds its shape.
4. Finish Bulk Fermentation
After we have a strong dough, it’s time to let the natural yeast do it’s work and rise our dough a bit. From now until you pre shape your dough, it will finish with its Bulk Fermentation. This stage of the recipe is when the dough rises (ferments) in one mass (bulk). Bulk Fermentation is a necessary step to allow the dough to continue to strengthen, ferment and develop flavor.
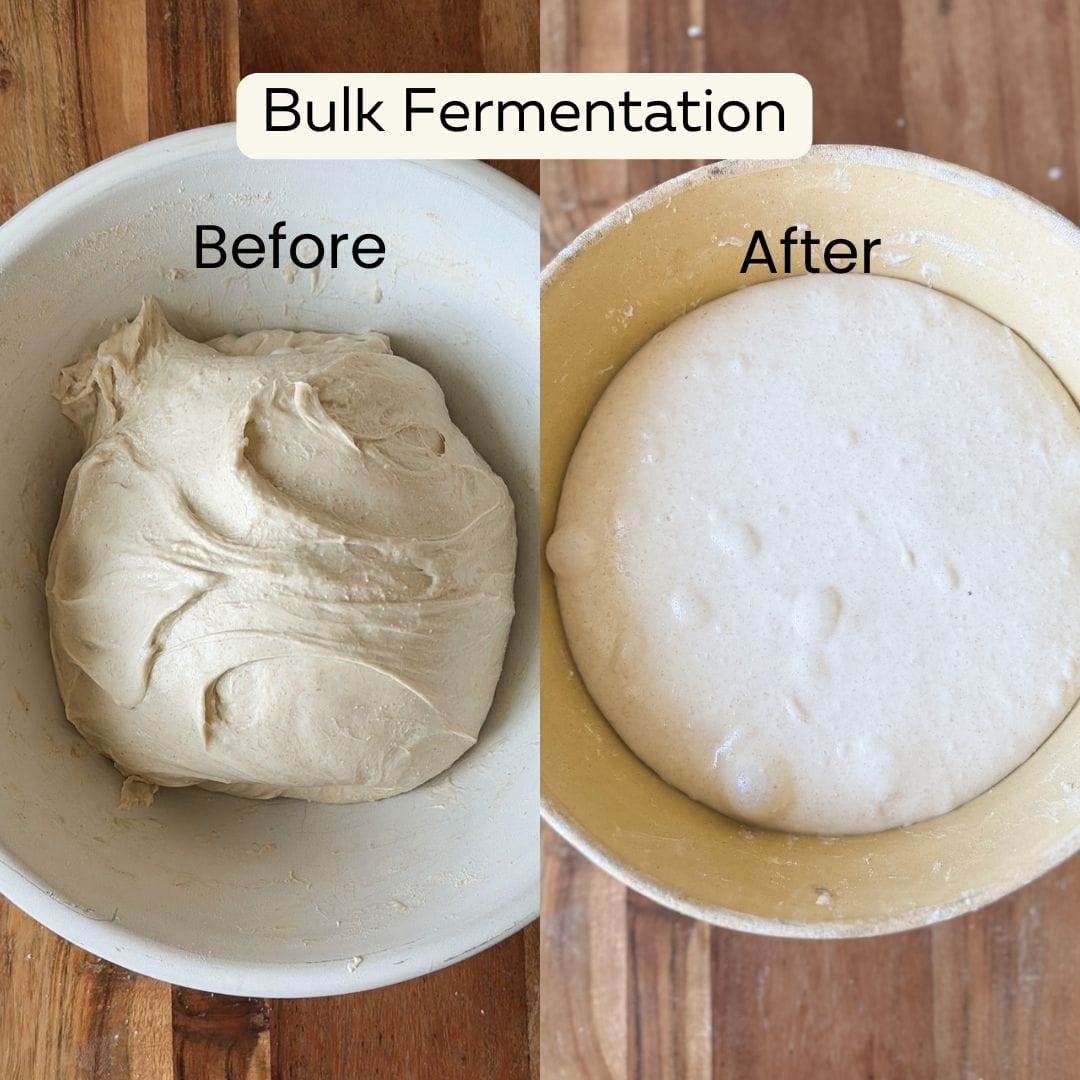
This is perhaps the step that trips up bakers the most. Knowing when Bulk Fermentation is done comes with practice and experience. Be patient, get to know your dough, make notes every time you bake, write down the times each step is completed. This will help you know what went right and what can be adjusted next time.
Here are some signs to look for when your dough is done with Bulk Fermentation:
Dough has risen in volume about 20-30%.
Dough is more aerated and feels fluffier.
There are a few bubbles on top of the dough and throughout.
The dough is rimmed around the edges and pulls away from the bowl easily.
When checking to see how the dough feels, be sure to wet your fingers with a bit of water. This makes it easier to handle your dough without it sticking to your fingers.
5. Pre Shape
Separate the dough into two equal pieces (no need to weigh, just eyeball it). Wet your fingers with water to handle the dough easier. Using your bench knife, round out each piece of dough in semi-circular motions until it has smoothed out and tightened on the outside. Let the dough rest, uncovered, for 20 to 30 minutes until it has relaxed again. It’s now ready for it’s final shaping.
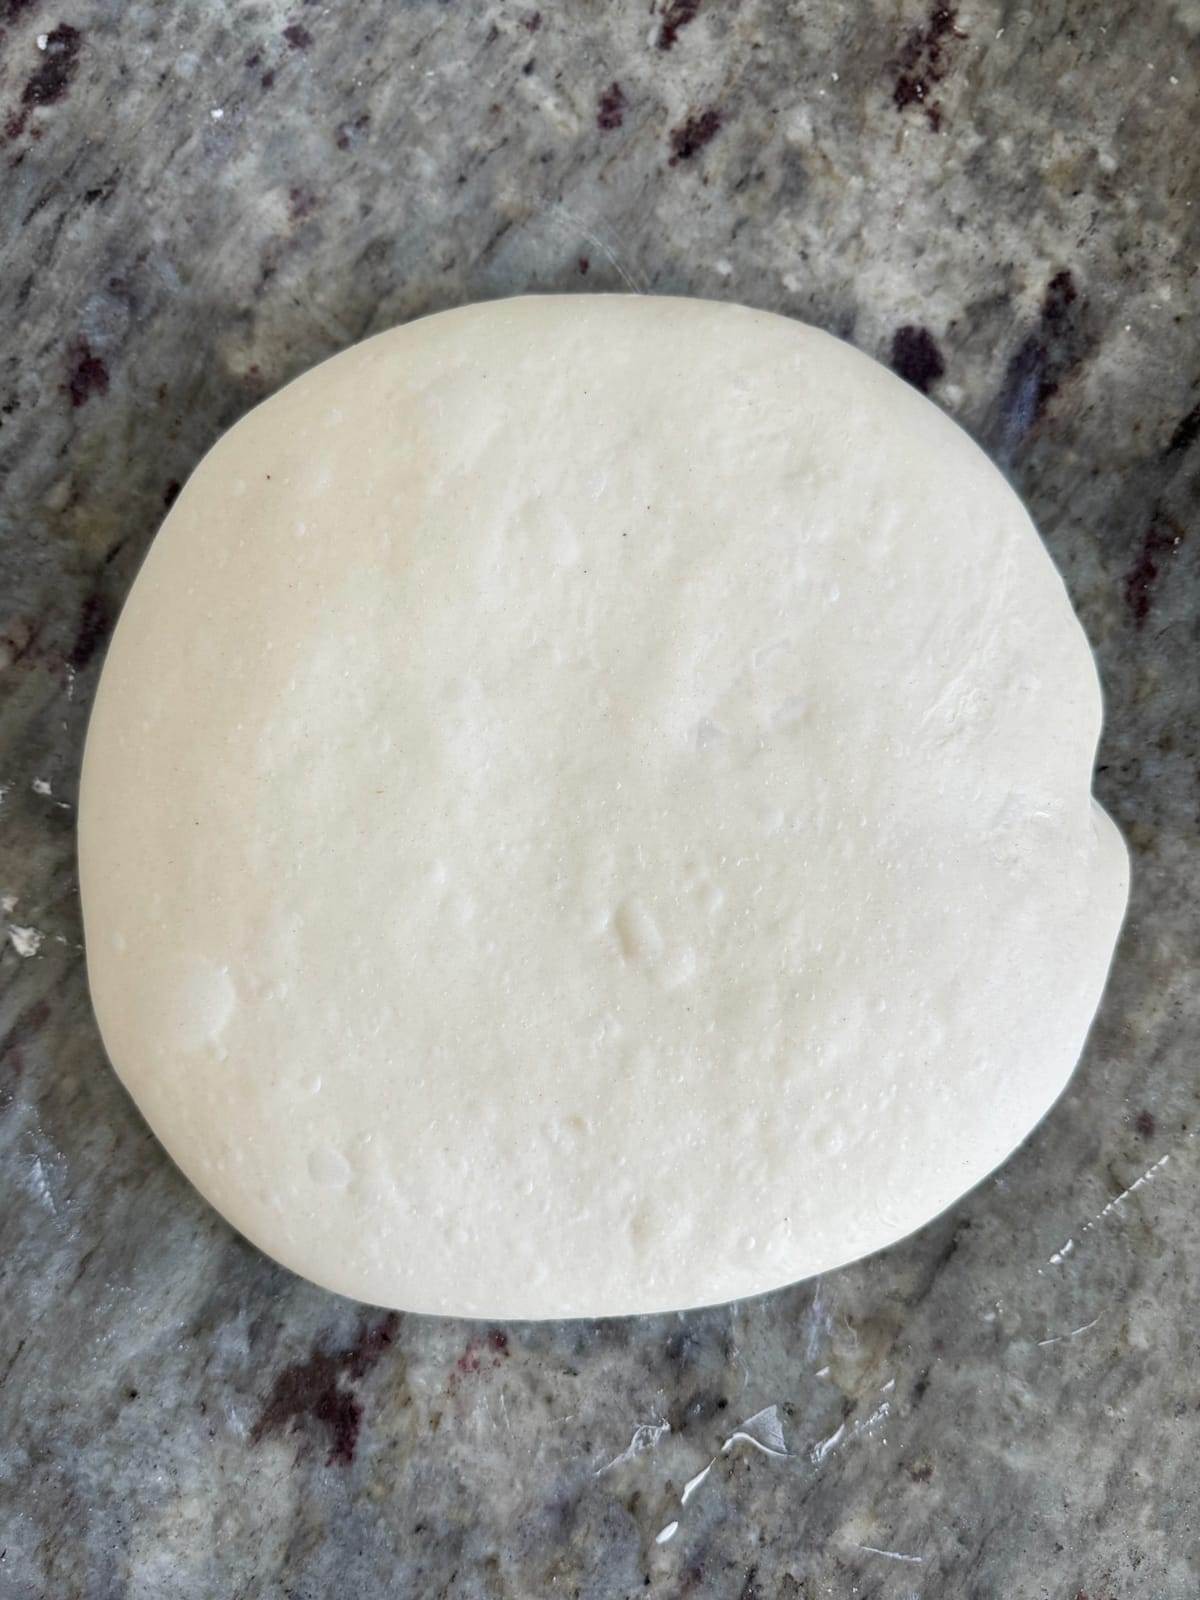
6. Final Shape
Shape your sourdough loaves into either a boule (round) or batard (oval). I have many shaping videos on my Instagram that you may find helpful. I also show all of these steps in detail in my Basic Sourdough Class and my Shaping and Scoring Class.
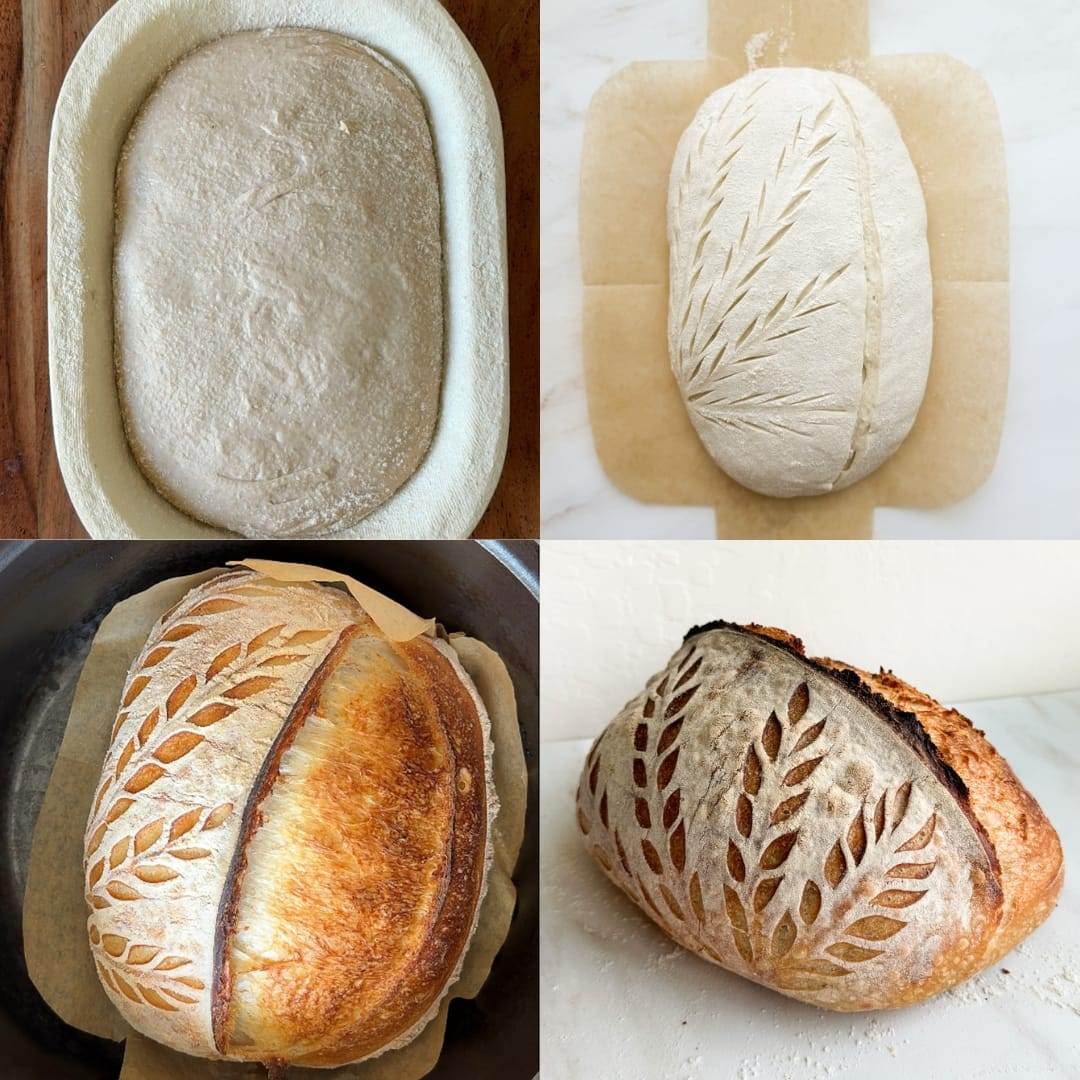
7. Bake
Baking sourdough in a hot Dutch oven is the most effective way to get the best rise and crust in a home oven!
- Place the Dutch oven on the middle rack of the oven.
- Preheat the oven to 475°F/245°C.
- Prepare your proofing baskets by lining them with a linen and dusting it with brown rice flour. This prevents the dough from sticking as it proofs.
- Place a piece of parchment over the loaf in the proofing basket and flip it over. The loaf should now be right-side-up.
- Score the loaf.
- Place the loaf inside the hot Dutch oven and cover with the hot lid.
- Bake for 14 minutes. Reduce the oven temperature to 450°F/232°C. Continue to bake an additional 14 minutes.
- Remove the lid and continue to bake another 10-15 minutes until golden brown. The interior of the loaf should reach at least 200°F/93°C.
- Remove the loaf from the Dutch oven and place on a wire cooling rack.
- Cool completely before slicing – preferably at least 2 hours. (okay, one hour if you just can’t wait!)
Same Day Sourdough Option
If you just can’t wait to enjoy your sourdough bread, you can bake it the same day. It’s not something I do very often. I’m partial to the more flavorful loaf from an overnight proof. However, you can still get amazing sourdough bread, baking it the same day!
Sourdough loaves baked the same day:
- less sour tasting
- more difficult to score
- more mild flavor
- tends to yield a more closed crumb
After final shaping, simply let your loaf proof at room temperature for a bit longer. Exactly how long will vary depending on the temperature of your dough, kitchen and development of your dough. The warmer the environment, the faster your loaf will rise.
This final proof time could take anywhere from 45 minutes to 2 hours or more. You’ll know your loaf is ready when it passes the Poke Test:
- Gently press on the loaf with your fingertip (flour your fingertip to keep it from sticking). If it leaves an indent that disappears right away, it needs more time to rise. If it leaves an indent but never springs back, and kind of deflates the dough, it has over-proofed. *If your fingertip leaves an indent that slowly springs back, it is ready to bake.
Pro tip: Place the 2nd loaf in the refrigerator while the first loaf bakes. This will prevent it from over-proofing as you wait on the oven.
Overnight Sourdough Option
This method in the recipe, is my favorite way to bake sourdough. I love the option of being able to put my loaf in the refrigerator overnight, allowing for flexibility to bake later. Overnight proofing, or retarding, yields a loaf with many delicious qualities:
- more sour flavor
- more complex flavor
- crispier crust
An overnight proof is anywhere from 8 to 16 hours. You can leave it in the refrigerator for up to 48 hours with great results.
Using a Levain
As you see in my recipe, I’m suggesting you use your starter at its peak – this means you’ll most likely be starting your mixing early in the morning when you typically feed it. However, you can push your timeline back a few hours by creating a Levain instead of your starter.
A Levain is almost the exact same thing as a sourdough starter, but with a few slight differences:
- It’s an offshoot of your starter, mixed specifically and entirely for your recipe. Your starter is maintained separately.
- You can switch up the flour choices for your levain without affecting your main starter.
- You can make a levain with different ratios of fresh water and flour to speed up the fermentation rate. This means, if you need it to be ready to use sooner, you can feed it with low ratios like 1:1:1 or 1:2:2. A levain mixed with these ratios will be ready to use within 3-5 hours.
Here’s an example of how to build a levain…
This means, you can start mixing later in the day if you are busy in the morning. To use a levain, you will feed your starter in the morning as usual, but take a portion of your discard to feed your levain at a 1:1:1 or 1:2:2 ratio (depending on your desired schedule). For example, if you need 200g of ripe starter for this recipe, you will make a levain at 8:00am in the morning with 70g active discard, 70g new water and 70g new flour. This will give you 210g of levain (starter) to use in the recipe as soon as it peaks- which most likely will be around lunchtime. This 1:1:1 ratio peaks much faster than my usual 1:5:5 feeding ratio which peaks every 12 hours.
Use a levain to your advantage. Don’t be a slave to your sourdough. Knowing how to use a levain will give you much more flexibility in your baking schedule!
Conclusion
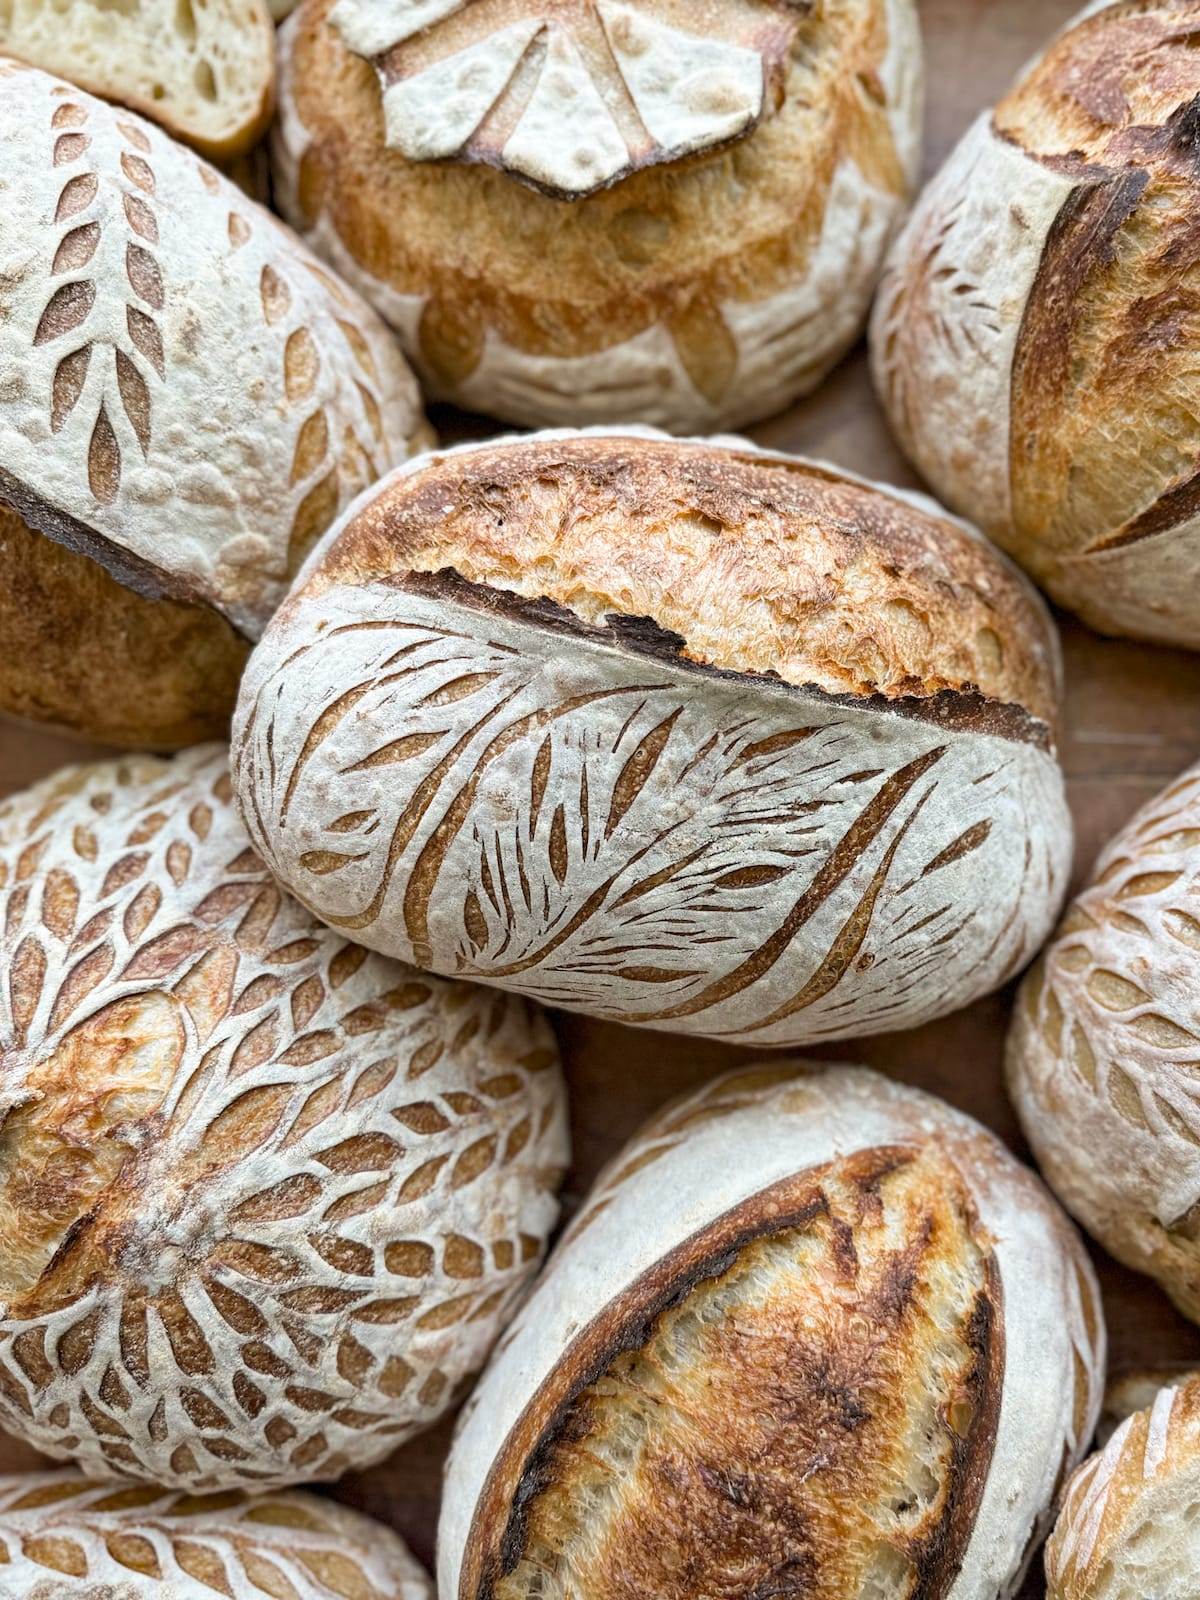
You will love this approachable, easy sourdough bread recipe! It’s one you will get great results with. The dough is easy to mix, develop and shape. You’ll love the spongy crumb and hearty, but not too thick crust. Use an overnight proof for a more pronounced sour, complex flavor. But you’ll also love the option to make it the same day if you prefer a faster, more mild tasting sourdough loaf too!
There’s really nothing in the world like a homemade loaf of sourdough!
Ready to learn more?

Hopefully this post helps you understand some basic concepts about sourdough baking, but if you’re like me, you always have questions and want to learn more! If so, my Baking Academy is FULL of sourdough classes and other classes too. You’ll learn both the basics and explore more advanced recipes.
One of my newest classes available is my Sourdough Shaping and Scoring Class! If you’ve always wanted to create beautiful, Instagram-worthy sourdough loaves, this is the class for you!
You can take individual classes or join my Baking Academy to gain all-access to my entire library of baking, pre-recorded classes. My classes are pre-recorded, which allows you to take them on your own schedule, at your own pace! They’re perfect for visual, hands-on learners! And you’ll love the beautiful and delicious things you will learn to make!
Follow me on Instagram @thatbreadlady, Facebook and YouTube for more baking tips and videos! Be sure to tag me #thatbreadlady when you try one of my recipes. I’d love to see your baking successes!
Other recipes you’ll love
- Braided Heart Bread
- Pumpkin Shaped Pretzel Rolls
- Peaches and Cream Cinnamon Rolls
- Healthy Zucchini Muffins with Chocolate Chips
Easy Sourdough Bread Recipe
Ingredients
Mix 1
- 650 grams water
- 200 grams ripe sourdough starter 100% hydration
- 85 grams whole wheat flour
- 500 grams bread flour medium protein ~ 11.5%
- 315 grams high gluten bread flour high protein ~13% or above
Mix 2
- 20 grams fine sea salt
- 20 grams water
Additional
- 60 grams brown rice flour for flouring proofing baskets
Instructions
8:00am-9:00am, Mix 1 & Autolyse
- In a large bowl, combine the 650 grams water and 200 grams starter. Break apart the starter with your fingers until evenly dispersed throughout the water.
- Add the 85 grams whole wheat flour, 500 grams medium bread flour, and 315 grams high gluten bread flour. Combine with a Danish whisk or with fingers until no dry bits of flour remain. Cover and let rest 45 minutes.
9:00am-9:40am, Mix 2, Beginning of Bulk Fermentation
- Remove the cover from the bowl. The dough should be much softer and hydrated. Sprinkle the 20 grams of salt and 20 grams of water over the top of the dough. Pinch the dough together until all of the salt and water is mixed into the dough. This is the beginning of bulk fermentation.
- Cover and let rest 40 minutes.
9:40am-10:20am, Fold 1
- Remove the cover from the bowl. Wet your fingers with water to prevent the dough from sticking as you handle it. Stretch one side of the dough up and fold it over to the other side. Rotate the bowl a quarter turn and stretch and fold dough again. Repeat two more times, completing this first series of stretches and folds on all four sides of the dough. Cover and let rest 40 minutes.
10:20am-11:00am, Fold 2
- Complete a series of four stretches and folds.Cover and let rest for 40 minutes.
11:00am – Fold 3
- Complete a series of four stretches and folds. Cover and let rest for the remainder of bulk fermentation.
11:00am-1:00pm (or beyond), finish Bulk Fermentation
- Allow dough to rest for the remainder of bulk fermentation. This could take anywhere for 2 to 4 hours. Bulk fermentation is complete when the dough has increased in volume about 20-30%, has a few bubbles on top, and the edges are ridged and slightly pulling away from the bowl.
1:00pm-1:30pm, Divide and Pre Shape
- Wet your fingers with water to handle the dough. Gently loosen the edges of the dough from the bowl. Turn the bowl upside down, releasing the dough from the bowl.
- Wet your dough scraper with water and divide the dough into two equal pieces. Working with one piece of dough at a time, use your dough scraper to round out the dough, tightening and smoothing the surface.
- Let dough rest uncovered for 30 minutes.
1:30pm, Final Shape
- Working with one loaf at a time, flip the dough over and shape into either a boule or batard. See video for details. Place in floured proofing baskets top side down. Cover with a plastic bag. See notes for same day baking option.
2:00pm-anytime next day, Overnight Cold Proof
- Place covered loaves in the refrigerator overnight or up to 48 hours. This is an important step that slows down the fermentation process, allowing for a deeper flavor and making the bread more digestible.
Next Day Baking
- Position oven rack on position just lower from the center. Place dutch oven on top and preheat it with the oven to 475°F/245°C. Allow oven to preheat at least 30 minutes. (*see notes for baking tips)
- Once oven is preheated, remove loaf from refrigerator. (*see notes) Place parchment paper over the top of the basket. Quickly flip the basket over, releasing the loaf onto the parchment. Now the loaf should be top-side-up. Dust with rice flour. Score loaf as desired.
- Remove the dutch oven from the oven and take off the lid. Quickly transfer the loaf into the dutch oven by lifting it with the sides of the parchment. Place the lid back onto the dutch oven and bake for 14 minutes.
- Without opening the oven, decrease oven temperature to 450°F/232°C and bake an additional 14 minutes.
- Remove lid from dutch oven. Bake an additional 10-15 minutes or until loaf is desired golden brown.
- Remove from oven and place on wire cooling rack. Allow loaf to cool completely before slicing (at least 2 hours).
Notes
- Same day baking option: After placing shaped loaves in proofing baskets, cover and let rise at room temperature until it passes the “poke test” (check blog post for details). This could take anywhere from 30 minutes to two hours, depending on your dough and ambient temperature in kitchen. Allow 30 minutes towards the end of proof time to preheat the oven. Place one loaf in the refrigerator as you bake the first loaf in a preheated dutch oven. This will prevent it from over proofing as the first loaf bakes. After baking the first loaf, place the lid back on the dutch oven and place in oven as you reheat it to 475°F/246°C. Bake second loaf as directed in recipe.
- If you have a baking stone, place it on the very bottom rack before preheating oven and allow it to heat up with dutch oven. This will help the bottom of your loaf to not burn.
- You can replace the whole wheat flour with another type of whole grain flour, or leave it out and replace it with more bread flour. Whole grain flour adds nutrition, flavor, and a more golden color to the loaf.
- About the flours: You can somewhat replace or adjust the ratios of flour types, as long as the total flour weight adds up to 900g. Check the blog post for more about flour choice and how it affects the outcome of your dough and bread.
- For more help or sourdough recipes, be sure to check my bread classes at thatbreadlady.com. All my classes have pre-recorded videos to walk you through your next baking success!
