These homemade Parker House Rolls are so delicious – it seems like they shouldn’t be so easy to make, but they are! You’ll love how soft, buttery and fluffy they bake up! They’re the perfect side to any meal!
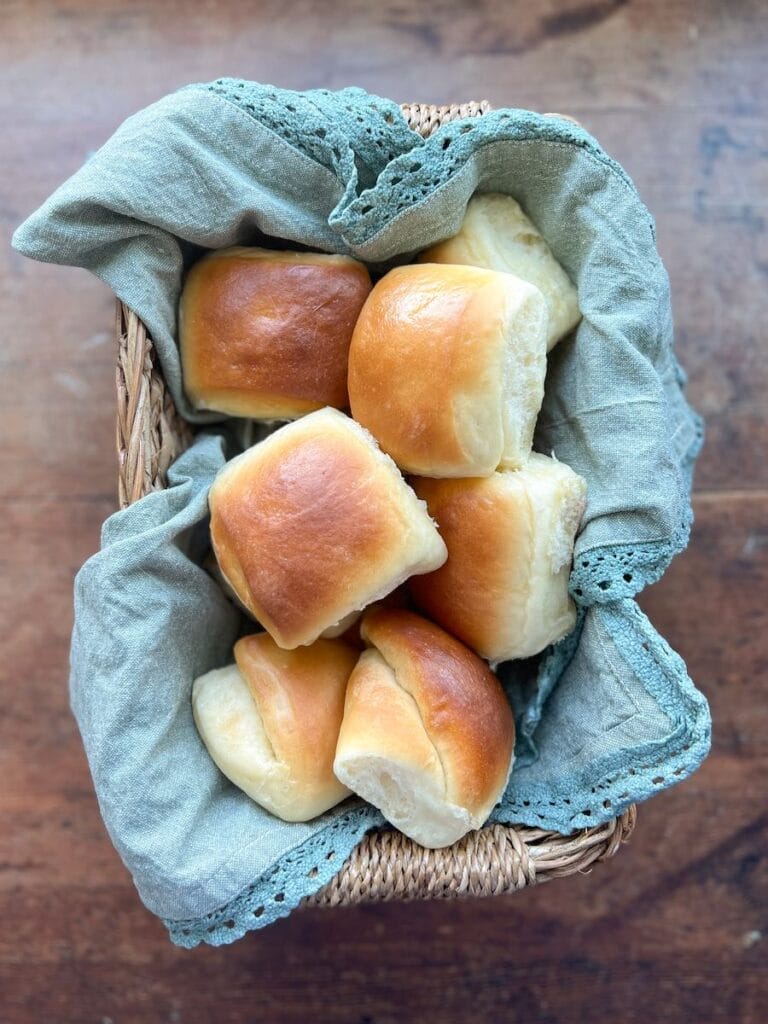
I grew up with my mom making Parker House Rolls for every Sunday dinner. I remember waiting in anticipation for them to come out of the oven in all their buttery, fluffy glory! The signature “fold” of the roll is what sets this apart from other dinner rolls. It was always so much fun to split the fold apart and fill it with a fork-full of mashed potatoes or Sunday roast.
Create your own family tradition with these homemade rolls! They’re a perfect side for Thanksgiving, Sunday dinner, luncheons, or whenever you just want a GOOD buttery roll!
How did they get their name?
Rumor has it that Parker House rolls got their name from the Boston Parker House Hotel, which opened in the late 1800’s. The legend goes that the hotel baker threw a batch of unfinished rolls into the oven, over a dispute with a hotel guest. This result was unexpected – a delicious buttery roll, made in a simple shaping technique. Lucky for us, they turned out to be a delicious way to enjoy a homemade dinner roll!
How to bake with yeast
If you are new to baking with yeast, this is the perfect beginner recipe! I have an article you can read HERE which explains the differences between instant yeast vs. active dry yeast. In this recipe, I suggest using instant yeast.
Parker House Rolls Ingredients
Each of the ingredients in this recipe play an important role. Here’s what you’ll need to make your own Parker House Rolls and why:
- milk – enhances a golden crust
- granulated sugar – adds sweetness
- unsalted butter – yields a rich flavor
- instant or active dry yeast – makes the dough rise
- eggs – adds fluffiness and structure to the bread
- salt – enhances the flavor
- potato flakes (boxed instant potatoes) – the starches create a fluffy, tender bread and extend the shelf life of the rolls (they stay fresher longer)
- all-purpose flour – the base of this recipe, to create a light, fluffy roll
How to make Parker House Rolls
This roll dough is so easy to put together. From start to finish, it takes about 3 to 3 1/2 hours. Most of that time is rest time (hands off time). Be sure to read the section at the end of the post about how you can make these ahead of time and let them overnight proof. You’ll love this option that allows you to serve fresh, out-of-the-oven rolls without having to start from scratch!
Here is a brief outline of the steps to make these dinner rolls. All of these are included in more detail in the recipe. Be sure to see the step by step pictures below!
- Get the ingredients ready: In a saucepan, bring the milk and sugar to a low simmer. Remove from heat and stir in the butter until melted.
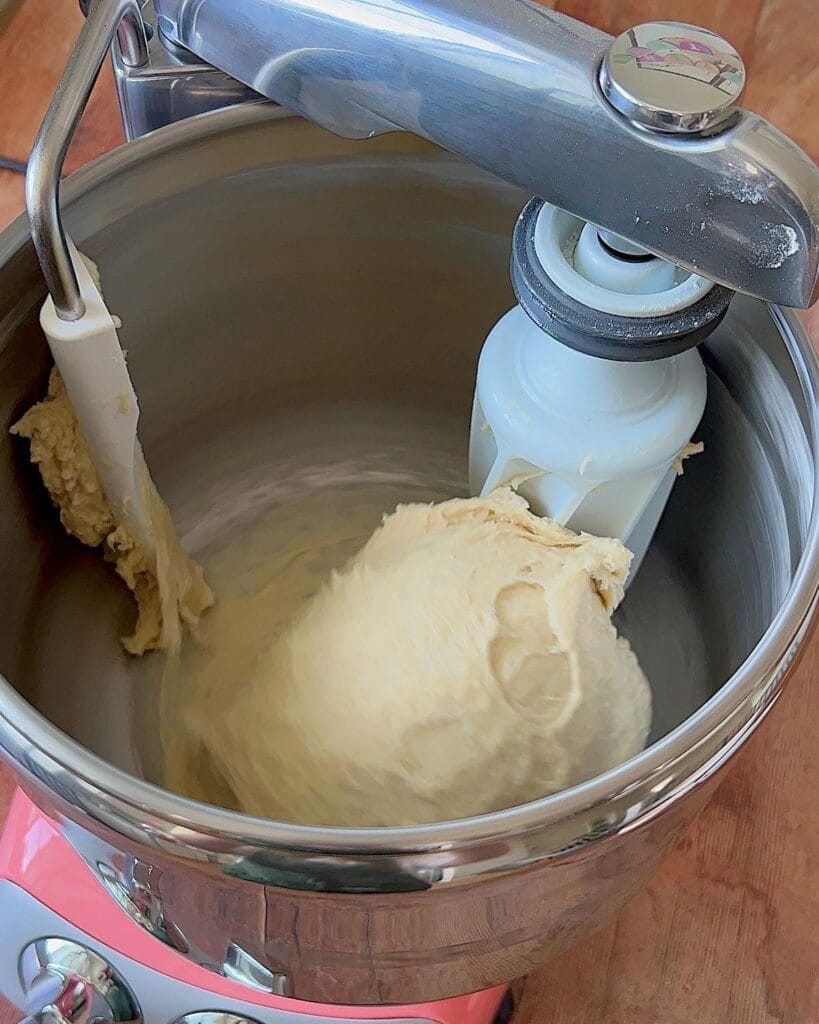
- Mix the dough: In a mixer, combine all of the ingredients, but only half of the flour. Gradually add the rest of the flour until fully combined and smooth. Knead for 5-7 minutes.
- First Proof: Place the dough in a large bowl, coated in nonstick spray. Cover it and let it rise 90 minutes to 2 hours, or until it doubles in size.
- Shape the rolls: Deflate the dough and turn it onto a floured work surface. Divide it into two pieces (each piece makes 1 dozen rolls). Roll each piece of dough and shape into rolls (see the detailed instructions below – you’ll love this easy method!)
- Final Proof: Cover the rolls and let them rise until puffy.
- Bake: Let them bake until golden, about 20 minutes. Brush them with melted butter as soon as they come out of the oven.
- Enjoy!
An insightful note: Heating the milk in this recipe helps to produce a dough that rises quickly and bakes up fluffy. When you heat milk, it weakens the proteins in the milk whey, which otherwise keep the gluten from forming properly. Heating the milk activates the yeast, especially in this slightly sweet roll dough.
Making the dough
In a few simples steps, you’ll be able to make the best Parker House Roll recipe!
- Start by heating up the milk. In a saucepan, warm the milk and sugar until it comes to a low simmer. Be sure to stir it constantly to keep the milk from burning. You want the sugar to dissolve and the milk to just barely start to simmer. Remove it from the heat and carefully add the butter. Stir until the butter is completely melted. Set that aside and let it cool until it comes to around 100°F/37°C. It will be warm, but not so hot that it kills the yeast.
- If you’re using active dry yeast, sprinkle that over the warm water and let it sit until it foams (about 10 minutes). If you are using instant yeast, you can still proof it to be on the safe side, but it is not necessary – you can simply add it to the rest of your ingredients during the mixing. Add the water and yeast to the bowl of a stand mixer, as well as the milk mixture. Add the eggs, potato flakes and salt. Add half of the flour.
- Mix on low, using the dough hook attachment. Allow all of the ingredients to come together until smooth. Gradually add the rest of the flour, about 1/2 cup at a time. Let the flour fully incorporate between additions. Knead on low speed for 5-7 minutes, until the dough comes together in one smooth mass. It will clean the sides of the bowl and concentrate around the dough hook.
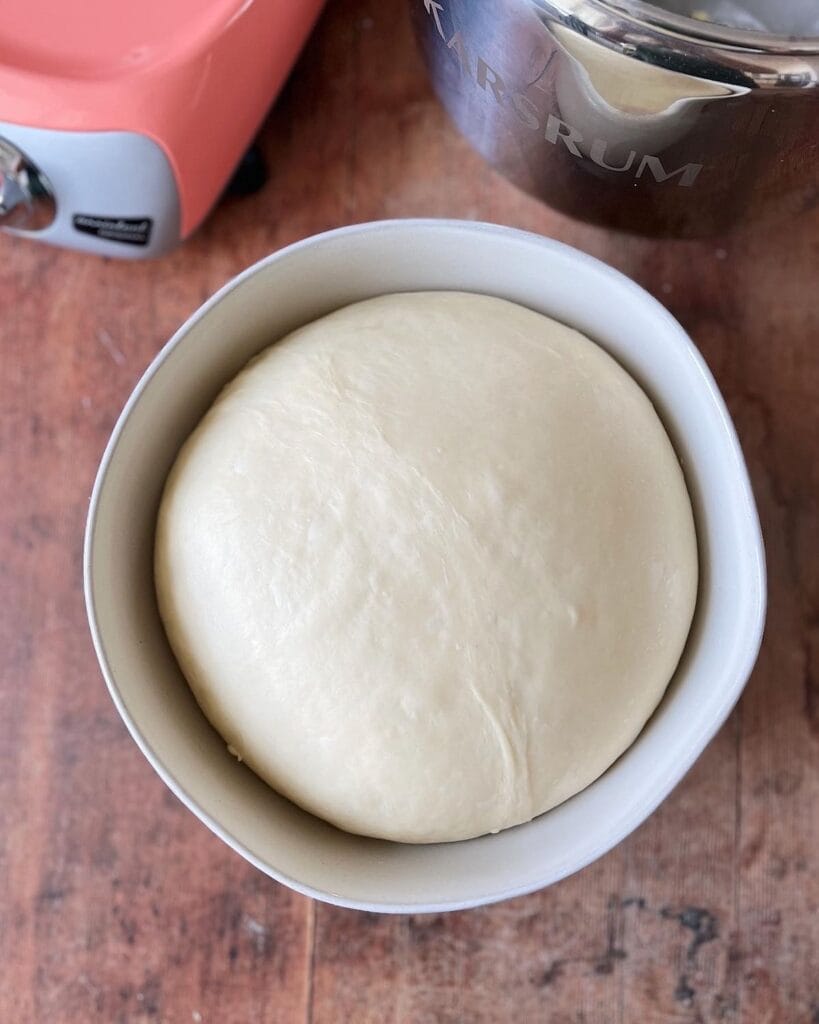
- Place the dough in a large bowl, sprayed with nonstick spray. Turn the dough so that all sides are coated with the spray. Cover the dough and let it rise in a warm place in your kitchen until it doubles in size. This should take 90 minutes to 2 hours.
This can be one of the most difficult things for a beginner bread maker. Knowing your dough comes with experience, but here’s a tip that will help you.
You may or may not need to use all of the flour. Likewise, you may need to add a bit more. When you’ve nearly added all of the recommended flour, stop the mixer and check the dough by lightly tapping on it with your finger. Your finger should come away mostly clean. The dough should feel soft and slightly tacky, but not wet or excessively sticky. If it’s still feeling wet, add an additional 1-2 Tablespoons of flour and mix well. Check the dough again and add more flour if necessary.
It’s important to keep in mind that adding too much flour will result in dry, dense bread or rolls. It’s always been my view to go on the lighter side – you can always add more flour during the shaping process to make the dough easier to handle.
Shaping the rolls
Parker House Rolls are known for their simple and no-fuss method of shaping. Their haphazard way of rolling, cutting out, folding and rising are a signature cornerstone of what makes these rolls unique.
However, if you’ve tried to make them before, you may have noticed that occasionally that fold can be difficult to maintain as the dough rises – sometimes opening up and not staying folded. I’m making this process even easier for you! with a more simplified method to shape the rolls.
Traditionally, to shape a Parker House Roll, you would roll out the dough and cut out the rolls with a round cookie cutter or biscuit cutter. The rolls would then be buttered, folded in half and nestled in a pan to rise and bake. You would gather up the scraps and ball up the dough to roll out again to cut out more rounds. This would be repeated until all of the dough is used up.
Let’s save time and just roll all the dough out once, shall we?! You’ll love this simplified technique! Instead of a “half moon” shaped roll, we’ll have a square shape roll – but don’t worry, we will still have that signature Parker House Roll fold!
- After the dough has risen, turn it out onto a lightly floured work surface. Divide the dough in half, as this recipes makes two dozen rolls.
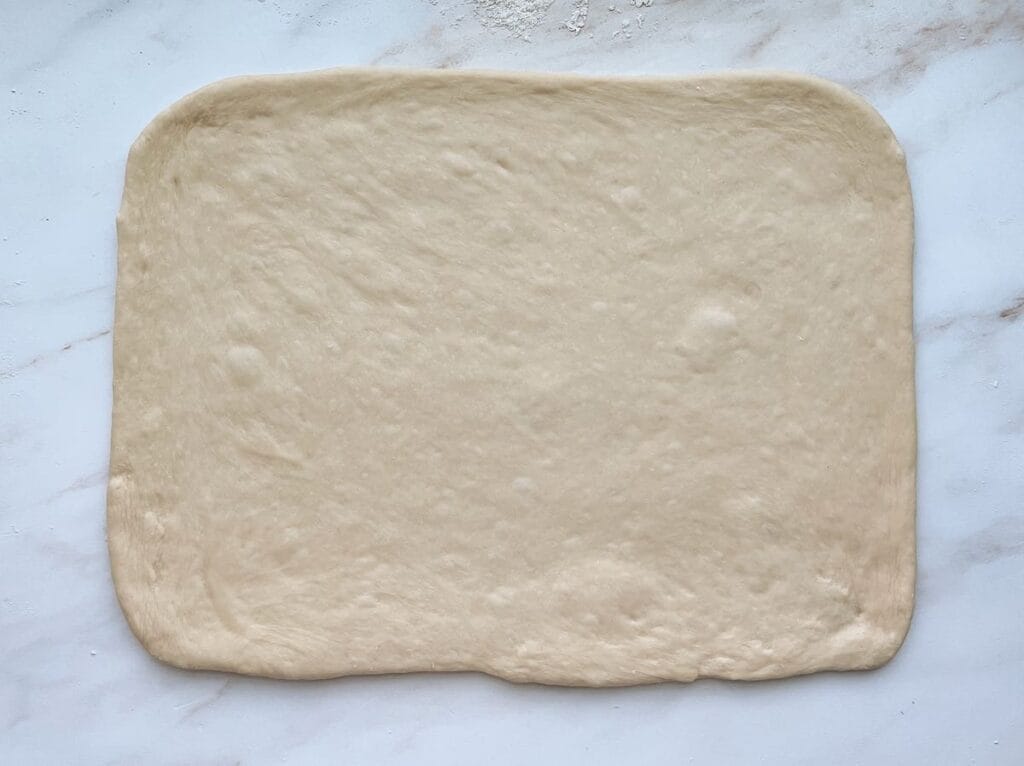
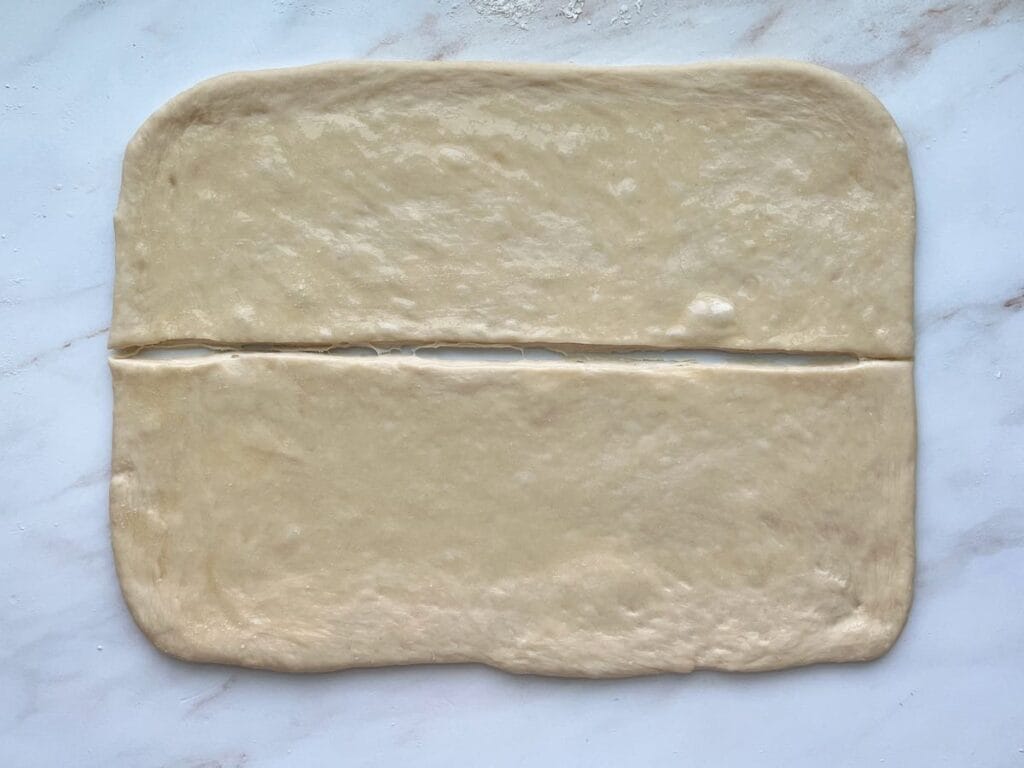
- Working with one half of the dough at a time, roll the dough to a rectangle, about 8×12-inches. Brush melted butter over the surface of the dough.
- With a pizza cutter, cut the rectangle in half lengthwise – this creates two rectangles, 4×12-inches in size.
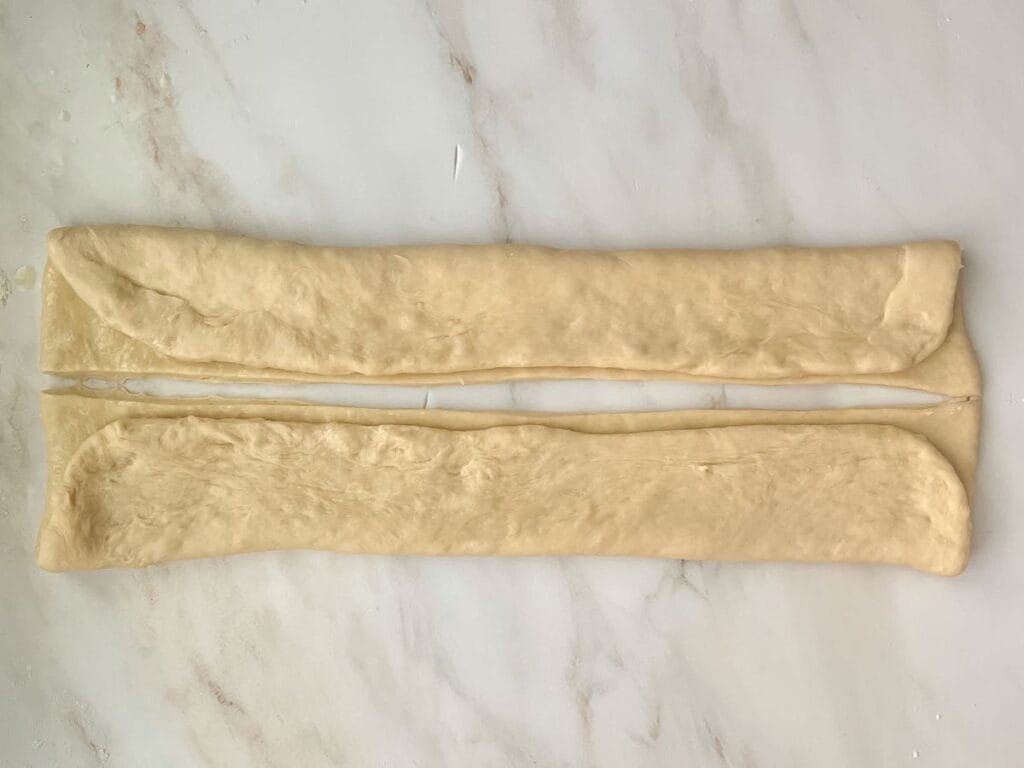
- Fold each piece of dough over lengthwise, stopping about 1/4-inch before the bottom edge. You’ll now have two long pieces of folded dough that are about 2 1/4-inches by 12 inches.
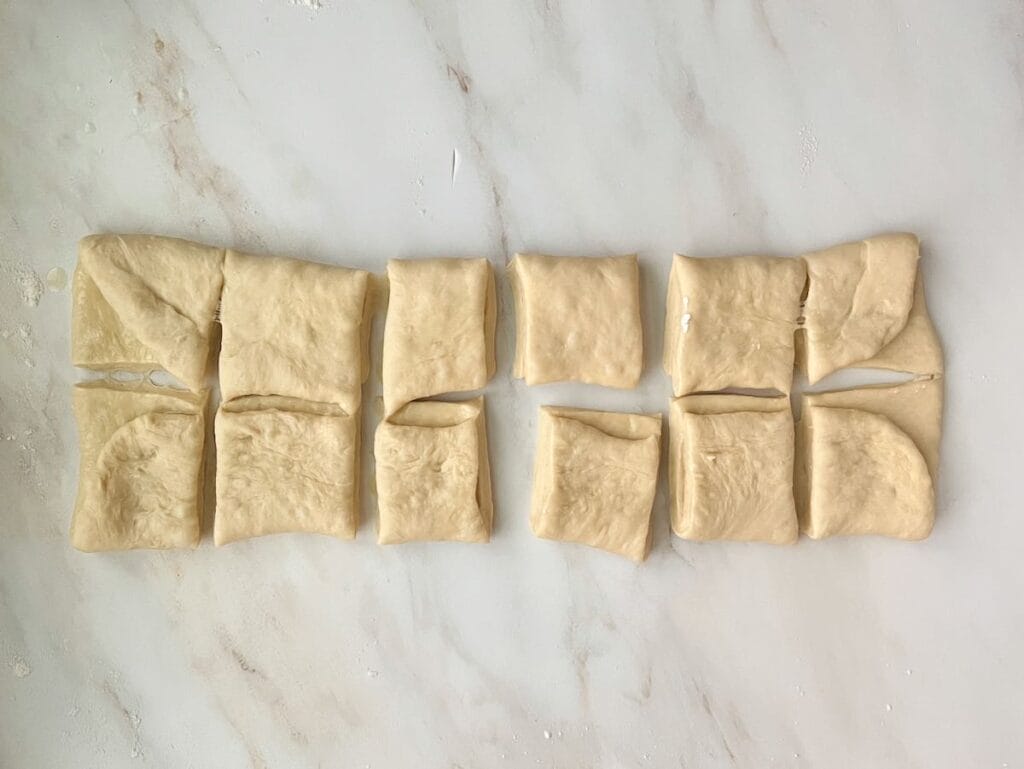
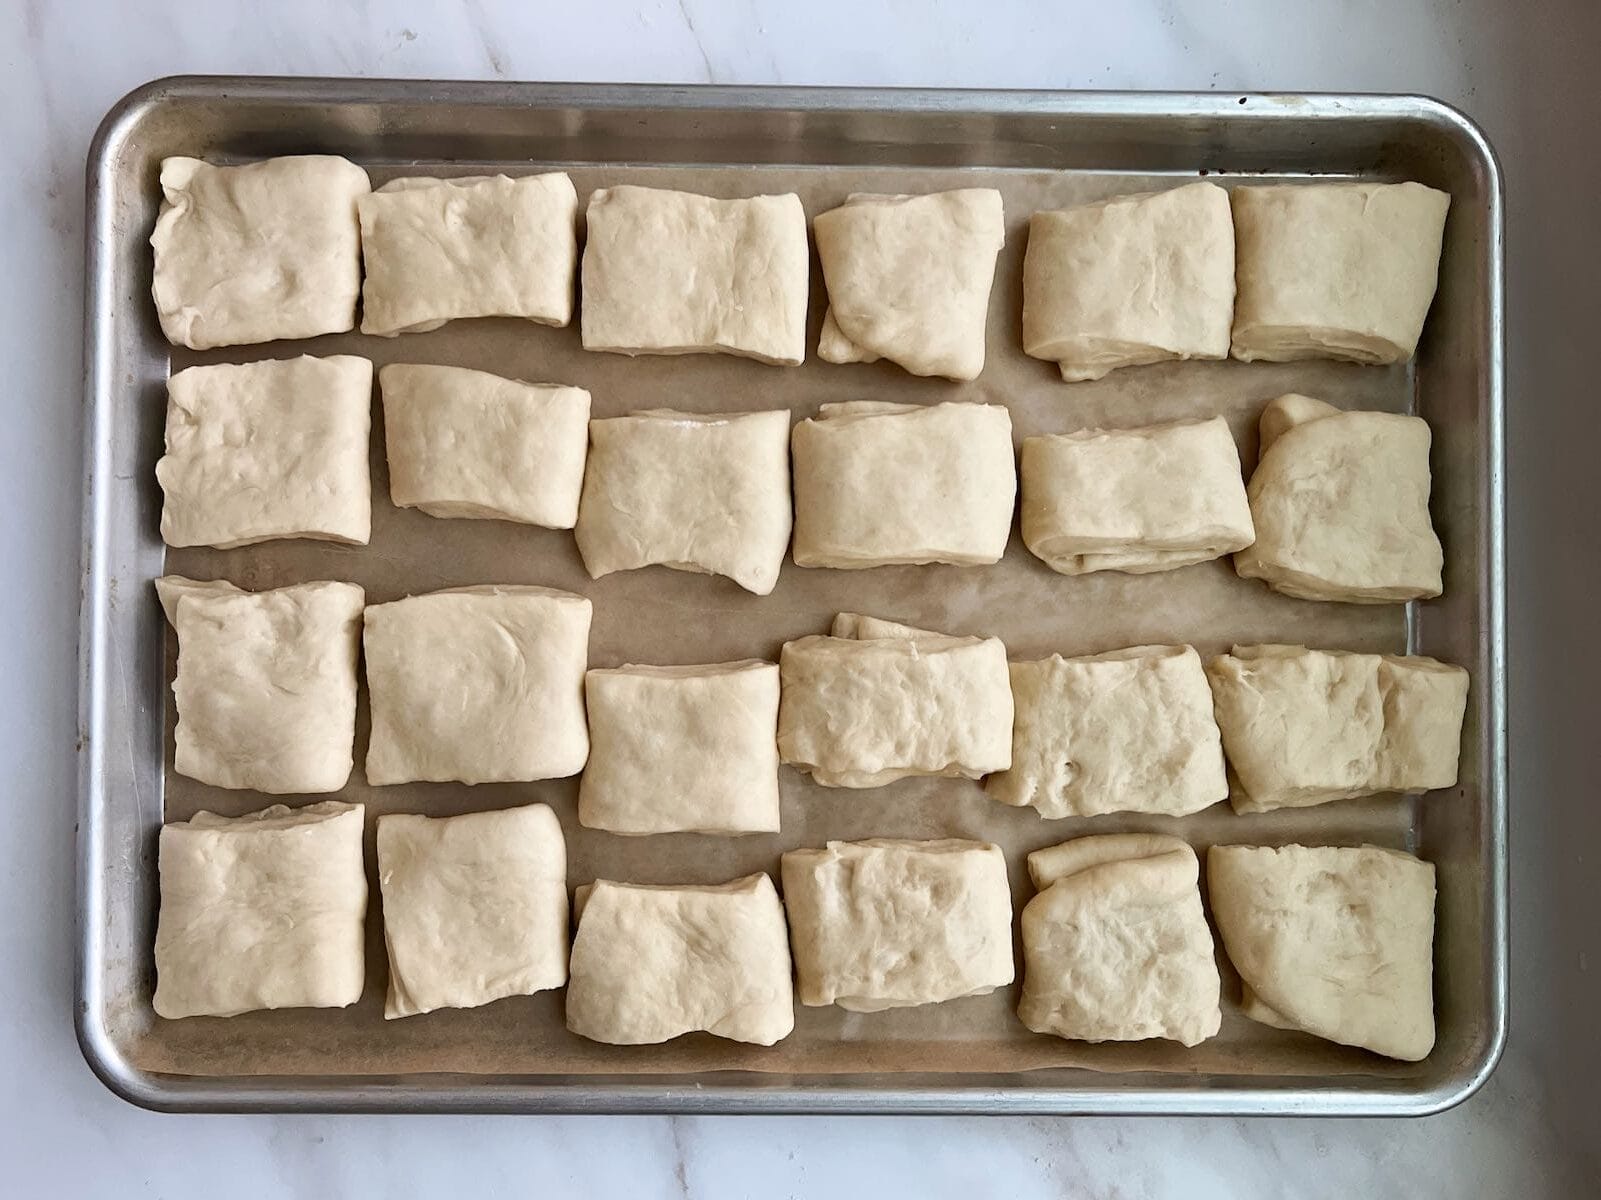
- Cut each rectangle into 6 equal pieces. This will give you 12 total folded rolls, about 2 1/4-inches by 2-inches.
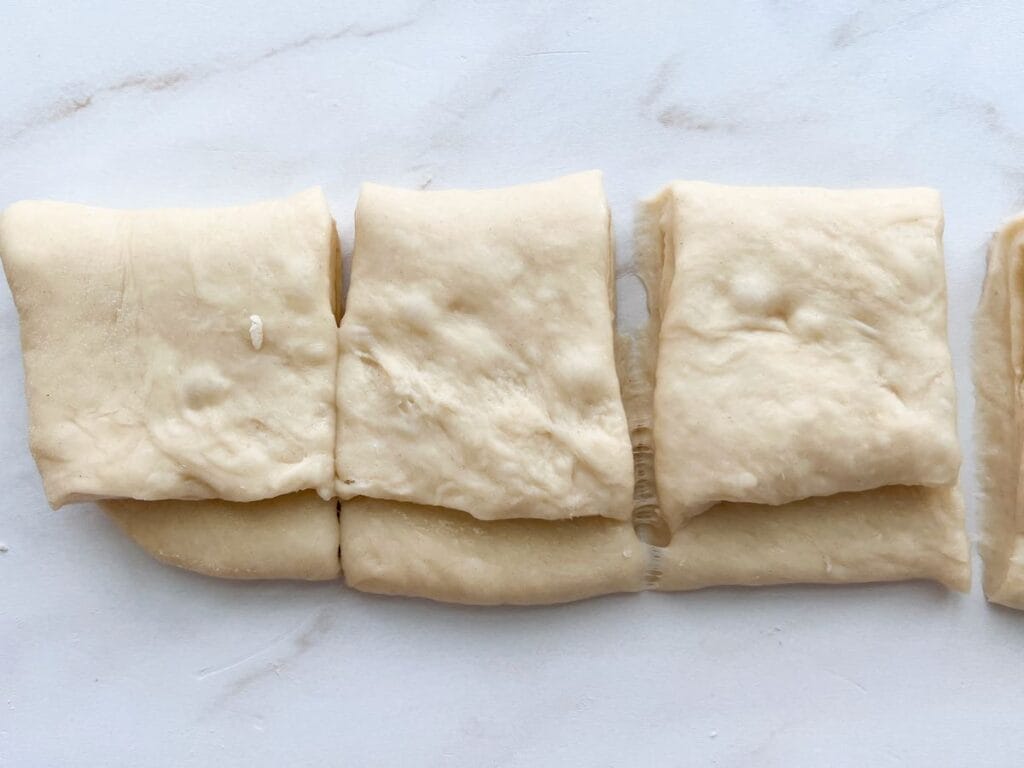
- Flip each roll over so that the longer side is on top. Place on a baking sheet either lined with parchment or prepared with nonstick spray. You can fit all 24 rolls on one half-size baking sheet (18×13-inches).
- Cover the rolls and let them rise until puffy, about 45 minutes to 1 hour.
How do I know my rolls are ready to bake
In my previous career of running a home bakery, I baked literally hundreds of thousands of dinner rolls! Mostly I was baking my famous Crescent Dinner Rolls, but I learned a really helpful tip during all of those late night bakes!
Let your rolls really puff up before baking. Like realllly puff up. Let them rise until they pass the poke test and then even maybe 5 to 10 minutes beyond that. Yes, you could definitely risk over proofing them, but the more you make this recipe, the better feel you’ll get for how far you can push it. Adding a few extra minutes of rise time will help you achieve that super fluffy, tall dinner roll!
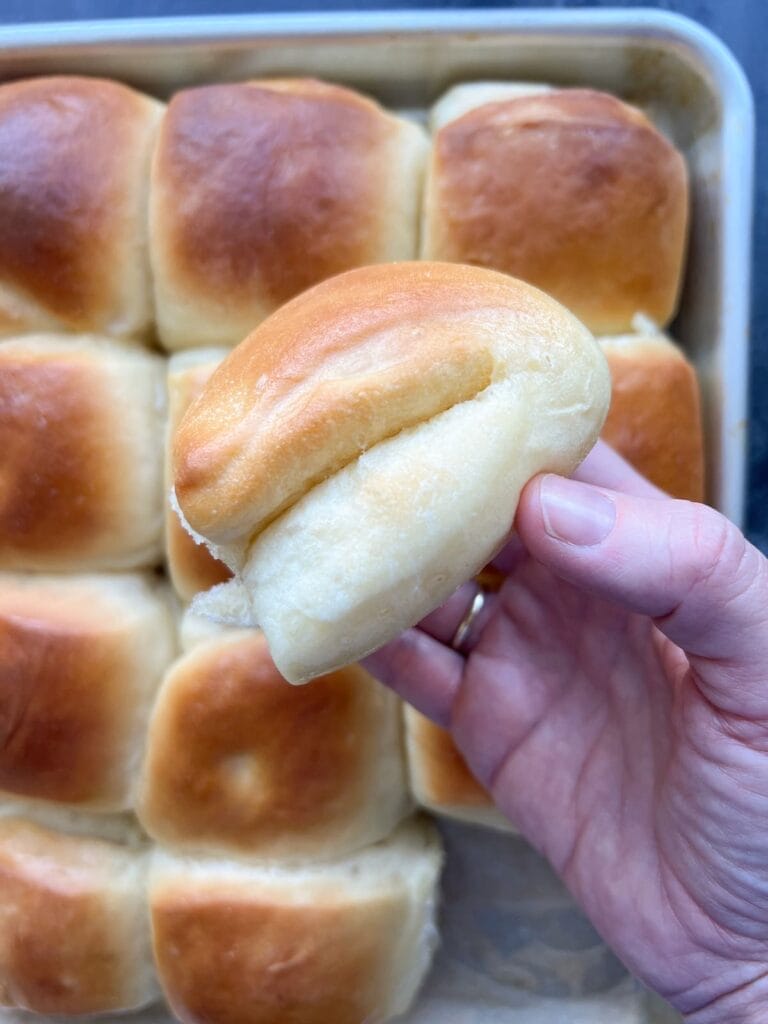
After the rolls come out of the oven, brush them with melted butter. Let them cool in the pan for about 10 minutes before removing. Serve warm for the the best experience!
Storing leftover rolls
Since we added potato flakes to this dough, these rolls have a longer shelf life than a typical homemade roll. Store any leftover rolls in an airtight container or sealed bread bag for up to 5 to 6 days. You’ll love that these Parker House rolls stay fresh and soft for several days – that is, IF there’s any leftover!
You can also freeze the baked rolls in a zip top freezer bag for up to 2 months.
Make ahead option
We all want to enjoy rolls, freshly baked from the oven. You can adjust your timeline to bake them right before serving. Depending on your schedule, here are three options to consider when making rolls ahead of time:
- Make ahead option 1: Make the dough the night before. Place it in a large bowl and cover. Refrigerate the dough over night. Remove the dough about 2 hours before you want to serve the rolls. Shape them and let them rise. Bake and enjoy!
- Make ahead option 2: The night before, make the dough and let it rise for its first proof. Roll out and shape the rolls. Place on baking sheet and cover with plastic wrap. Place in the refrigerator. About 1 hour before you want to serve the rolls, remove the pan from the oven. Let them rest on the counter while the oven preheats. Bake, serve and enjoy!
- Make ahead option 3: Shape the rolls and place on a baking sheet. Immediately after shaping, place the baking sheet in the freezer and freeze rolls for 24 hours. Remove frozen rolls from the baking sheet and store in a zip top freezer bag. Keep frozen rolls in the freezer for up to 4 to 6 weeks. About 4-5 hours before you want to serve them, remove the rolls from the freezer and place on a prepared baking sheet. Cover and let them rise until puffy. Bake as directed in the recipe.
My pro tip for bread making
Always weigh your ingredients! Especially the flour! This will give you much more accurate and reliable results! Food scales are most often the most important tool you’ll use in bread making. Find a food scale HERE.
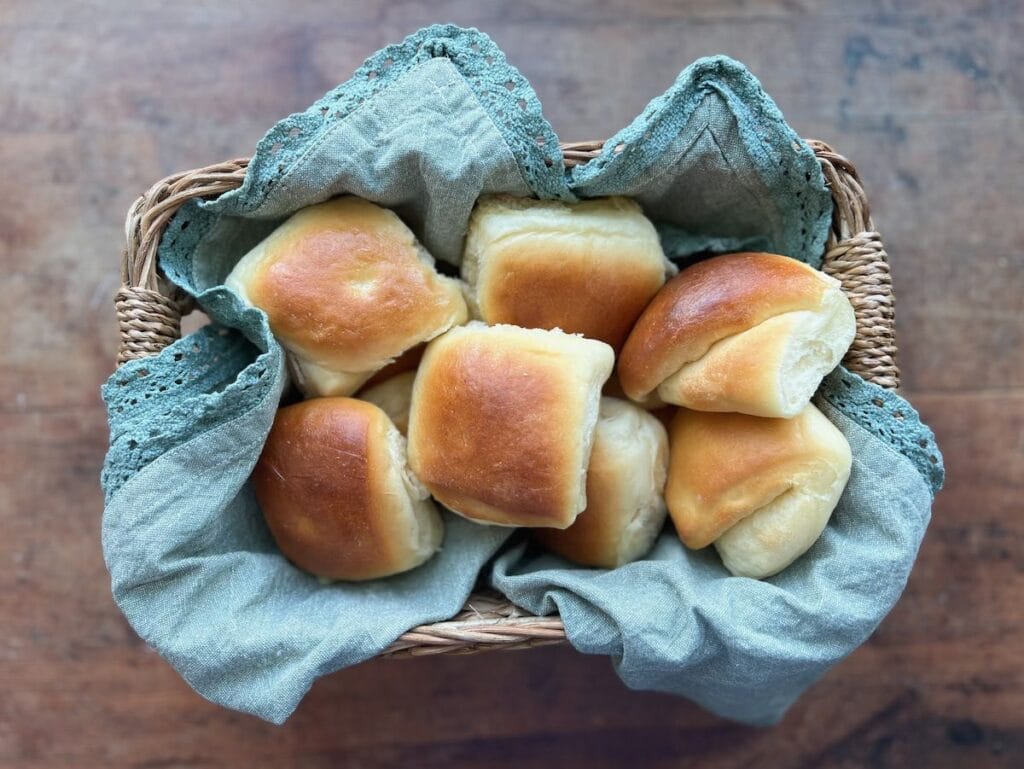
This amazing dinner roll recipe is sure to be a new family favorite! I know you’ll love enjoying these!
Other recipes you’ll love
The Best Homemade White Sandwich Bread
Share and follow along!
I love to see how you are enjoying my recipes! Please leave a comment below and let me know how it turned out for you! Follow me on Instagram @thatbreadlady, Facebook and YouTube for more baking tips and videos! Be sure to tag me #thatbreadlady when you try one of my recipes. I’d love to see your baking successes!
(This post contains affiliate links. I receive a commission on purchases made from affiliate links, at no cost to you.)

Parker House Rolls Recipe
Ingredients
- 1 and 1/2 cups 360g milk (2% or whole)
- 1/2 cup 100g granulated sugar
- 4 Tablespoons 56g unsalted butter, plus 4 tablespoons for filling and finishing rolls
- 1/2 cup 112g warm water (~100°F/37°C)
- 2 and 1/4 7g teaspoon instant yeast
- 2 large eggs room temperature
- 1 and 1/2 teaspoon 9g fine sea salt
- 1/4 cup 15g instant potato flakes
- 6 cups 720g all-purpose flour, plus an additional 1/2 cup (60g) as needed
Instructions
- In a saucepan, warm the milk and sugar, on medium low heat, until it comes to a low simmer. Stir constantly to keep the milk from burning. You want the sugar to dissolve and the milk to just barely start to simmer. Remove it from the heat and carefully add the 4 Tablespoons of butter. Stir until the butter is completely melted. Set aside and let it cool until it comes to around 100°F/37°C. It will be warm, but not so hot that it kills the yeast.
- To the bowl of a stand mixer, add the cooled down (but warm) milk mixture, warm water, yeast, eggs, potato flakes and salt. Add half of the flour. Mix on low, using the dough hook attachment. Allow all the ingredients to come together until smooth, about 2 minutes. Gradually add the rest of the flour, about 1/2 cup at a time. Let the flour fully incorporate between additions. Knead on low speed for 5-7 minutes, until the dough comes together in one smooth mass. Dough should clean the sides of the bowl and concentrate around the dough hook. Add 1-2 Tablespoons additional flour, as needed, if dough is excessively wet or sticky.
- Place the dough in a large bowl, sprayed with nonstick spray. Turn the dough so that all sides are coated with the spray. Cover the dough and let it rise in a warm place in your kitchen until it doubles in size, about 90 minutes to 2 hours.
- After the dough has risen, turn it out onto a lightly floured work surface. Divide the dough in half, as this recipe makes two dozen rolls.
- Working with one half of the dough at a time, roll the dough to a rectangle, about 8×12-inches. Be sure to lightly flour work surface to prevent dough from sticking. Melt 3 Tablespoons butter and brush half of it over the surface of the dough.
- With a pizza cutter, cut the rectangle in half lengthwise – this creates two rectangles, 4×12-inches in size.
- Fold over each piece of dough lengthwise, stopping about 1/4-inch before the bottom edge. You’ll now have two long pieces of folded dough that are about 2 1/4-inches by 12 inches.
- Cut each rectangle into 6 equal pieces. This will give you 12 total folded rolls, about 2 1/4-inches by 2-inches.
- Flip each roll over so that the longer side is on top. Place on a baking sheet either lined with parchment or prepared with nonstick spray. Roll out and shape the second dozen of rolls. You can fit all 24 rolls on one half-size baking sheet (18×13-inches) if you arrange them in 6 rows of 4.
- Cover the rolls and let them rise until puffy, about 45 minutes to 1 hour. Towards the end of the final rise, preheat oven to 350°F/176°C.
- Bake for 18-22 minutes, until golden. Brush with melted butter right out of the oven.
- Let rolls cool in the pan 10 minutes before serving.
Notes
- If using active dry yeast, add to the warm water 10 minutes before mixing. It should begin to foam or bubble. If you don’t see any activity after 10 minutes, your yeast is most likely not good and you should grab a new packet.
-
- Make ahead option 1: Make the dough the night before. Place it in a large bowl and cover. Refrigerate the dough over night. Remove the dough about 2 hours before you want to serve the rolls. Shape them and let them rise. Bake and enjoy!
-
- Make ahead option 2: The night before, make the dough and let it rise for its first proof. Roll out and shape the rolls. Place on baking sheet and cover with plastic wrap. Place in the refrigerator. About 1 hour before you want to serve the rolls, remove the pan from the oven. Let them rest on the counter while the oven preheats. Bake, serve and enjoy!
-
- Make ahead option 3: Shape the rolls and place on a baking sheet. Immediately after shaping, place the baking sheet in the freezer and freeze rolls for 24 hours. Remove frozen rolls from the baking sheet and store in a zip top freezer bag. Keep frozen rolls in the freezer for up to 4 to 6 weeks. About 4-5 hours before you want to serve them, remove the rolls from the freezer and place on a prepared baking sheet. Cover and let them rise until puffy. Bake as directed in the recipe.
- Store leftover rolls in an airtight container for up to 4-5 days, or freeze in a ziplock freezer bag for up to 2 months.

When I use metrics and double 720g of milk is closer to 3 cups. Is that correct?
Yes, that is correct.
These are absolutely delish! Made them in my Ankersham and it was great fun! Thanks you!
So glad you liked it! Thank you for trying it!
Can the dough be refrigerated for 24 hours
It can…but I would try to refrigerate it no longer than 12 hours. The longer you refrigerate it, the more likely it will over proof.
Thank you