The Best Homemade White Sandwich Bread
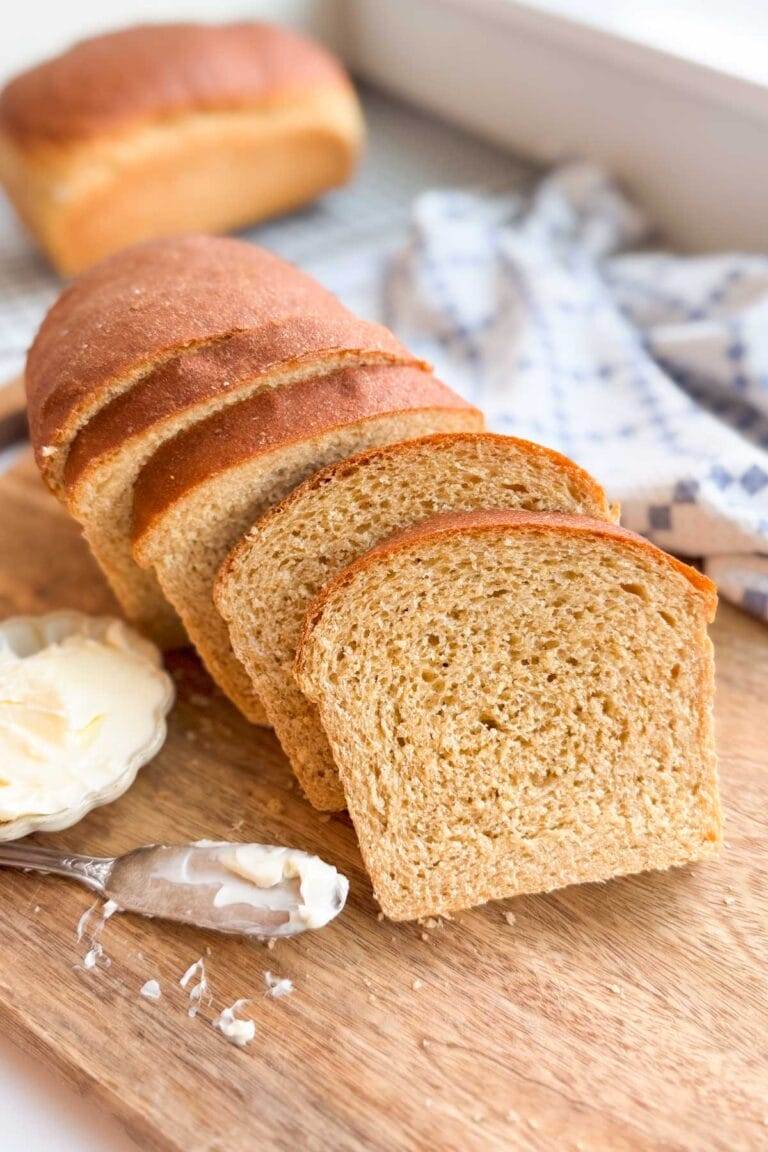
This homemade bread is so light, fluffy and buttery soft. It’s the one sandwich bread recipe you need to have in your baking repertoire, making it THE Best Homemade White Sandwich Bread! This recipe uses the Tangzhong Method – making a small mixture of milk, water and flour and heating it to create a thick slurry. When added to the bread recipe, it will improve your bread dramatically – creating an extra soft bread that stays fresher longer.
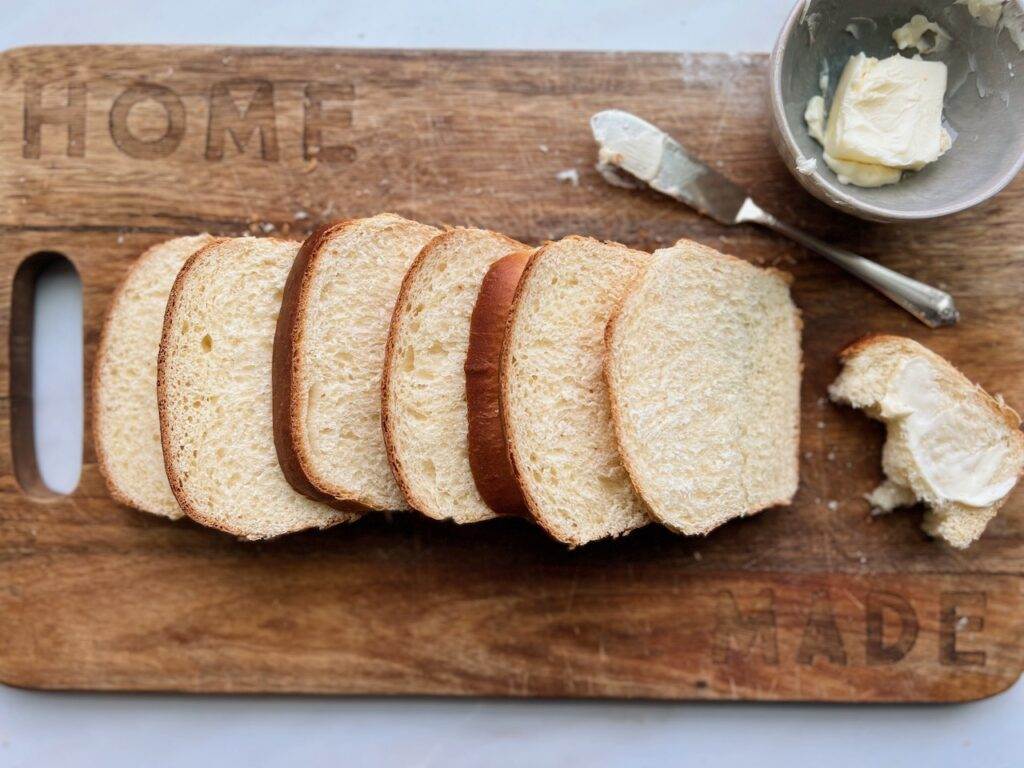
Use commercial yeast or sourdough starter for this recipe. See the recipe notes for the sourdough option. If you are new to working with yeast and not sure what is the best yeast for bread, see my post about working with Instant Active Dry Yeast vs. Instant Yeast. Or check my guide, How to Create a Sourdough Starter to get started on your sourdough baking.
Why you’ll love making your own homemade bread
There’s really nothing like homemade bread, warm out of the oven. It’s quite possibly one of the most comforting things in the world! Growing up, my mom had a weekly bake day where she made homemade bread for our family of eleven! It was a small miracle that any loaves made it past that first day! We could easily devour one loaf straight out of the oven. Every time I smell bread baking, it takes me back to those simple, happy days as a child.
Making your own bread is so many things – an artform, a way to be creative, a form of therapy, a healthier option than store bought, a way to save money, a form of self-reliance, and so much more! You’ll love knowing that you can create something so delicious out of just a few ingredients. And even, more, you’ll love the smell in your kitchen and the deliciousness of this amazing bread!
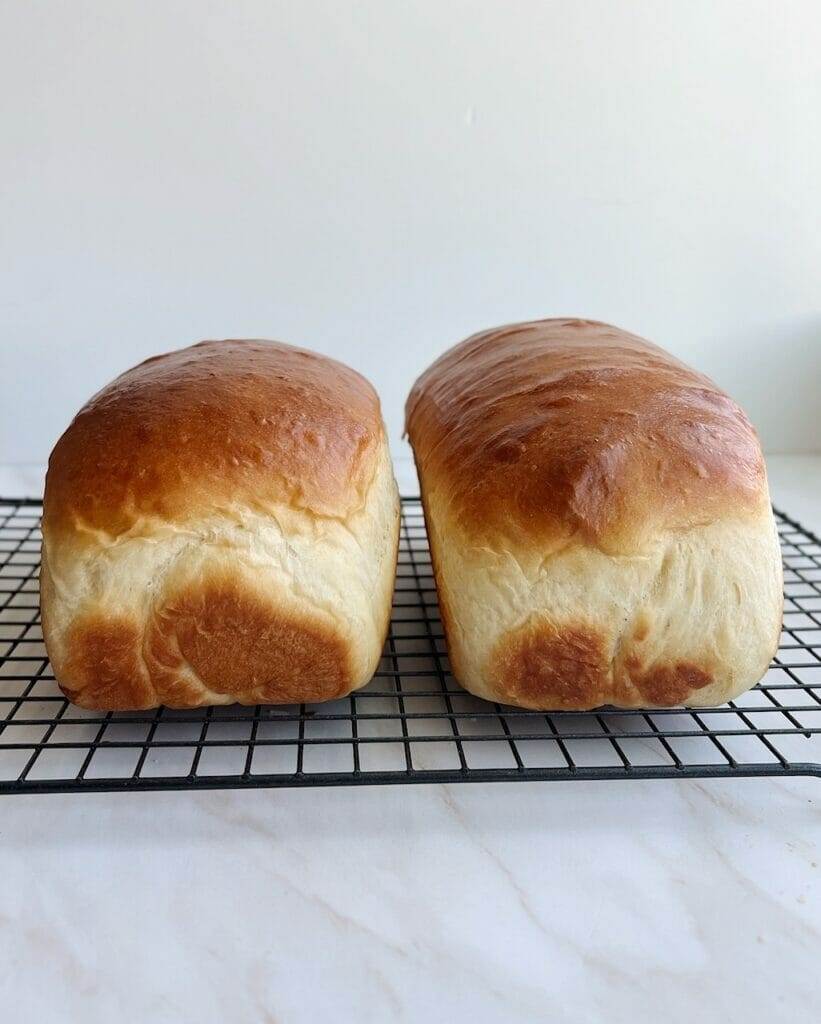
This is by far, my most favorite bread recipe for a classic white sandwich loaf! It’s nearly the same recipe as my Japanese Milk Bread, with a couple of differences that make it more well suited to a classic sandwich bread.You’ll love how fluffy it bakes up and how SOFT it is. It’s a very simple recipe, but incorporating the Tangzhong Method makes all the difference!
What is Tangzhong
Tangzhong is an Asian baking technique which has origins from Japan’s yukone (or Yudane). It’s the simple method of cooking a portion of the flour and liquid from the recipe to create a thick mixture or slurry. After cooled, it is added to the recipe.
Why use Tangzhong in yeast doughs? This method pre-gelatinizes the starches in the flour, meaning it can absorb more water. In fact, flour will absorb twice as much hot water or milk as it does the cool/lukewarm water or milk you’d usually use in yeast dough.
Since heating the starch with water creates structure, it’s able to hold onto that extra liquid throughout the kneading, baking, and cooling processes. Which means a few things:
- The dough is less sticky and easier to work with.
- Your bread will rise higher – more retained water creates more steam when baking. Which, in turn, yields a loaf that will rise more when baked.
- Since your bread is retaining more water, it will be more moist and stay fresher longer!
You’ll really love the results you get from using the Tangzhong method in this bread! You’ll be amazed at how it stays so fresh and soft for several days!
Steps for making this Sandwich Bread
We’ll go into further detail, but here is an overview of this recipe:
- Cook the Tangzhong mixture and let it cool.
- Mix the dough. Knead until it passes the “window pane” test.
- Let the dough rise in a large, covered bowl until doubled in size. (Bulk Fermentation)
- Punch down the dough, divide it into two and shape the loaves.
- Let the loaves rise until they pass the “poke test”.
- Bake and let cool before slicing.
If you’re new to bread making
While I’ve tried to make this post as thorough as possible, I also have another resource that you may find helpful too. I have many bread classes available HERE, including several using the Tangzhong Method (Japanese Milk Bread, Garlic Knot Dinner Rolls and Raspberry Lemon Sweet Rolls). If you are new to bread making, you’ll find my pre-recorded classes invaluable! I show you how to make the recipes from beginning to end, step-by-step.
Equipment needed to make homemade white sandwich bread
There’s a few things you’ll want to use to make this recipe successfully. Click on each item for a link in case you need to see an example or are looking to easily purchase.
- Stand Mixer: When you’re mixing an enriched dough (dough that has eggs or butter), it really is so helpful to use a stand mixer. It will mix your dough so much more efficiently and quickly than you could by hand. I use an Ankarsrum mixer for most of my recipes in my kitchen. I talk a lot about how much I love this mixer on my Instagram. But any stand mixer will do. In fact, I test my recipes on different types of mixers so that I can help you be successful, no matter what type of mixer you have. For this recipe, you’ll use your dough hook attachment. If you’re using an Ankarsrum, use the dough roller and bowl scraper attachments.
- Food Scale: I recommend weighing your ingredients – especially when making bread. You’ll see my recipes have the ingredients listed by volume and by weight. Weighing your ingredients gives you the most accurate and reliable results in your baking. Think about it this way: a cup isn’t always a cup, but a gram is always a gram.
- Bread Pans: A standard loaf pan measures 8-1/2 inches long by 4-1/2 inches wide by 2-1/2 inch deep. Typically this will be the size of pans you’ll most frequently see in the store. This recipe will make two loaves, baked in a standard size loaf pan. Using the right size of pan is important to give your dough enough space to expand and rise when baking. Two brands I have used and love for bread pans are NordicWare and USA Pans.
- Thermometers: Read more in the Baking Section below about why I recommend both an oven thermometer and a digital food thermometer. Both are so important!
Making the Tangzhong
This super simple method allows the liquids in the dough to get “trapped,” meaning the bread dough can hold on to more of the unabsorbed water during the mixing, shaping and baking process. More moisture equals an incredibly fluffier bread that will stay fresher longer!
Tangzhong works perfectly with this Homemade White Bread Recipe, but you can also add it to other yeast bread or roll recipes too! A typical tangzhong will use 5-10% of the flour from a recipe and consists of one part flour to 5 parts liquid.
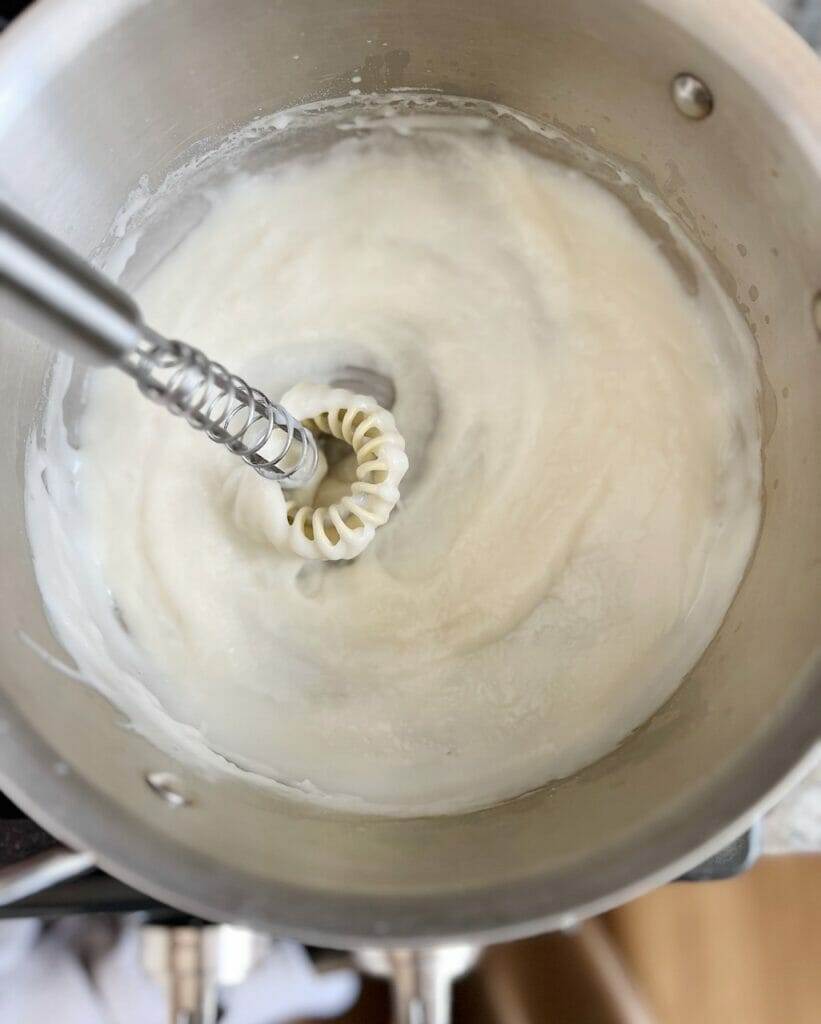
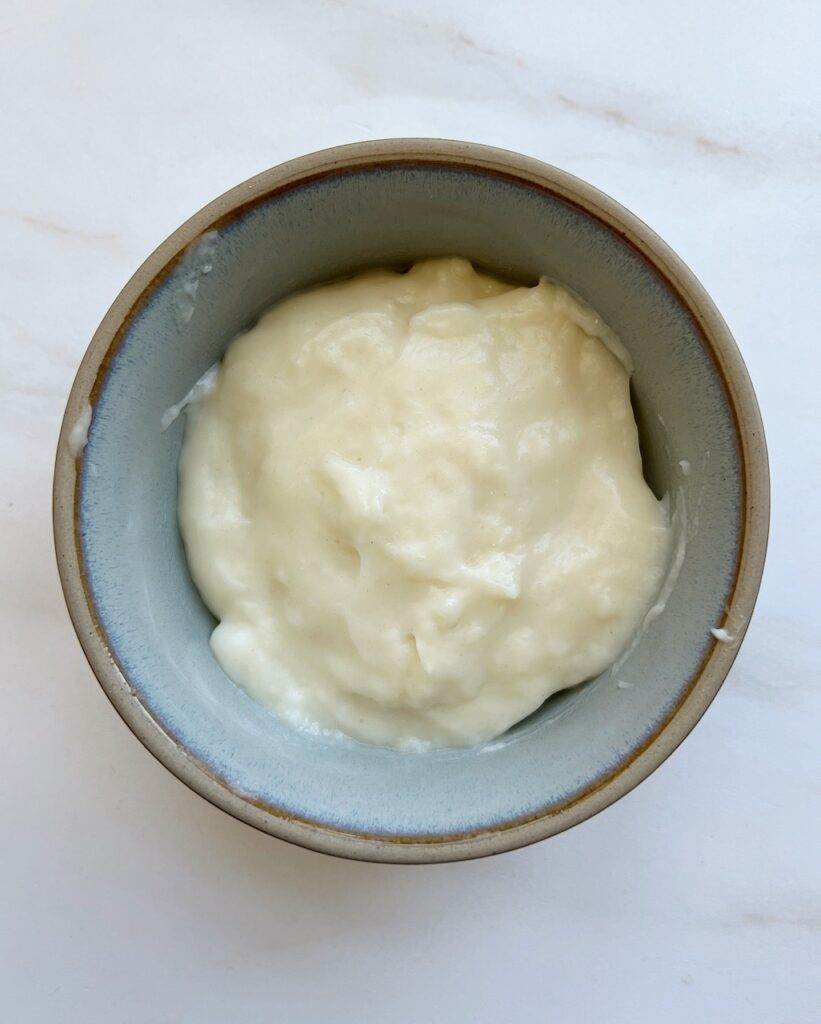
To make the tangzhong for this recipe:
- Combine the flour, water and milk in a saucepan. Whisk it together before you turn on the heat, breaking down any lumps in the flour.
- Heat the mixture on medium low, stirring constantly with a wire whisk. I love using my handy dandy saucinator whisk for this job – it is shaped specifically for this job! But any wire whisk will do!
- Whisk the mixture until it comes to a thick slurry or paste. It shouldn’t take too long, about 2-3 minutes.
- As soon as you’ve achieved that thick paste-like texture, remove the pan from the heat and transfer the tangzhong mixture into a heat safe bowl. Allow it to cool down before adding it to your recipe. As it cools, it will continue to thicken up and will eventually be as thick and gelatinous as Jello.
- Add the tangzhong mixture to the recipe with the liquid ingredients to help it incorporate really well. You can make the tangzhong mixture 1-2 days in advance and keep it in your refrigerator. If you do, let it come to room temperature before adding it to your bread recipe.
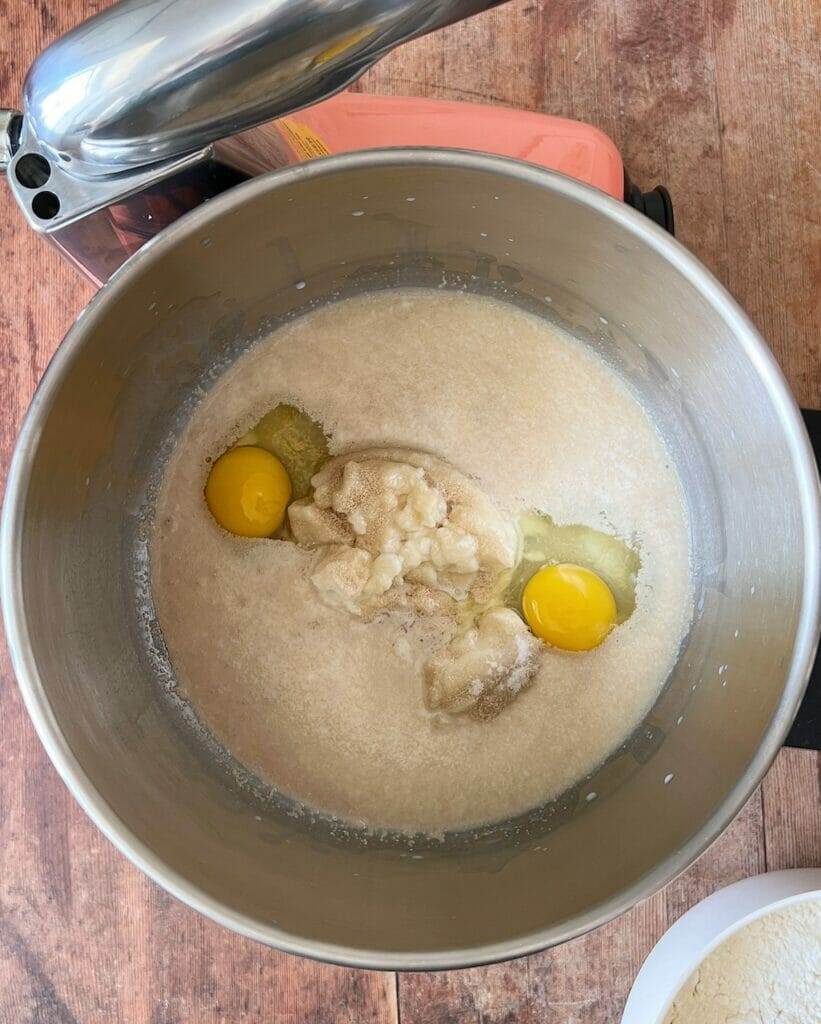
Sandwich Bread Ingredients
Each ingredient plays an important role in making this bread bake up so light and fluffy. We’re using basic ingredients but in a strategic way to produce the best bread possible. When measuring your ingredients, I highly suggest you use a food scale. It will give you much more consistent results in your bread making!
- Bread flour: I almost always use bread flour when making yeast bread doughs. Why? It all comes down to the defining factor that separates flour types – protein content. Protein levels play a big role in the way your dough behaves, impacting your final baking results. Basically the more protein content, the more gluten is developed. The more that gluten develops, the stronger the bread structure will be. It’s also important to keep in mind, that the higher the protein content, the more absorbent your flour will be. A high gluten flour (high protein) will absorb much more water than an all-purpose flour. You may notice that your dough may be stickier or drier, depending on what type of flour you use.
- Eggs: In this recipe, the eggs add an extra rich flavor and tenderness to the crumb.
- Milk: In bread, milk creates a slightly sweet flavor but also produces a rich golden crust. Using all milk in this recipe will produce an extra soft, delicate bread. If you prefer a drier sandwich bread, you can swap out half of the milk for water. Whatever liquid you end up using, be sure it’s lukewarm, to activate the yeast.
- Yeast: Using an instant yeast like SAF or BellaRise will make this recipe easier and quicker than if you used an active dry yeast. You can add instant yeast directly to the recipe without having to bloom it first. If you prefer to use sourdough starter (natural yeast), refer to the recipe notes for directions. This recipe tastes incredible with sourdough starter!
- Sugar: Sugar adds a bit of sweetness to the dough, but also gives the yeast a source to feed on.
- Salt: Enhances the flavors.
- Butter: Adding softened butter at the end of the mixing process will create a rich, velvety dough and a bread that tastes super buttery and delicious.
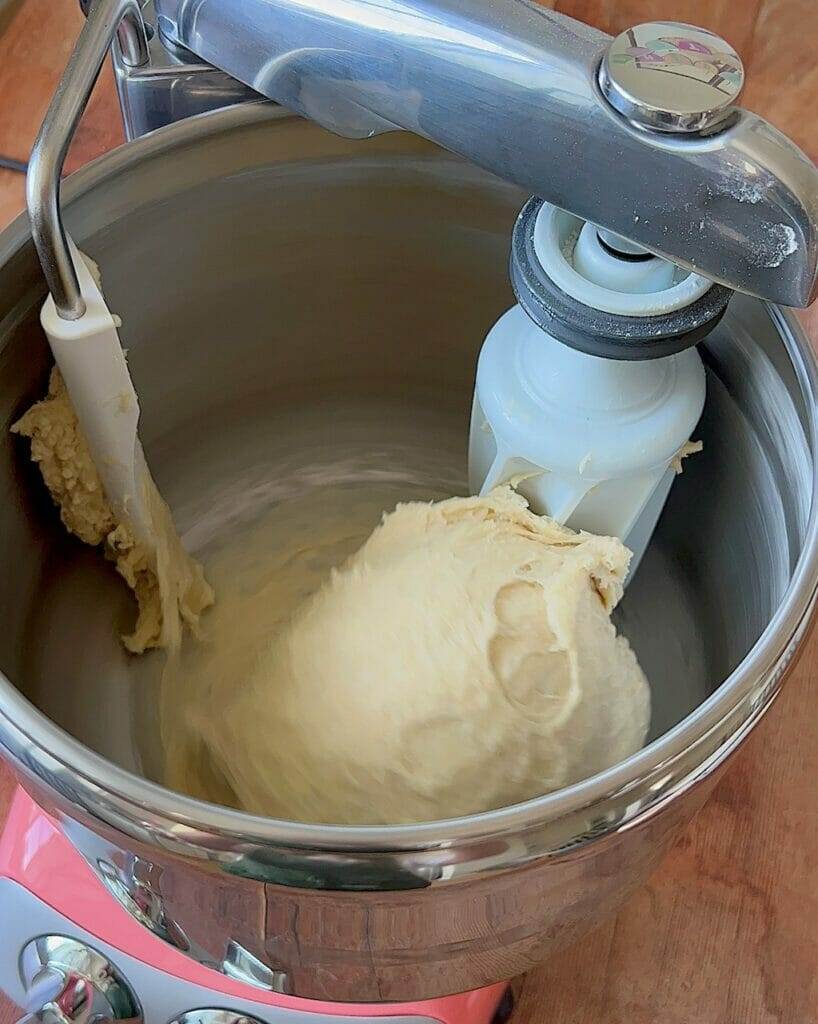
How to make the bread dough
Since this is a soft, enriched dough, you’ll need some type of a stand mixer to make this recipe. There are important cues to look for when making this dough.
- First make the tangzhong mixture and give it some time to cool down before adding it to the dough. If you use it when it’s too hot, it could kill the yeast – which would cause your bread to not rise.
- In the bowl of the stand mixer, combine the milk, eggs, lukewarm tangzhong and about 1/2 of the flour mixture. On low speed, mix with the dough hook attachment until combined and smooth.
- While on low speed, gradually add in the second half of the flour mixture until combined. Allow it to mix thoroughly, smoothing out. The dough will be fairly dense at this point.
- Gradually add the softened butter, one tablespoon at a time, allowing it to fully incorporate between each addition. This may take up to five minutes. During the butter addition, the dough will soften and become more elastic. Depending on what type of mixer you are using, the dough might not clean the sides of the bowl. If the dough feels excessively wet, you could add 1-2 Tablespoons more flour, but keep in mind that the dough will come together more as it’s kneaded.
- Once the butter has been incorporated, knead the dough on a low speed. If. you are using a Bosch mixer, keep it on Speed 1. If you are using a mixer like a KitchenAid, use Speed 2 or 3. If you are using an Ankarsrum or something similar, set the dial in the 2:00 position. Knead the dough until it passes the window pane test. See the section below for tips on this technique. Depending on the type of mixer you are using, this could take 10-15 minutes.
- Place the dough in a large, greased bowl. Cover with a lid or clean kitchen towel and let it rise in a warm place in your kitchen until it doubles in size. (You can also place the covered dough in the refrigerator for up to 24 hours before shaping and baking. See the recipe notes for instructions for this option.)
- Punch the dough down. Turn it onto a lightly floured work surface.
After kneading your bread dough for several minutes, take a piece of the dough and gently pull it apart with your fingers. If the dough is properly developed, you’ll be able to stretch it several inches without it tearing, and it should be slightly translucent (like a window pane). If the dough is underdeveloped, it will tear easily when you try to pull it apart. In that case, return to kneading the dough for 2-3 minutes and then test it again. A bread dough that passes the window pane test has adequate gluten development and will yield a dough with a strong oven spring and crumb structure. 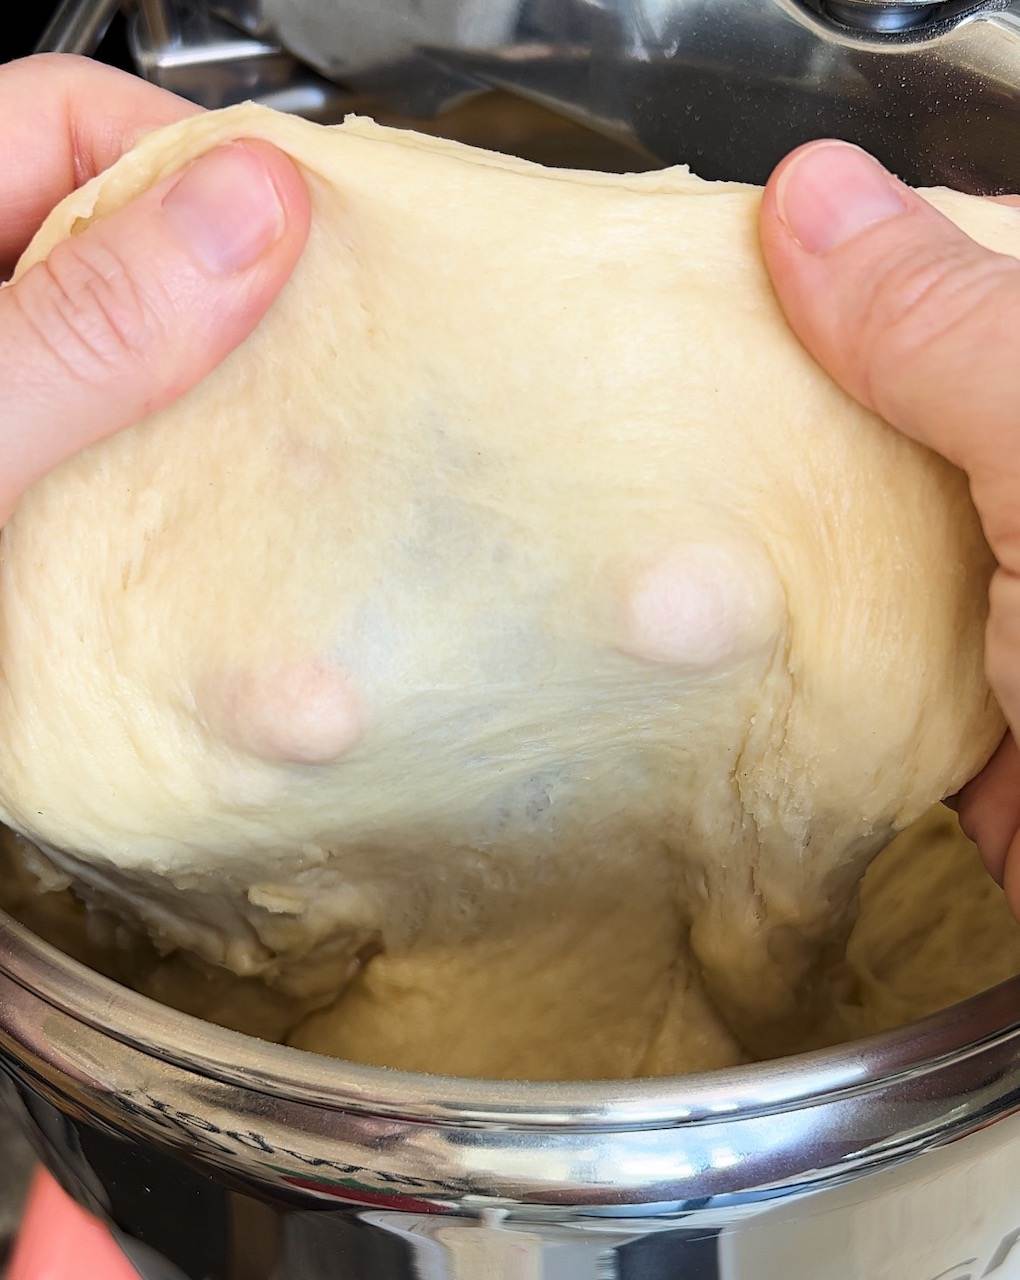
When the dough is rising during bulk fermentation, it should grow to double in size. This is the yeast working! Avoid letting it rise too long as this could create a less than stellar loaf of bread. Dough that has been overproofed will typically create a loaf that lacks a strong crumb structure.


How to shape a loaf of bread
This dough is very soft and pillowy and so easy to work with! You should be able to easily shape it into a loaf with little to no effort, using your hands. No rolling pin required!
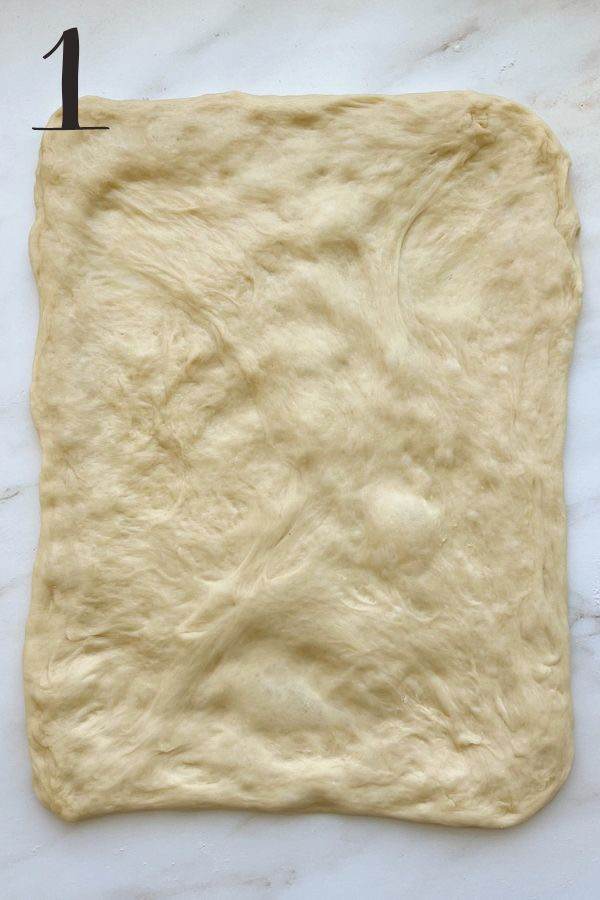
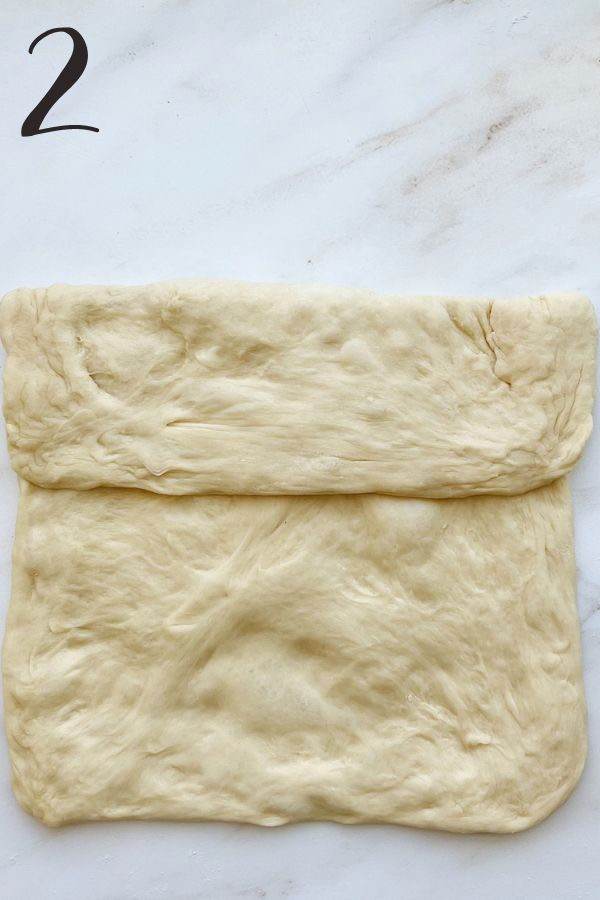
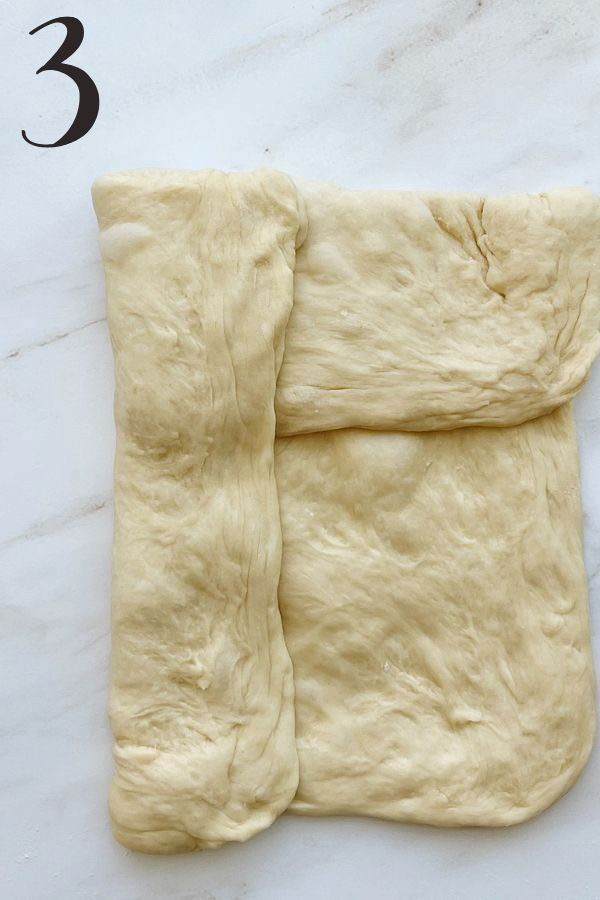
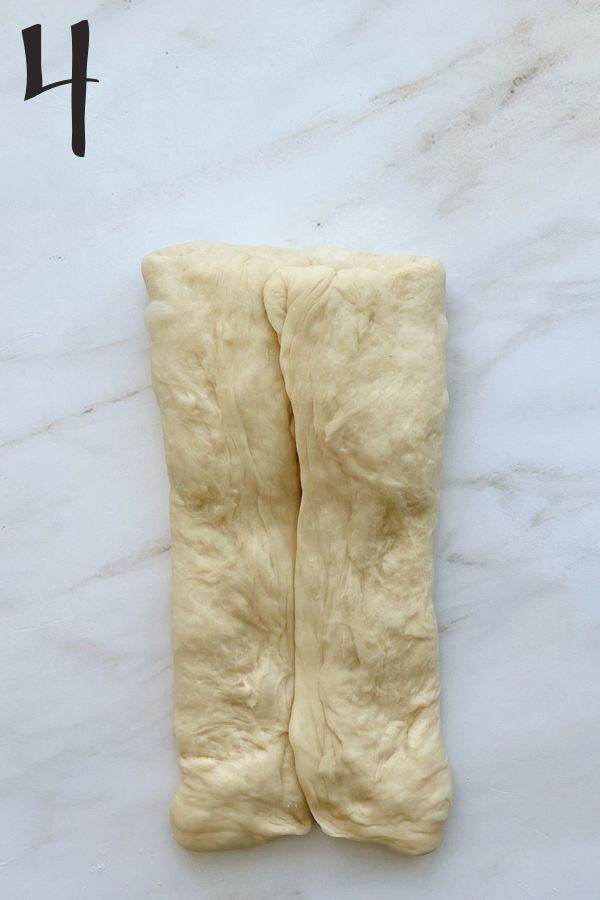
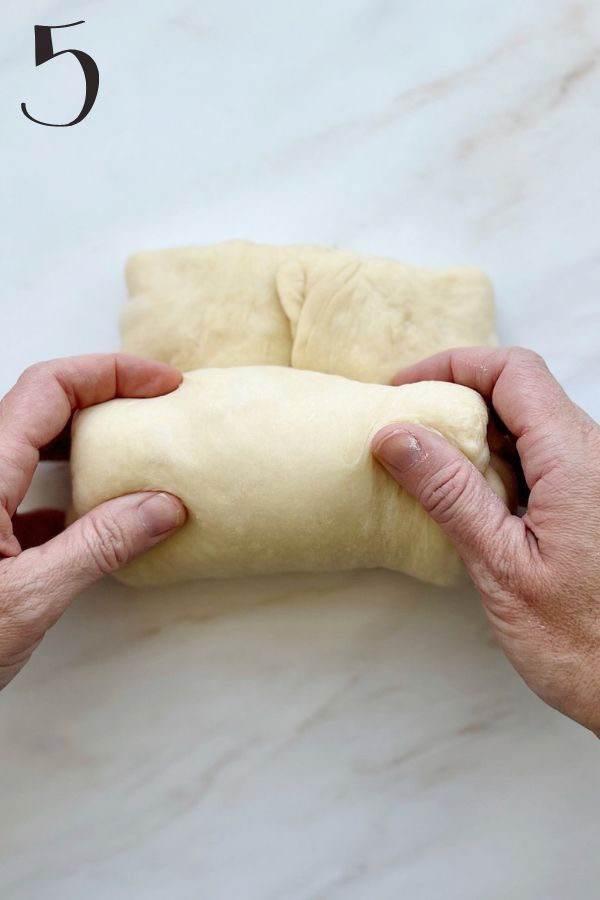
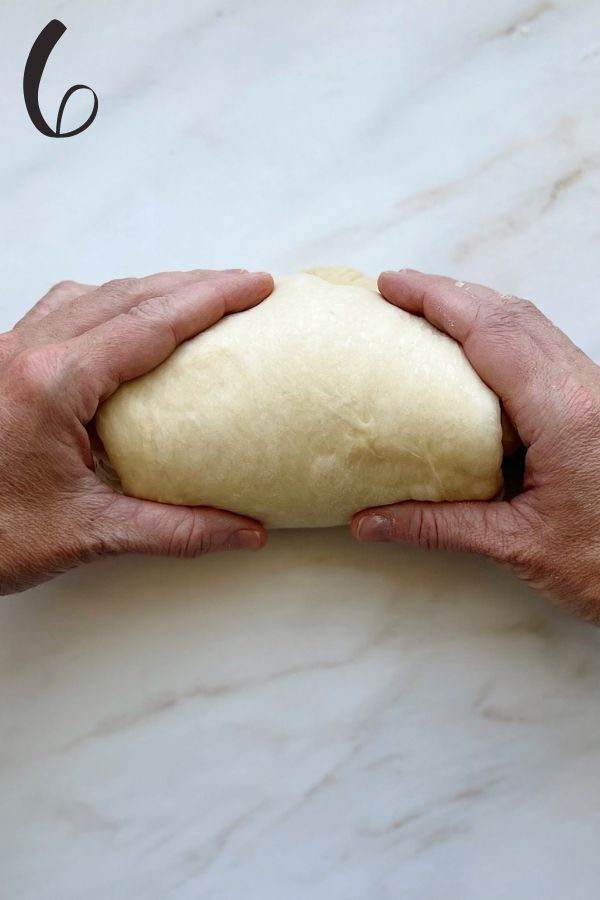
- Stretch the dough to a rectangle, about 10 inches wide and 12 inches long.
- Fold the top third part of the dough in towards the center.
- Fold the left side in towards the center.
- Fold the right side in towards the center. Gently press the center seam together.
- Beginning with the bottom side, closest to you, roll the dough upwards.
- Gently drag the loaf towards you, with the seam side down, about 3-4 times. This tightens the outside of the loaf and seals the seam shut. Make sure your work surface isn’t floured too much. The dough needs to slightly stick to the work surface to create that surface tension as you drag it towards you.
Once your loaf is shaped, place it in the loaf pan, seam side down. Cover with a kitchen towel and let it rise until it passes the Poke Test. What’s the “poke test?” I’m so glad you asked! See the section below for some very helpful tips!
Please note: This final rise will be shorter than the first rise. Depending on how warm your kitchen is, your loaves may rise in about 45 minutes. Be sure to preheat your oven during this final proof time – I suggest allowing your oven to preheat for at least 30 minutes before baking.
Knowing when your bread is ready to bake can be difficult for a beginning baker. Using the Poke Test will help you to be able to gauge whether your bread is ready to bake. When your bread has risen about 30% and you think it might be ready to bake, gently poke the side of the dough with your fingertip or knuckle. You’ll get one of three results:
1- The dough will spring back immediately, not leaving an indentation. This means it needs more time to rise. The yeast is still working and has not produced an adequate amount of gases in the dough to give it a proper rise and structure. An under proofed loaf will most like split when baked and be very dense.
2- There will be an indentation that never springs back. The dough feels weak and very airy. The outer skin of the dough will be very thin and there might be big bubbles on the surface.This means it has over proofed. The yeast has been active for too long, over feeding on the dough. The gases released by the yeast have started to break down. Bake your bread right away. Over proofed bread may sag in the center after it comes out of the oven and the bread might be very crumbly. But I prefer over proofed bread to under proofed bread.
3 – There will be an indentation that slowly springs back. The dough feels soft and light but not too airy. This is the perfect point at which to bake your bread. The yeast has produced an adequate amount of activity to allow the bread to spring in the oven and holds its structure.
Go to my Instagram video HERE to see the Poke Test in action.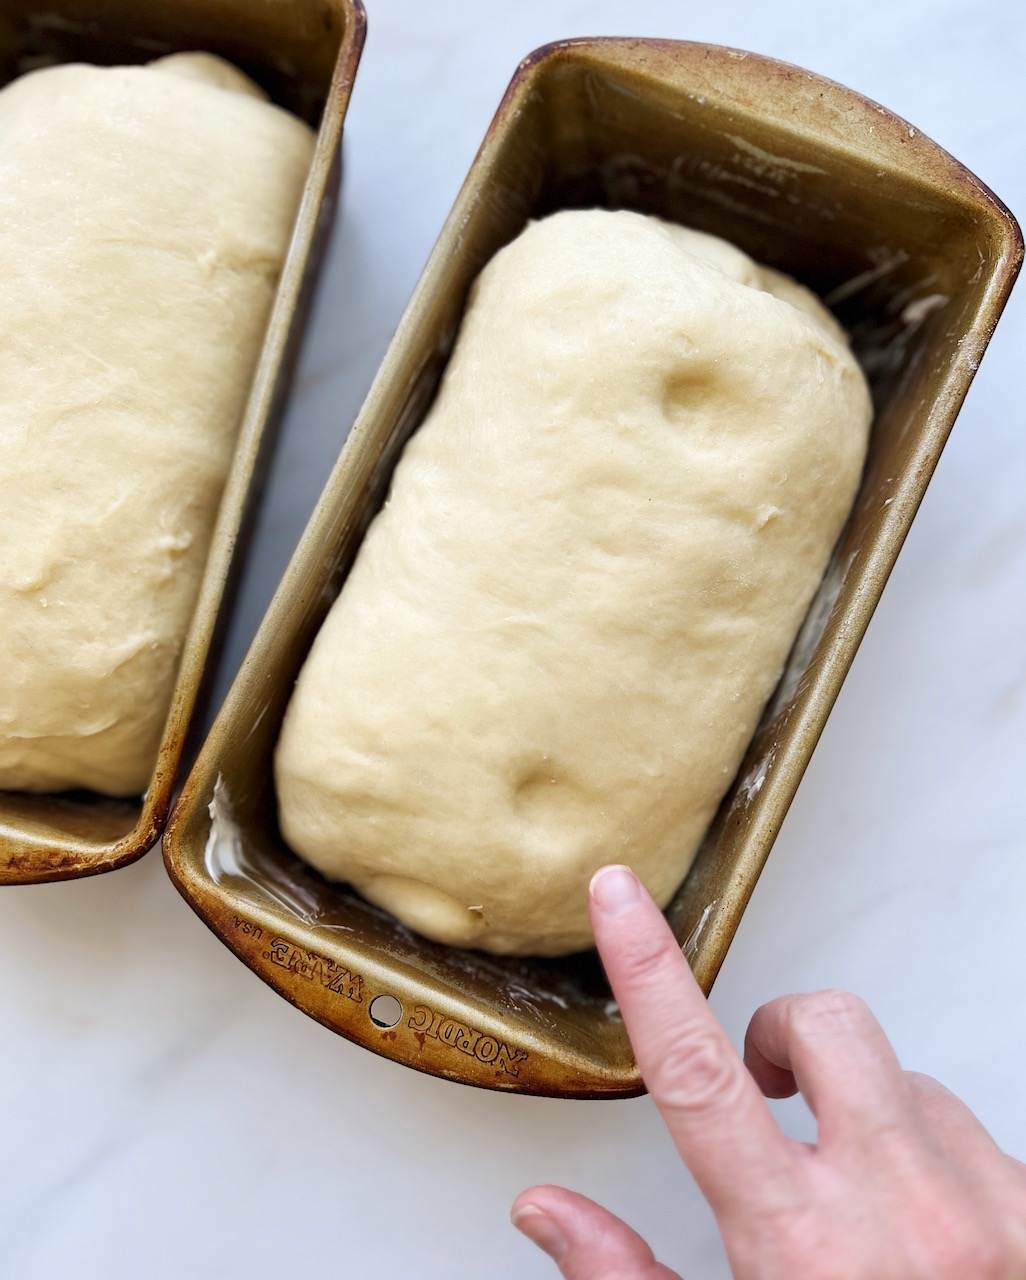
How to bake homemade sandwich bread
Once your loaf has passed the all-important poke test, it’s time to bake! Brush the tops with egg wash to give the crust a beautiful golden shine. Simply whisk an egg together with a splash of water and brush it on with a silicone pastry brush.
To successfully bake your bread, I very strongly recommend that you get two important types of thermometers for your kitchen.
- Oven Thermometer: It’s important to note that not one oven is exactly like another. Ovens can vary slightly or drastically. My oven most likely will bake differently from yours, even on the same temperature setting. Our ovens can be a bit deceptive when that preheat setting beeps. Using an oven thermometer will help you to know exactly what temperature your oven is. You will get much more reliable results when using one! You can find one on Amazon HERE.
- Digital Food Thermometer: You don’t need to guess if your bread has baked all the way through. And why would you want to? Don’t go to all of the effort to make homemade bread, only to have a half baked bread in the center. Use a digital thermometer to take the temperature of the center of your bread. It is baked all the way through when the center reads at least 190°F/90°C. You can find the thermometer I use HERE. Just insert the thermometer into the side of the loaf (try to choose an inconspicuous spot) and make sure it goes into the center of the loaf. If it’s not quite reaching that target temperature, return your bread to bake for an additional 2-3 minutes and then check it again. See my Instagram video HERE for more about temperature.
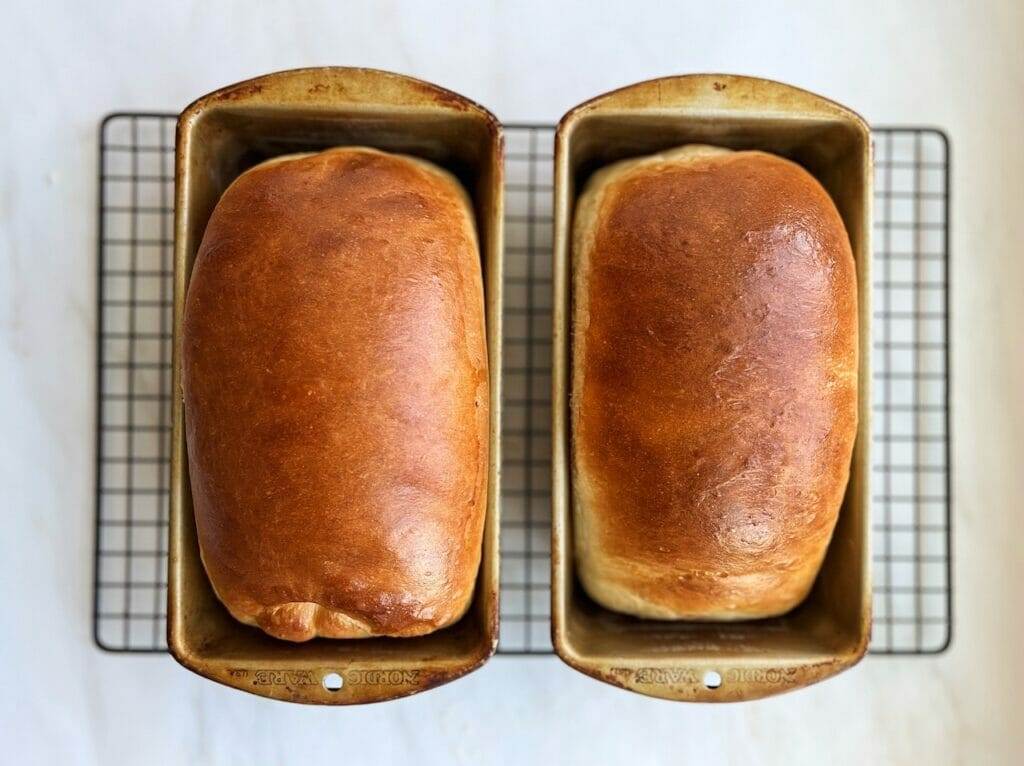
When the bread comes out of the oven, allow it to cool for 10 minutes in the pan before gently removing it. Let it continue to cool on a wire cooling rack.
One more bread making tip
This might be the most difficult part of making bread – allow it cool before slicing it. I know! You want to devour that bread the second it exits the oven! But resist the urge and give it some time. It is continuing to bake internally. If you slice into the bread as soon as it comes out of the oven, it will be doughy and you’ll most likely smash the loaf.
Now, I’m not saying you can’t enjoy warm out-of-the-oven bread. I’m not that cruel. But, at least allow it to mostly cool before slicing it. I’ll usually give my sandwich bread no less than 30 minutes out of the oven to cool before slicing it. You may have to leave the room and distract yourself to resist the urge, but I promise, it’s worth it. It will still be slightly warm inside and melt the butter you should most definitely spread on top of a big fat slice!
Storing your homemade bread
Since we’re using the tangzhong method for this homemade bread recipe, you’ll love how your bread will stay fresher longer. Allow it to cool completely before bagging your bread. Store it in an airtight container or thick bread bag to keep it fresh and from drying out.
Promise me you will not put your bread in the refrigerator to extend the shelf life! This will actually dry out your bread. Keep your covered bread at room temperature, preferably in cooler place in your kitchen. If you’d like to save your bread for later, opt for freezing instead of refrigerating. Store in the freezer for up to 3 months.
To defrost your frozen bread, take it out of the freezer the night before you’d like to use it. Allow it to thaw out in the bread bag, on the kitchen counter. If you need to defrost it right way, open the bread bag but leave the loaf inside. Microwave on high for 90 seconds. This will mostly defrost it, but it may be slightly frozen in the center. I will usually slice it in half and return it to the microwave for another 30 seconds.
Other recipes you will love
Share and follow along!
I love to see how you are enjoying my recipes! Please leave a comment below and let me know how it turned out for you! Follow me on Instagram @thatbreadlady, Facebook and YouTube for more baking tips and videos! Be sure to tag me #thatbreadlady when you try one of my recipes. I’d love to see your baking successes!
(This post contains affiliate links. I receive a commission on purchases made from affiliate links, at no cost to you.)

The Best Homemade White Sandwich Bread
Ingredients
Tangzhong
- ⅓ cup water
- ⅓ cup milk whole or 2%
- 3 Tablespoons bread flour
Dough
- The tangzhong mixture cooled to lukewarm temperature ~85°F/30°C
- ¾ cup milk whole or 2%, lukewarm ~85°F/30°C
- ⅓ cup granulated sugar
- 2 teaspoons fine sea salt
- 2 Tablespoons instant yeast
- 2 large eggs room temperature
- 4 ¼ cups bread flour ~13%protein
- 6 Tablespoons unsalted butter softened
Instructions
Preparation:
Make the Tangzhong
- Add all the ingredients for the tangzhong to a small saucepan. Before turning on the heat, whisk the ingredients together, smoothing out any lumps of flour. Once combined, place the saucepan on medium low heat, stirring constantly until it thickens to a paste-like mixture (like making a rue), about 5 minutes.
- Remove from the heat and transfer the tangzhong into a heat-safe bowl. Set aside to cool to a lukewarm temperature, about 85°F/30°C.
Mix the dough:
- To the bowl of a stand mixer, combine the tangzhong mixture, milk, sugar, salt, instant yeast, 2 eggs and about half of the flour (2 cups/240g). On low speed, mix with the dough hook attachment until combined and smooth. While on low speed, gradually add the remaining half of the flour (2-1/4 cups/270g). Continue to mix until fully combined. The dough will be thick and slightly dense.
- While on low speed, add the softened butter, one tablespoon at a time. Allow butter to fully incorporate between additions. This could take up to 5 minutes. While adding the butter, the dough will begin to smooth out and become softer.
- Knead dough for 10-15 minutes on low speed, until it comes to a full window pane (check blog post for tips on the windowpane test). At this point, the dough should feel very soft and elastic. It will become easier to handle after it rises during bulk fermentation.
Bulk Fermentation:
- Place the dough into a larger, greased bowl. Cover with a plastic bowl cover or clean kitchen towel. Let rise until doubled in size, about 60-90 minutes.
Shaping:
- Grease loaf pans with nonstick spray and set aside.
- Turn dough onto a lightly floured work surface and deflate. Divide dough into 2 equal pieces, each weighing about 525g.
- Working with one piece of dough at a time, gently stretch the dough, with your hands, to a rectangle about 10-inches by 12 inches. Be careful as to not tear the dough. Fold the top third over towards the center. Fold the left and right sides in towards the center, meeting in the middle. Gently press the vertical seam together. Roll the dough up, starting at the end closest to you. With the seam side down, drag the loaf towards you, tightening the outer layer of the bread and sealing the bottom seam shut. (see blog post for shaping pictures)
- Place each loaf in the loaf pan with the seam side down. Cover with a clean kitchen towel.
Final Proof:
- Let the bread rise in a warm area of your kitchen, around 40-60 minutes until risen about 50% in size.
- Towards the middle of the rise time, begin preheating oven to 350°F. Place the oven rack just below the center position.
Baking:
- Before baking, use the poke test to make sure the dough has risen enough – Gently poke the side of the dough with your finger. If it leaves an indentation, it is time to bake. (see blog post for more about the poke test)
- Brush egg wash on top of the loaves and bake for 30-35 minutes. It should be golden brown and the internal temperature should be at least 190°F.
- Place the loaves on a wire rack, leaving them in the pans for 10 minutes before removing. Allow to cool completely on the wire rack before slicing.
- Store leftover bread in a bread bag for up to one week. Or store in the freezer for up to 3 months.
- Enjoy!
Notes
- Sourdough option: If replacing yeast with 100% hydration sourdough starter, use 1/2 cup (120g) ripe starter. Ripe starter is active and bubbly and just about ready to be fed. Be sure to reduce the bread flour and milk in the dough recipe to compensate for the amount you are adding with the starter. If using a 100% hydration starter, reduce the flour by 60g and the milk by 60ml. Rise times will be longer, depending on the activity of your starter and the climate in your kitchen.
- Make ahead option: When placing dough in container for Bulk Fermentation, you can refrigerate it for up to 24 hours before shaping. Placing in the refrigerator will slow down the fermentation (rise). The dough will continue to rise in the refrigerator, but at a slower rate. When ready to bake, remove dough from refrigerator and let rest in the container, at room temperature, for 30 minutes. Divide dough, shape and place in bread pans to rise. Depending on how warm your kitchen is, chilled dough may take up to an extra hour to rise before baking.
- A standard loaf pan measures 8-1/2 inches long by 4-1/2 inches wide by 2-1/2 inch deep.


Hi
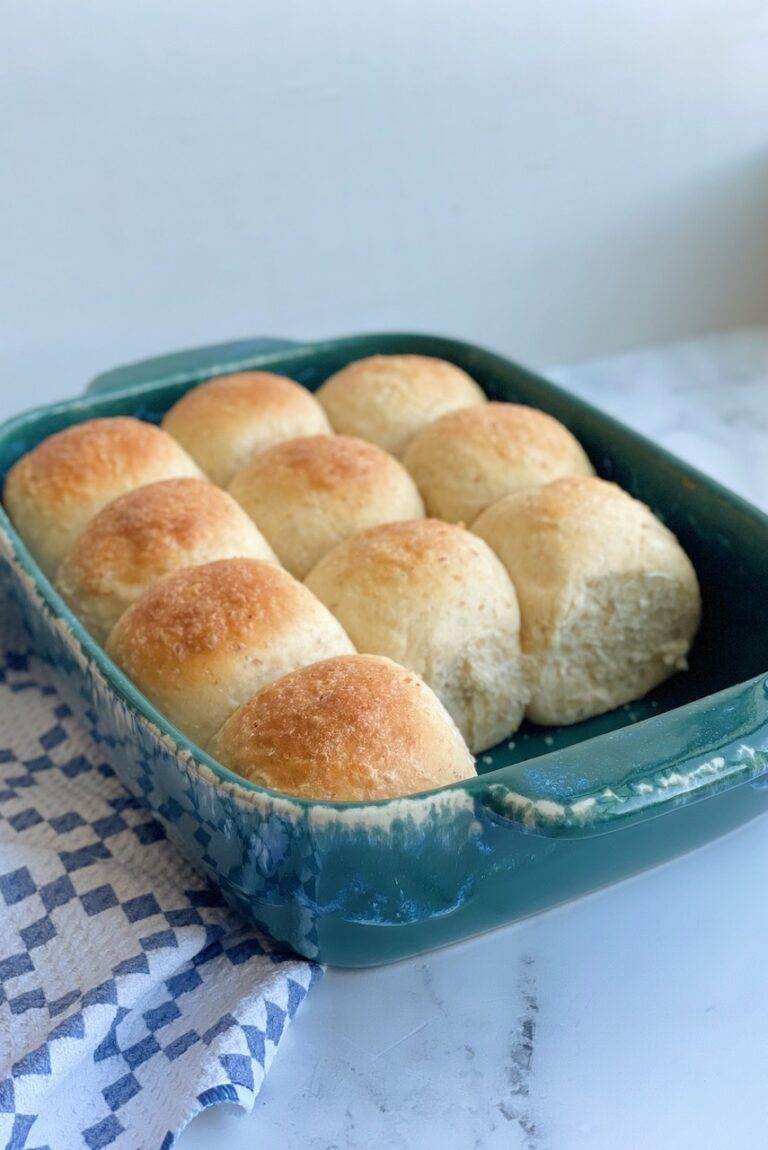
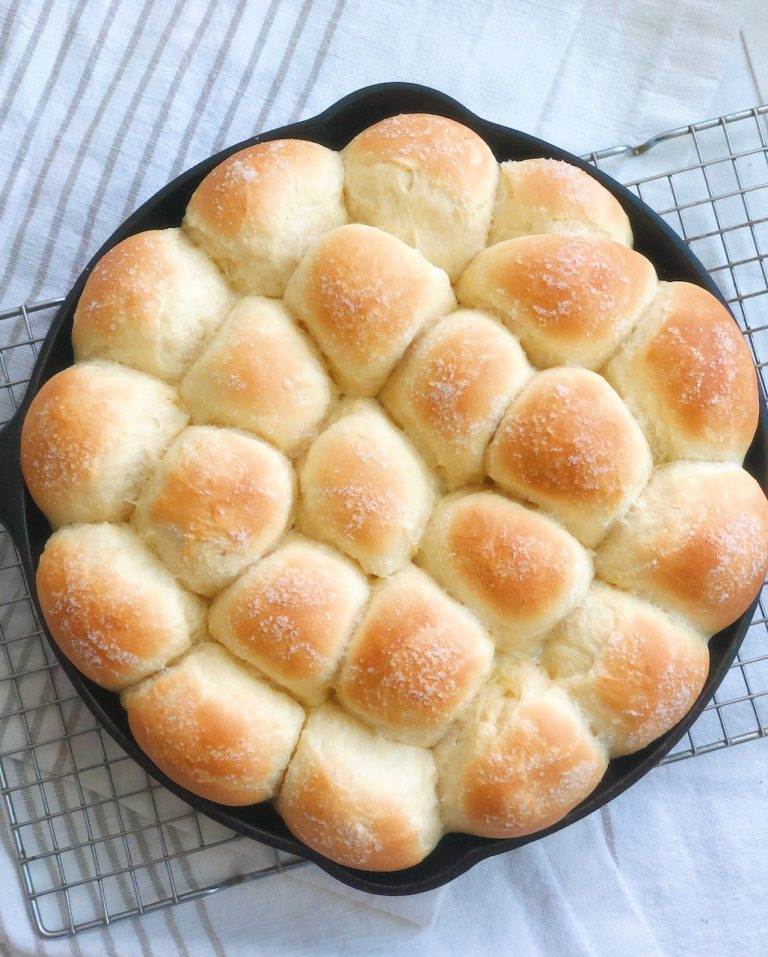
I tried this recipe today,I actually made this in to buns.
I am just amazed with the results.its really too good.
So soft fluffy and tasted so well.
Thank you for sharing
So glad you liked it!!
I don’t have bread flour, can I use all purpose?
Yes you can use all-purpose, but it will be more sticky and difficult to work with. You may need to add a bit more flour to make it more manageable.
I made this recipe today and oddly, the loaves are kind of sunk in on the sides. Everything else seems fine. I’m a seasoned baker and have made tons of sandwich bread. I used instant yeast. I’m not entirely sure what causes this. I am also in AZ so the only thing I can think of is perhaps overproofed due to a warm kitchen, but it didn’t appear that way before baking. Got plenty of oven spring. Oh well, I think it’s going to taste amazing!
Hi Megan,
It’s hard to say what might be the problem without seeing your loaves, but my initial question is…what size pans did you use? In the post, I suggest a standard size loaf pan which is 8-1/2×4-1/2×2-1/2 inches. If your pan is bigger than that, you most likely will not have as fluffy as a loaf as it will bake outwards instead of upwards. The only other thing I can think of is overproofing, which can cause the loaf to collapse or sag after coming out of the oven.
Have you ever made this with the Food nanny commute flour? It seems to be better for my family that has issues with gluten. Do you have any suggestions what I could do if using that flour instead?
I have not made this with Kamut flour, but you could definitely give it a try. You may notice that you don’t need as much flour in the final mixing. Let me know how you like it!
Hi,
I am just now making this recipe, and it seems like the metric measurements are not correct on some of the ingredients, when compared to the US measurements?
example: I measured out 1 Tbls of instant yeast, and it weighed 9 grams, which is the weight you have listed for the 2 Tbls of yeast?
These other ingredients are off too, just not as much as the yeast.
Butter, salt, bread flour
The sugar and the milk seem to be fine.
I am going to use the US measurements, as hopefully, this is what the others used that made this and were happy with the outcome.
Please advise as to which is correct.
Thanks!
Hi Jeanette,
When measuring by volume (US measurements), results can very, from baker to baker. This is why I also include metric measurements too. Weighing your ingredients will insure that you are replicating the recipe exactly how it was written. I always encourage bakers to weigh ingredients for the best possible results.
Correction on my previous comment . . .
The butter weight is correct.
I only have active dry yeast. Can I use that instead of instant yeast? If so, how do I use it? Do I do anything different? The is my first attempt at bread & I’ve never used either product.
Oh yay! I’m so excited for you! Yes you can use active dry yeast! With instant yeast, you can just add it straight to the recipe. But with active dry yeast, you need to activate it first before adding to the recipe. You can sprinkle it into the milk and let it sit for about 10 minutes to make sure it bubbles up. Wait as long as 15 minutes – if nothing happens, it’s probably yeast that needs to get replaced. If it does bubble up, go ahead and add that mixture to the recipe and continue to mix as directed. Let me know how it goes! You can read more about yeast in this article: https://thatbreadlady.com/active-dry-yeast-vs-instant-yeast/
Is it possible to bake these loaves in disposable aluminum pans? If so, would there be any changes to the baking?
You definitely can. Just make sure they’re the right size. They might bake faster on the bottoms since the foil is thinner. I’d try baking one loaf first to test it out before committing your entire batch to it. Maybe place the foil pans on top of a baking sheet to keep the bottoms from getting too brown. Check the loaves 5 minutes earlier to see how they’re doing. Let me know how it turns out.