How to create a Sourdough Starter
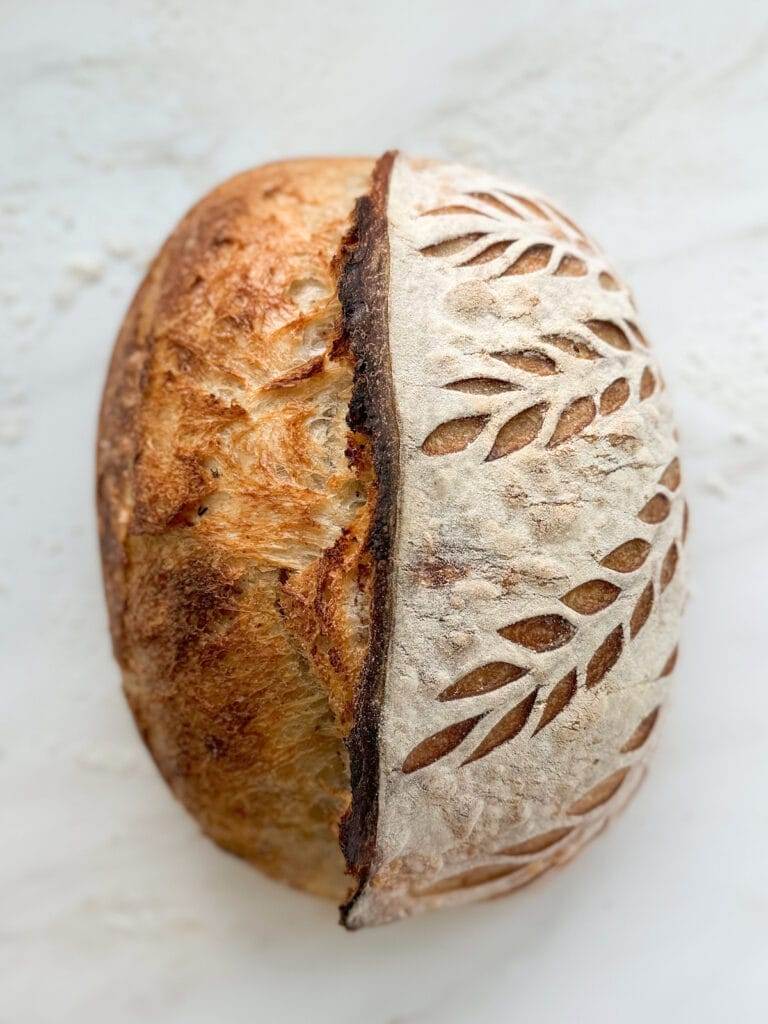
A good sourdough starter is the foundation of the best sourdough bread! These simple steps will give you a great starter in as little as 7 days! Follow the schedule and you’ll see just how easy it can be to establish your own sourdough starter!
This post contains affiliate links
Years ago I set off on a journey to figure out this whole sourdough thing. I read so many articles, recipes and discussion boards about the subject of baking with natural yeast. The more I read, the more confused I became. Sourdough seemed like such an abstract concept that I just couldn’t wrap my brain around. For far too long, I was just too intimidated to try sourdough baking.
It wasn’t until I finally decided I would just start somewhere, that I began to learn it wasn’t as complicated as I had built up in my brain. It took quite a lot of trial and error to get to where I am today in my sourdough baking, but I can honestly say it has opened up such a delicious and rewarding world of baking for me! This is what sourdough can do for YOU too!
There are many different ways you can achieve a successful starter. I know there are so many voices out there telling you “this is the best way to do sourdough”. Keep in mind, what works for one, might not work best for you. The best thing you can do, is just start with the basics and go from there. There’s no one correct way to do it. You’ll learn as you go, what works best for you in your own kitchen.
My goal is to give you some of the basics to build off of as you begin your sourdough journey.

My Sourdough Class
While it can seem overwhelming, focus on the basics first, establishing a good, healthy, dependable starter and the delicious bread will undoubtedly come next. I created my Basic Sourdough Class for this very reason – to provide you with a good foundation and understanding of sourdough baking. Take away all the sourdough confusion with my pre-recorded, step by step videos! You’ll come away with a comprehensive knowledge of sourdough baking and learn to make your first loaf of delicious sourdough bread!
Terminology
If you’re new to the world of Sourdough, it’s best to acquaint yourself with the terminology. There’s endless amounts of information out there and knowing a few key words will help you as you discover the ins and outs of this delicious bread making process!
- Starter. It’s a mixture of fermented flour & water which cultivates the wild yeast in our environment to a form we can use for baking. It’s a natural yeast, a living organism, that makes bread rise. A good starter is the foundation of a great loaf of bread! Healthy starters are maintained with regular feedings. Along with rising the bread, starter also helps to give Sourdough bread that amazing, complex flavor. Baking with starter has also been shown to aid in nutrient absorption and encourages a healthy digestive system. Starter can be used in other types of recipes as well – pancakes, Easy Belgian Waffles, Sourdough Banana Bread, muffins, crepes and more.
- Feeding the Starter. You’ve probably heard about the importance of feeding your starter. This is simply the process of reserving a portion of your starter (throwing out the rest) and mixing it with fresh flour and water. Feed your starter when it has risen to its peak point – this is when it has risen and you’ll notice it’s starting to fall. Feeding can also be referred to as “refreshing” in some recipes. Feeding your starter is key to creating and maintaining a healthy leavening agent for your bread. It takes only a few minutes, but is vital in the reliability of your starter.
- Discard. As I mentioned, each time you feed your starter, you will only be keeping a portion of it. The part of your starter you do not carry over is called the discard. You can do a few things with it. You can throw it away (which I know seems wasteful, but is necessary), keep it in the refrigerator for several days for baking with later, or use it in a recipe right away. Discard from your starter can be used to replace instant or active dry yeast in recipes by using 1 cup of starter for every 2 teaspoons of yeast called for. You will need to adjust the liquid and flour in your recipe by omitting the amount of flour and water you are adding with your starter. Rise times will be about double when using starter in place of commercial yeast. You can also use it for discard recipes like my Sourdough Peach Cobbler.
- Mother Starter. It’s your main starter that you maintain and pull from for recipes. It’s ideal to keep this consistent, using mostly the same type of flour every time you feed it. You can create variations of your mother starter by using a portion of it & feeding it with different flours, or by using it to make a Levain in your recipe.
- Levain. In French it means, “to rise”, which is exactly what it does! You’ll see levain often used in bread recipes, but not always…it’s an offshoot of your mother starter. Essentially is it when you combine a small portion of starter and a larger amount of flour & water and let it rise (almost like another feeding). This creates the leavening agent for a bread recipe. Ideal for a couple of reasons: 1- you’re able to maintain a small mother starter (less waste), and 2- you can use different flour types without changing your mother starter.
- Autolyse. This is a step in the recipe that occurs at the beginning stage of mixing. Typically, you’ll combine the majority of the flour and water only, and allow it to rest for 30-60 minutes. This allows the flour to fully hydrate. It’s especially useful when using whole grain flour – it softens the wheat bran which helps reduce the negative effects bran can have in gluten development.
- Bulk Fermentation – the first rising period in bread making. Bulk Fermentation occurs after mixing the dough and before shaping the loaves. It’s a vital period of time during which the dough is developed through stretches & folds and eventually letting it rise all together in one mass.
- Hydration refers to the amount of moisture in a dough. Find this ratio by dividing the total weight of water (or other liquids in the recipe) by the total weight of the flour and times is by 100. For example, a recipe that uses 100 grams of flour and 75 grams of water has a 75% hydration level. Higher-hydration sourdough bread is considered softer with a more open crumb (bigger holes) and a thinner crust.

Items you’ll want to use
These items have become key to the success of my sourdough starter. Some are necessary, while some are just a “nice to have” item that will make the process easier.
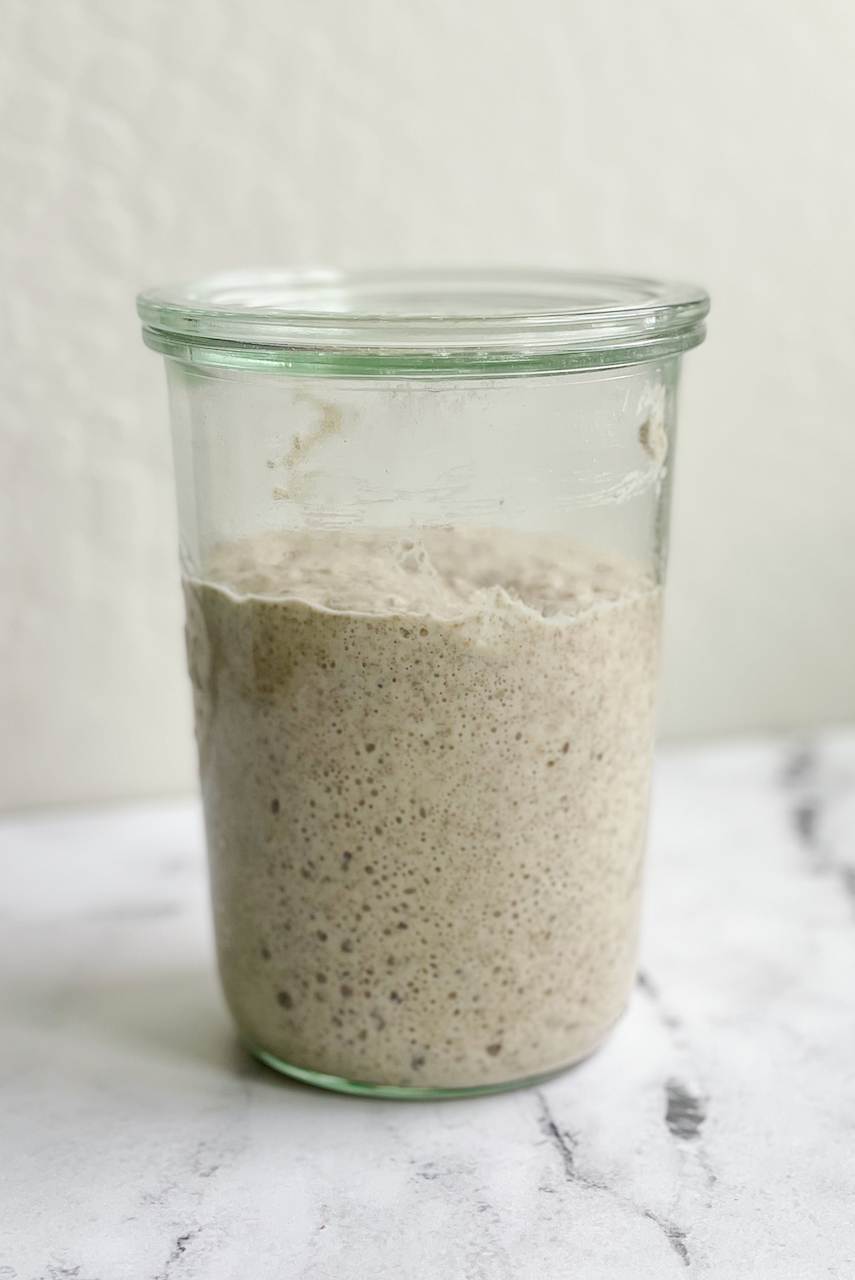
- WECK CANNING JARS. I love this jar because it slightly tapers out towards the top, making it easier to stir and mix your ingredients really well. It comes with a rubber gasket and clamps, but you won’t be using these for your starter. Only use the glass lid – it keeps the starter from drying out, but still allows air to circulate. Using a see-through, glass jar is key to monitoring the progress of your starter. I prefer the 3/4 liter size jar. Having at least two jars is ideal, however, you may find it useful to have more than that. I use my jars for lots of other things too. On Amazon, you can buy a set of two HERE or for twice that price you can get a set of six jars HERE.
- FOOD SCALE. This is one of those tools that is a must have for creating a sourdough starter. Measuring by weight will give you a reliable and healthy starter. You can find an affordable food scale HERE.
- INSTANT READ THERMOMETER. Temperature is an important key to a healthy starter. Being able to monitor the temperature will help you to make adjustments as needed. Find an excellent thermometer HERE.
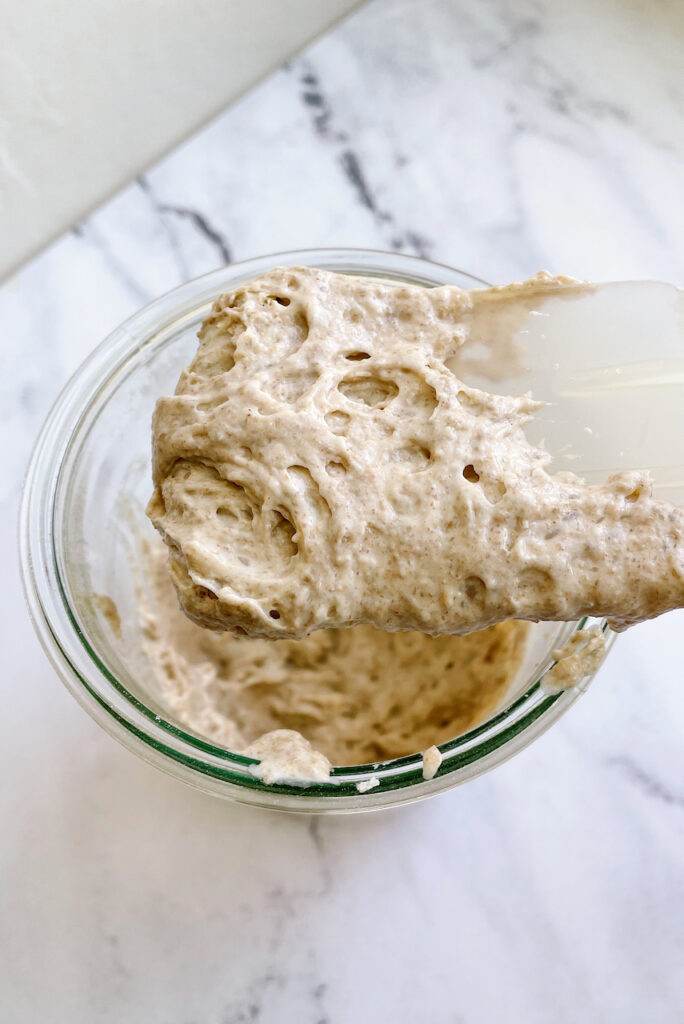
- JAR SPATULA. A sturdy spatula with a long handle makes stirring your ingredients much easier. I like a spatula that’s sturdy enough to scrape the sides of the jar, giving me a nice clean view to monitor its progress after I’ve fed it. Find a great spatula HERE.
The Process of Feeding your Starter
- Place a clean jar on your scale and zero it out.
- Add a portion of your starter mixture to the clean jar and zero out the scale again.
- Add fresh flour and zero out the scale.
- Add fresh water and stir to combine all the ingredients. Make sure there are no dry bits remaining.
- Cover and let sit in a warm place until the next feeding.
- Either throw away or use the discard for a recipe.
- Clean out jar and use for next feeding.
What to look for
When you have a well-established starter, here are a few things to look for in deciding when your starter has hit its peak and is ready to use for baking or refreshing.
- Smell. You will notice how the smell of the starter will evolve with time during the process of a feeding. In the first few hours of a new feeding, you will notice that the starter has a mostly sweet smell. As it gets to its peak, just before it’s time to feed it again, you will notice it has a mostly sour smell with an underlying sweet aroma.
- Look. Within the first 2-3 hours, you may see your starter double in size. Seeing those air pockets developing is always so encouraging. The top will have a dome shape. The starter will continue to grow vertically over the next few hours. After about 9-10 hours, you’ll notice the dome has begun to level out and vertical growth has slowed. Keep letting it sit and ferment – it’s almost there. At about 12 hours, the vertical growth has peaked, the top is flat but has even more bubbles on top and the sides. It’s ready to bake with or refresh.
- Temperature. Your starter should maintain a temperature around 77-80°F. Periodically take the temperature with your instant-read thermometer. Find a warm spot in your kitchen to keep it. If your counters are cold, put a towel underneath your jar to keep it off of the cold surface. This Dough Mat from BakeHouse Essentials has been a life saver for me! You can get 10% off by using the discount code: thatbreadlady10.

Water
This simple ingredient may seem like a no brainer, but there are some things you’ll need to keep in mind for creating your starter. In order to get a good healthy natural yeast growing, it’s important to use the right kind of water. It’s best to stay away from using tap water – cities often use a chemical called chloramine to treat their water. This chemical inhibits growth of good bacteria in your starter. For the best results, use bottled, spring or purified filtered water. Water should typically be room temperature when refreshing your starter.
Flour
You can maintain a successful starter with just about any kind of flour. When creating a new starter, using a whole rye flour and unbleached all-purpose flour will help establish a healthy, dependable starter quickly. After you’ve created a successful starter, you’re in “maintenance” mode and you can switch up the types of flour you use for your starter feedings. Some flours you might want to use are all-purpose unbleached flour, whole wheat flour or whole rye flour. You can use all of one type or a combination of two or more types. The type of flour you use is not as important as the attention you pay to your starter, feeding it consistently as needed. My personal preference for maintaining my starter is to use 50% whole wheat flour and 50% organic unbleached all-purpose flour, but you might like a different flour type and that is a-okay! Do what works best for you, in your own kitchen! However, if you are switching up your flour type, do it gradually, over a few feedings to avoid shocking your starter.
How long before I can bake with my new Starter?
A reliable starter that consistently rises on a dependable schedule will take at least 7 days to accomplish. Even then, a new starter is still building its strong bonds and complex flavor. If well attended, it will only get better with time! That being said, as long as you are getting consistent results with your starter after 7 days, go ahead and use it in your baking! Don’t be surprised though, if it takes 2-3 weeks before you get to this point. I promise, your hard work will pay off!
Starter Maintenance
Once your starter is rising, more than doubled in size within your 12-hour feeding schedule, you have an established starter and are ready to bake! You are also now in maintenance mode. There are many different ways you can maintain a starter, and everyone has a personal preference. Since you are just starting out, we’re not going to dive deep into this subject here. For now, these are the two most common ways you can maintain your starter.
- If baking less than 3-4x/week: Maintain your starter in the refrigerator. You can slow the fermentation process, by storing your established starter in the refrigerator. Feed the starter at least once a week, even if you aren’t baking with it. Once you are ready to use your starter, give it two feedings, 12 hours apart to refresh it before adding to your recipe. When making bread, you always want to use a starter that is at its peak.
- If baking 3-4x or more/week: Maintain your starter on your countertop, at room temperature, feeding every 12 hours. This schedule will ensure you always have a ready-to-use, active and healthy starter for your baking.
Maintenance Measurements
You’ll notice that in my guide to create a new starter, I leave you with a 1:4:4 ratio for maintaining your starter – that is 1 part starter to 4 parts flour and 4 parts water. This is a pretty safe ratio for most times of the year and most climates. Typically you’ll need to feed every 12 hours using these ratios. For example, for a small, 45g starter, you would feed with 5g starter, 20g flour and 20g water.
However, if you are noticing your starter is peaking much sooner than 12 hours, or taking more than 12 hours to peak, you can adjust your ratios. For example, if your starter is peaking at 8 hours, you’ll want to increase the feeding ratio to 1:5:5 – essentially giving it more “food” so that it’s not getting hungry too soon. Likewise, if it’s taking 20 hours to peak, you can try decreasing the ratio to 1:3:3 – giving it less food will cause it to peak sooner.
Typically you’ll need to adjust your feeding ratio as the seasons change. Warm temperatures cause yeast to rise faster, and cold temperatures slow down the rate of fermentation. Also, the climate, flour type, humidity, and water, all play a role in how your starter will behave. Get to know your starter and adapt as needed.
How to maintain a smaller sourdough starter
Not only can you change the feeding ratio, but you can also change the amount of starter you are maintaining. If you want to cut back on waste, you can maintain a much smaller starter than suggested in the guide. I’ve successfully maintained a 45g starter during times I’m not baking as much. Likewise, you can also build your starter to get ready for a big bake too. To adjust the measurements of your starter, keep to the ratios you typically feed with and scale up or down.
My number 1 tip
Stick to the schedule! I can’t stress that advice enough!
If you have seen an initial activity in your starter and it seems to completely stop at Day 3 or 4, that is completely normal. It is just the process of the good bacterias forming. Continue with the schedule. While it is possible to get a consistent starter going in 7 days, it could take longer. If you are still not seeing a starter on Day 7 that is active, bubbly and peaking around 12 hours, stick to the schedule and continue feeding as instructed for Day 7.
I’m here to help!
I know this can seem overwhelming and like a major commitment. But it only takes a few minutes. Stick to the schedule and you’ll end up with an amazingly healthy starter that will yield the most delicious bread. Become great friends with your starter, treat it right and it will return the favor!
Do you want to make an amazing loaf of Sourdough Bread?
My Basic Sourdough Class is perfect for the beginner sourdough baker! Let me make this overwhelming process simple and easy for you! Find more information about my Sourdough Class HERE.
Sourdough recipes to try
- Easy Sourdough Bread Recipe
- Sourdough Sugar Cookies
- Sourdough Discard Blueberry Muffins
- Cinnamon Roll Focaccia (sourdough version)
How to create a Sourdough Starter
Ingredients
- whole rye flour
- unbleached all-purpose flour
- water filtered
Instructions
- Day One: To a clean jar, add 100g whole rye flour and 125g warm water (about 95°F). Stir until fully combined and there are no dry bits. Loosely cover and let sit for 24 hours.
- Day Two: To a clean jar, add 75g of the mixture from Day One, 50g whole rye flour, 50g unbleached all-purpose flour and 115g water (room temperature). Stir until fully combined. Loosely cover and let sit for 24 hours. (Discard the remaining mixture from Day One)
- Day Three: To a clean jar, add 75g of the mixture from Day Two, 50g whole rye flour, 50g unbleached all-purpose flour and 115g water (room temperature). Stir until fully combined. Loosely cover and let sit for 24 hours. (Discard the remaining mixture from Day Two)
- Day Four: You will feed the starter twice. This is easiest if you do one in the morning and one in the evening. To a clean jar, add 75g of the mixture from Day Three, 50g whole rye flour, 50g unbleached all-purpose flour and 115g water (room temperature). Stir until fully combined. Loosely cover and let sit for 12 hours. (Discard the remaining mixture) After 12 hours, repeat the same steps for a second feeding and let mixture sit for 12 hours.
- Days Five & Six: Repeat steps of Day Four, feeding every 12 hours.
- Day Seven and Beyond: In the morning of Day Seven, in a clean jar, combine 10g of the mixture, 10g whole rye flour, 30g unbleached all-purpose flour and 40g water. (Discard the rest of the mixture from the previous feeding). Repeat this feeding twice a day, about 12 hours apart indefinitely. You can maintain your starter with just about any type of flour you like from this point.
Notes
- Recipe updated 1/29/24. I originally had listed a 1:2:2 ratio for maintenance, but have since found that a higher ratio like 1:4:4 ratio is generally safer and will not peak too soon within the 12 hour feeding time. Adjust your ratios as needed for your own kitchen conditions. See post for more tips.
- After you have a well-established starter, that rises dependably every 12 hours, you can switch flour types. Different flours will behave differently and change the flavor of your bread. Keep in mind that whole grains tend to encourage a very active starter.
- If you want to maintain a smaller starter, decrease each ingredient by the same ratios.
- See recipe post for how to maintain your starter in the refrigerator: https://thatbreadlady.com/how-to-create-a-sourdough-starter/
- If you’d like more one-on-one help, my Basic Sourdough Class is so helpful for beginners!
How do I begin a second starter using my established start? I’m thinking I would take it from the refrigerator, feed twice and then from the discard create another start?
Just came across your site, and was reading your Sourdough Guide. I’ve noticed an error in your Hydration definition section, In your calculation example you wrote “a recipe that uses 100 grams of water and 75 grams of flour has a 75% hydration level.” 100 g water divided by 75 g flour (100/75) = 1.333 = 130% hydration. It looks like you may reversed the water/flour amounts … 75 g water / 100 g flour = .75 = 75%.
Wow! Thank you so much for letting me know. I’ve corrected it.
Brand new to this so I have lots of questions. Thanks for your easy to understand directions. I wanted to know if you don’t have rye flour can you use whole wheat flour in it’s place when beginning a brand new starter?
Yes, you definitely could use wheat flour instead. Whole grains tend to boost the activity of your starter. Rye produces lots more activity initially to help you get started faster, but whole wheat will work too. Have fun!
Hello,
I’m now on day 3, but have run into an issue. My day 2 starter exploded, more or less, in less than 12 hours. I left it alone. Today is morning of day 3, and I realized the explosion had completely taken the light covering off of the jar. The mixture seems to be separated and is extremely watery. I’m not sure if I should keep going as scheduled with what I have or if I need to start over. Thoughts?
Hi Aly,
Oh boy! It shouldn’t be extremely watery. Since you’re still in the first few days, I’d start over. Be sure you have a large enough container for it to triple in size. Let me know how it turns out!
So the mixture itself wasn’t watery. It was more that there had become a separation and there was water sitting kind of on top. I think if I had fed it again earlier that may not have happened (it was also quite warm). Just as an experiment I continued on with the schedule to see what would happen. So I’m now on day 5 and I’m continuously getting bubbles, but no rise. Should I officially toss this one and start fresh? Thanks for getting back to me!
Is it ok to use all-purpose only? Will the ratio of flour to water still be the same? Thanks!
Sorry I didn’t see this sooner. When beginning a starter, it’s best to start out with part of the flour a a whole grain. It will give your starter an initial boost it needs to develop quicker. Once your starter is well-established, you can switch over to all-purpose flour if you like.
Hey there! End of day one my starter had tripled! I fed it and within 4 hours it had tripled and growing out of my jar so I fed it again early so it didn’t make a big mess. Then it stopped? Now I’m barely getting activity. Wondering if you have any thoughts why?
Hi Jennifer, What day are you on? There can initially be activity and then none for a couple of days. Stay on the schedule and keep the faith! Sometimes it can take up to two or three weeks for your starter to be consistent and predictable (healthy).
I am only on day three! So it’s still early on, I just thought I got lucky right out the gate haha. I’ve been trying different methods to get a starter going for months now so I was super excited to see it grow so fast in hours. But I’ll keep going. Thanks for your response!