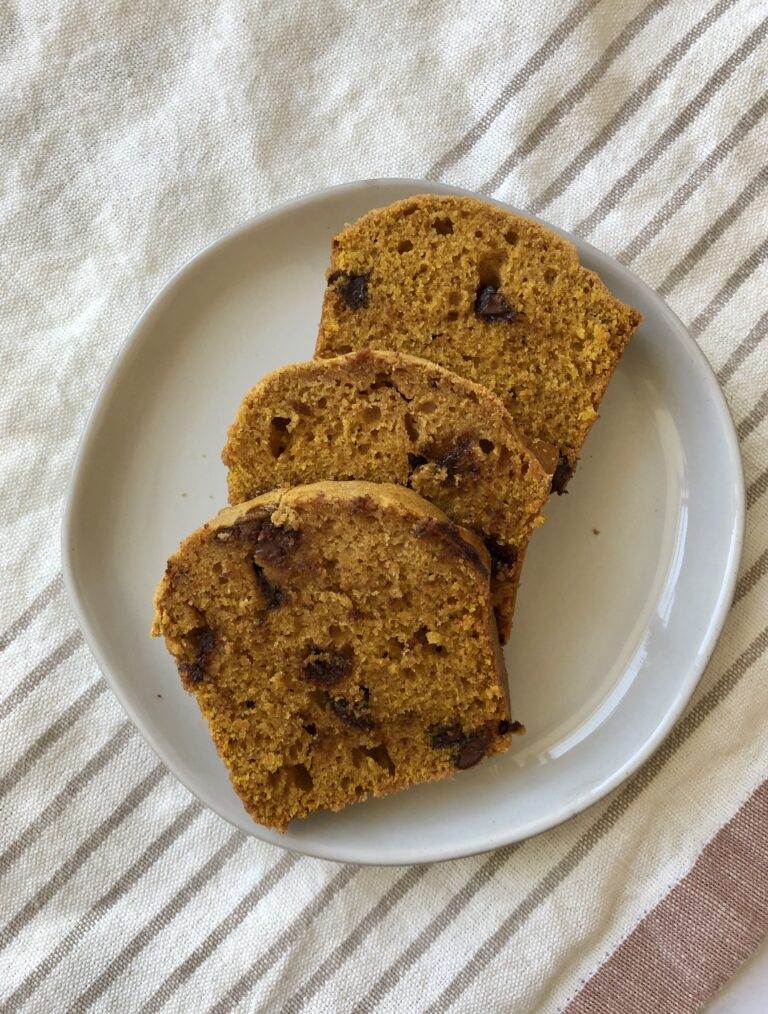
Peach Bread (Quick and Easy)
This peach bread, full of fresh peaches, is the perfect summer treat. It’s packed full of a flavorful fresh peach filling, cooked in browned butter and cinnamon spices. Top off this super moist sweet bread with a delicious vanilla icing! This super moist quick bread tastes just like peach cobbler, but in a sliceable loaf cake!

“This peach bread is incredible! It was so moist and yummy with my fresh summer peaches! My family loves it! I’ve made it 3 times and making again this weekend! Thank you for this yummy recipe!” -reader, Hannah
Quick Look: Peach Bread Recipe
Save and Summarize this recipe content on:
SAVE AND SUMMARIZE:
Why you’ll love this easy peach bread recipe
- Quick and Easy – If you love good sweet quick bread recipes, you’ll love this recipe! Sweet breads are easy to mix up quickly. There’s little effort with a big reward!
- Ripe peaches – The perfect recipe for summer peaches. Yummy peach recipes like my Perfect Peach Crisp are so good with ripe, seasonal peaches.
- The peach filling – With the addition of browned butter, cinnamon, and nutmeg, this makes the best peach bread you’ve ever had! It reminds me of my Sourdough Peach Cobbler recipe!
- Mini loaves – I prefer to make this recipe in mini loaves – they bake a little faster, each slice is a little less decadent, and they’re the perfect size for gifting. I share the links for my favorite pans down further in this post!
- Freezes well – My sweet breads, like my Sourdough Banana Bread or Lemon Pound Cake freeze really well. You can make a bunch of peach bread while peaches are in season, and then freeze them to enjoy later.
Table of contents
A note about peaches: Ripe peaches make the best summer dessert recipes like Peach Crumble Pie and Peaches and Cream Cinnamon Rolls. If your peaches are too firm, place them in a paper bag and roll it closed. Leave the peaches in the bag for 1-3 days, until the peaches feel slightly softer.
Ingredients for Peach Bread

- Peaches: Use fresh, ripe peaches when they’re in season. Especially with my Vanilla Almond Granola sprinkled on top! So good! If you have more summer peaches than you can use up, make the filling and freeze it to use later.
- Warm, cozy flavors: Mixing the peaches with browned butter, cinnamon, and nutmeg, make a warm and cozy flavor that makes this recipe above any other!
- Sour Cream: This addition to the bread batter yields a bread that is fluffy, tender and has a slight tang. It balances out the sweetness of the peach filling and vanilla icing perfectly. I love how it tender it makes this Cranberry Sweet Bread too!
- Almond flavoring: If you haven’t tried the combination of almond flavoring with fresh fruit, like peaches, it is a game changer. It really brings out fruity flavors and gives a unique taste!
Substitutions
- Peaches – I’ve only used fresh peaches for this recipe, but you could use frozen or canned peaches too. If using canned peaches, make sure you drain off the juices. If using frozen peaches, allow them to thaw first and then drain off any excess juice.
- Sour Cream – Just like with my Banana Bread with Crumb Topping recipe, you can substitute the sour cream with plain Greek yogurt. It will still give you that tender crumb and slight tang.
How to make Peach Bread
Prepare the peaches

Step 1: Peel, pit, and cut up the peaches. Smaller chunks of peaches work best.

Step 2: Combine the peaches with the brown butter, sugar, cinnamon, nutmeg, cornstarch, and lemon juice. Simmer until it thickens. Then set aside to cool.
Prepare the bread batter

Step 3: Begin preparing the bread batter by creaming together the butter and sugar with an electric mixer. Add the eggs one at a time and whip until light and fluffy. Add the vanilla and almond flavorings.

Step 4: Add the sour cream and flour mixture alternately. Mix on low speed to combine, but avoid overmixing. It should be light and fluffy.
A note about the peach filling: I like to put the peach filling in the refrigerator to cool it down more quickly. This also helps to firm it up a little bit better. You can make it ahead of time and keep it in the refrigerator. This is the same delicious peach filling I use for my Peach Cinnamon Rolls.
Assembling the bread

Step 6: Prepare your bread pans. I prefer to use mini loaf pans, but you can also use a 9-inch loaf pan. If using a 9-inch pan, line it with parchment paper with about an inch hanging over the sides. This makes it easier to lift the loaf out of the pan.

Step 7: Time to layer. Start by spreading a portion of the bread batter over the bottom of the pan.

Step 7: Add a layer of the peach filling. Leave a small border close to the pan.

Step 8: Add another layer of bread batter. Repeat again. You’ll end up creating 3 layers of bread batter and 2 full layers of peaches.
Baking

Step 9: Add a few more peaches on top of the bread. Arrange the pan(s) on top of a baking sheet. Baking the peach bread like this will prevent any possible messes in the oven.

Step 10: Bake the peach bread on the lower third rack of your oven, until a cake tester or toothpick inserted in the center comes out clean. Cool in the pan for 20 minutes before transferring to a wire cooling rack.

Step 11: After the bread has cooled completely, drizzle the vanilla icing over the top. I use the parchment from baking and place it underneath the cooling rack for easier cleanup.
Storing options
- Store in an airtight bag. I like to use either a zip top bag, or a cellophane bag – especially great for gifting mini loaves. I use these for other mini loaves like my Sourdough Banana Bread. I’ve stored my peach bread at room temperature for up to 3-4 days with no issues.
- Store in the refrigerator if you want to be sure there are no issues with the peaches going bad.

Frequently Asked Questions
I get the best results from using fresh peaches. Canned peaches usually have additional sugar. You can use frozen peaches. Let them thaw first and drain any extra juices.
Yes. Just divide the batter into a lined muffin tin, layered with peach filling, and bake at the same temperature for 18–22 minutes.
Yes. After the peach bread cools completely on a wire cooling rack, wrap it in plastic wrap and then place in a freezer ziplock bag. You can freeze it for up to 2 months. Wait until thawed to add the icing.
More Quick Bread recipes to try


Peach Bread (Quick and Easy)Recipe

Peach Bread (Quick and Easy)
Equipment
- 4 mini loaf pans option 1
- 1 8-inch loaf pan option 2
Ingredients
Peach Filling
- 28 g unsalted butter (2 tablespoons)
- 350 g fresh peaches, peeled, pitted, and cubed (about 3 large peaches)
- 50 g granulated sugar (¼ cup)
- ¼ teaspoon ground cinnamon
- ⅛ teaspoon ground nutmeg
- 1 teaspoon lemon juice
- 1 tablespoon cornstarch (8g)
Bread Batter
- 240 g all-purpose flour (2 cups)
- 1 teaspoon baking powder
- 1 teaspoon baking soda
- ½ teaspoon fine sea salt
- 113 g unsalted butter, softened (½ cup/1 stick)
- 200 g granulated sugar (1 cup)
- 2 large eggs (100 g)
- 1 teaspoon pure vanilla extract
- ¼ teaspoon pure almond extract
- 240 g sour cream (1 cup)
Vanilla Glaze
- 227 g powdered sugar
- 1 teaspoon pure vanilla extract
- 1-2 tablespoons milk (14-28 g)
Instructions
- Make the filling: In a saucepan, on medium low heat, melt the butter and allow it to lightly simmer until it begins to turn a light amber color and has a nutty aroma. 28 g unsalted butter
- Add the peaches, sugar, cinnamon, nutmeg, lemon juice and cornstarch. Stir constantly for 2-3 minutes until the filling thickens. Do not completely cook the peaches, just until they're tender. Once the filling is thickened, remove the pan from the heat and set it aside to cool completely.350 g fresh peaches, peeled, pitted, and cubed50 g granulated sugar¼ teaspoon ground cinnamon⅛ teaspoon ground nutmeg1 teaspoon lemon juice1 tablespoon cornstarch
- Preheat oven to 350°F/176°C.
- Make the bread batter: To a medium bowl, add the flour, baking powder, baking soda, and salt. Whisk together to combine. Set aside.240 g all-purpose flour1 teaspoon baking powder1 teaspoon baking soda½ teaspoon fine sea salt
- To the bowl of an electric mixer, add the butter and granulated sugar. Using the paddle attachment, beat them together on medium speed until smooth and combined, about 1-2 minutes. Add the eggs, one at a time, and continue to mix until light and fluffy, about 1 minute.113 g unsalted butter, softened200 g granulated sugar2 large eggs
- Add the vanilla and almond flavorings and mix to combine.1 teaspoon pure vanilla extract¼ teaspoon pure almond extract
- While on low speed, gradually add the flour while alternating with the sour cream, beginning and ending with flour. Avoid overmixing. The batter should be light and fluffy.240 g sour cream
- Spray pans with nonstick spray. You can make either 4 mini loaves or one 8-inch loaf (see notes for pan dimensions, or see recipe post for links to pans). If making a 8-inch loaf, I suggest lining it with parchment.
- Assemble: Now it's time to assemble the bread. You'll be creating three layers of batter, 2 layers of peaches, and top the loaf with a few more peaches. Start by spooning a layer of bread batter to cover the bottom of the pan. Next spread a layer of peach filling. Add another layer of bread batter, followed by one more layer of peach filling. Add one more layer of bread batter to cover the peach layer. Spoon a few peaches on top center of the batter layer. When all assembled, the pan should be 2/3 full. Place filled loaf pan(s) on a baking sheet to catch any spills as the bread bakes.
- Bake: Bake on the lower third rack of the oven for 40-45 minutes for small loaves or 45-55 minutes for a larger loaf. Check at 30 minutes – if the loaves are browning too quickly, lightly cover with foil. Check for doneness by inserting a cake tester or knife into the center of the loaf – it should come out clean. The tops will be golden brown.
- Place the peach bread on a cooling rack, allowing it to cool in the pan(s) completely before removing, about 45 minutes. Remove the bread from the pans and place on the cooling rack to prepare for icing.
- Make the glaze: In a small bowl, whisk together the powdered sugar, vanilla and milk. Add just enough milk to create a thick glaze that has a steady stream when you spoon it. Place a piece of parchment under the cooling rack to catch any icing. Drizzle the glaze over the tops of the peach bread and let is set for about 15 minutes before slicing.227 g powdered sugar1 teaspoon pure vanilla extract1-2 tablespoons milk
Notes
- When making quick bread like peach bread, I prefer to make them in mini loaf pans (5.75 x 3.25 x 2.25 inches/14.5 x 8.5 x 5 cm). I prefer this option because they cook through to the center better, they’re easier to slice, and it feels less indulgent to enjoy a smaller slice. A larger loaf can be made in a 4 x 8 inch pan.
- Store leftover bread by wrapping in plastic wrap and keeping in an airtight container for up to 4 days. Extend the freshness by storing in the refrigerator for up to 6 days.
- To freeze, wrap in plastic wrap, and store in a freezer zip top bag. Freeze for up to 2 months. Thaw, covered, at room temperature for 3-4 hours.
- This recipe is similar to my Cranberry Quick Bread.
The recipe attached is hot for the peach bread it is a lemon blueberry one:(. Can you attach the peach bread recipe??
I’m so sorry about that recipe card mix up. The peach bread recipe is now updated and ready for you to make! Hope you enjoy!