All Butter Pie Crust
Pies made with an all butter pie crust are full of flavor and have a light and flaky crust. The flavor from the butter enhances the fillings (I love to use it for my Apple Crumble Pie). The water from the butter is released during baking and creates a super flaky crust. Find my helpful tips below for how to roll out the perfect all butter pie crust.
(This post contains affiliate links)
When baked, the moisture from the butter escapes as steam, yielding a crust that is light and flaky.
An all butter pie crust is one of the most delicious vessels for a homemade pie. Delicate layers of carefully incorporated butter chunks make it light and flaky, but firm enough to support any filling. It’s definitely my most favorite pie crust to make, but my Homemade Flakey Pie Crust comes in a close second! I love to use it for my all-time most loved pie, Apple Crumble Pie. It’s also so amazing made with my Peach Crumble Pie! You’ll find some of my most helpful tips in this post, giving you the tips that helped me to bring my pie making to the next level.
How to make pie-making easier…
Has making pies from scratch just completely alluded you?! You’re not alone. This simple pastry can be one of the most frustrating, and difficult recipes to master. But don’t give up yet, because help is on the way!
If you could use some extra help, check out my PIE MAKING 101 virtual baking class! My pie class includes a pre-recorded video, showing you how to make two types of pie crusts (all butter & half butter/half shortening). It’s a very comprehensive class that focuses mainly on the pie crust, the foundation of every good pie! Since it’s pre-recorded, you can take the class on your own schedule!
If you’re ready to take your pie making to the next level, Pie Making 101 is for you!
The most important things to know about making pie crust from scratch
Homemade pie crusts are notoriously known for being high maintenance. If you’ve ever put a perfectly beautiful pie crust into the oven, only to have it come out shriveled up, melted, deformed or burned, YOU ARE NOT ALONE! It’s something that can go wrong so quickly if you don’t keep a few key tips in mind. Here are some of my most important pieces of advice you should know, especially when making an all butter pie crust.
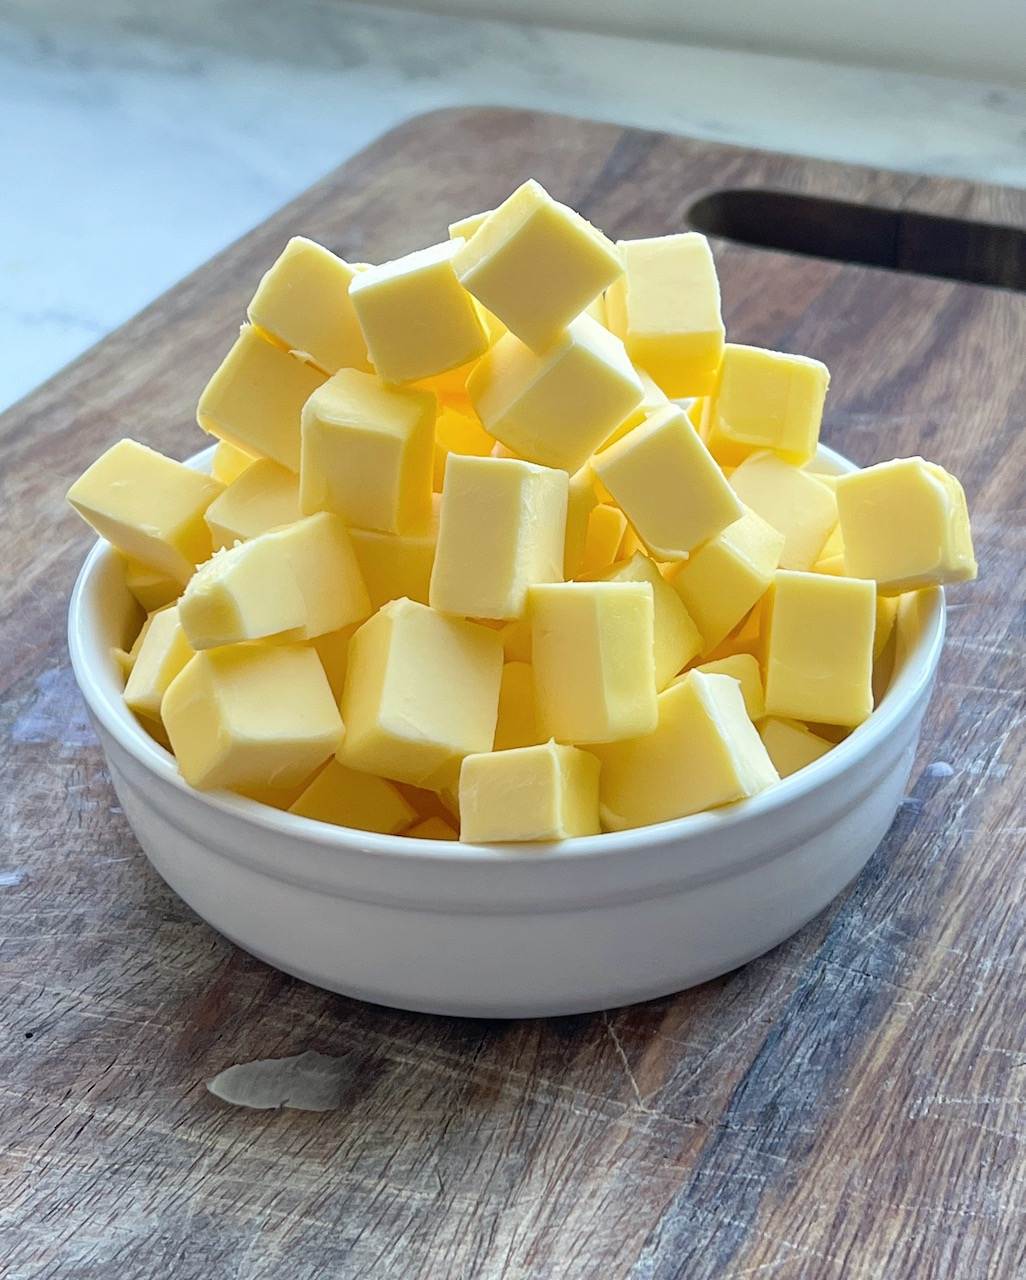
- Keep ingredients COLD – Cube your butter and place it in the freezer for 10 minutes before mixing your dough. Use ice water. If you have a warm kitchen, you can even chill your flour. Cold ingredients keep the butter from melting into the dough when mixing.
- Handle the dough as little as possible – This is important for two reasons: keeping the dough chilled & reducing the gluten development. The heat from your hands is gradually melting the butter. When preparing the dough, mix it mostly with a wooden spoon or spatula, and just until it holds its shape so that you can form it into a disc. Cover it with plastic wrap and chill it in the refrigerator for at least 2 hours. During this time, the gluten will relax and the flour will continue to hydrate. Avoid handling the dough too much when mixing and rolling, or you will over-develop the gluten, yielding a tough dough.
- Avoid adding too much liquid – Again, the dough will hydrate more as it chills in the refrigerator. Add just enough liquid to get it formed into a disc. If you add too much liquid, you’ll end up with a sticky dough. This might tempt you to add more flour, and if you get into that vicious cycle you’ll end up with a tough pie dough.
- Avoid overworking the dough. If you are rolling out your pie dough and it keeps shrinking back, that’s a sure sign the gluten needs to rest. Just walk away from the dough! Let it rest on the counter for 10 minutes and come back to it. You’ll find that it’s much easier to roll out!
- Bake your pie COLD – Whether you are blind baking a pie shell (baking it without the filling) or baking an entire pie all together, it is so important for the pie dough to be COLD when it goes into the oven! It all comes back to keeping those small pieces of butter in tact so that they can create that important steam! Chill your pie for at least 30 minutes before baking. This is the perfect time to preheat your oven, by the way!
Butter
It should come as no surprise that butter is the star of the show when it comes to an all butter pie crust. Butter is such an important ingredient in making sure your pie crust bakes up flaky and pastry-like and tastes, well…buttery!
When making an all butter pie crust, try to use a high fat butter. Butters with high fat content create exceptional results. Typically these types of butter are what we call in the U.S., “European Butter”. A high fat butter will have a fat content of 82% or higher. (While American butters typically have a content of 80% fat). Higher fat means it has less water, meaning the butter will melt more quickly – yielding a more buttery flavor!
When it melts in the oven, the water from the butter creates steam – which is what creates a flaky crust. Since this steam can create a “fluffier” crust than an all shortening crust (which is 100% fat), it’s typically a crust that won’t hold a super defined design. If you are wanting to create shapes and designs that remain perfectly intact after baking, I would suggest using my Homemade Flaky Pie Crust, which is part butter, part shortening. It’s a great all purpose pie crust! But whenever you want that rich and buttery, pastry-like flavor for your pie, an all butter pie crust is the way to go!
That being said, you can most definitively still bake up a wonderfully delicious all butter pie crust with American butter! Just be sure to always use unsalted butter to control the flavor of your dough.
It’s important to note: Since butter can melt so quickly, especially when matched with the warmth of your hands, it can easily melt into the dough. If the butter is not incorporated at a cold temperature, or if it warms too much when mixing the dough, the butter will melt into the dough and lose its effectiveness in creating those all-important steam pockets. It will also yield a pie crust that loses its shape completely when baked!
Ingredients
The ingredients for a homemade pie crust are simple but so important.
- Flour: Choosing the right kind of flour makes a big difference in your baking results. There are so many types of flours and they can even vary from brand to brand. All-purpose flour is best for pie dough. If you can, use a bleached all-purpose flour. Bleached flour inhibits gluten development, which will yield a more tender pie crust.
- Vinegar: The addition of this acid helps to prevent gluten formation, which makes the dough more tender and helps to prevent the crust from shrinking in the oven. Other acids have been used in pie crusts like lemon juice or even vodka. Juices can add flavor and vodka can make the dough a little tougher. A standard white vinegar is my preference.
- Ice Water: Using ice water will help keep the temperature of the dough down as you mix it together. Maintaining a chilled dough will yield a lighter, flakier crust.
- Butter: Whether using a high fat butter like European Butter, or a slightly lower fat American Butter, make sure your butter is COLD! Keeping the butter chunks in tact will ensure they create some steam when baked, yielding a light, flaky crust!


Helpful Pie Making Tools
These tools help so much in creating a beautiful and delicious pie from scratch! Click on each image to find an affiliate link to purchase on Amazon. See a description below as well and learn why these tools are so helpful.
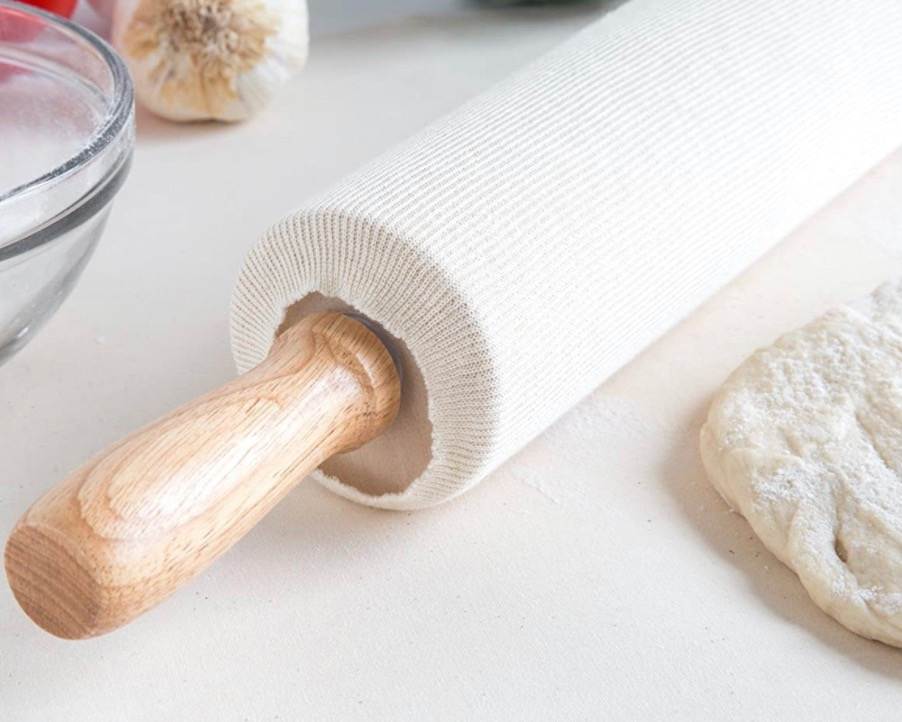
- Rolling Pin Sleeve – These are so helpful if you find that your pie crust sticks to your rolling pin, preventing you from rolling it out smoothly. You can easily slide this cotton sleeve onto any size rolling pin and wash to reuse next time. These sleeves will allow you to use less flour when rolling up your dough, thus yielding a more soft and tender crust.
- Pie Crust Shield – Yes, you could make your own by creating a make shift pie shield out of several pieces of aluminum foil. That can be a really tedious process though, and often not very effective. I like this adjustable silicone pie shield because it fits several different sized pans and always keeps my crust from browning too quickly.
- Pastry Rolling Mat – These silicone, non slip mats are a game changer! Roll your pie dough out on this and you’ll be amazed at how much easier it is! You’ll only need a minimal amount of flour to keep the dough from sticking and it will be so much easier to roll out! It’s a must!
- Pie weights – If you are blind baking your pie crust, some kind of a pie weight is an absolute necessity! You can use ceramic pie weights like the ones I have pictured above, or you can use something from your pantry like dry rice or dry pinto beans. If you do use rice or beans, you can reuse them as pie weights, but you cannot cook with them. *Whatever weight you use, be sure to fill your pie shell all the way to the level of the pan to keep your pie dough from sliding down while it bakes! You’ll usually use about 1.5 – 2lbs of ceramic pie weights for a 9-inch pie, depending on how deep your pie pan is.
How to mix the pie dough
This recipe covers how to mix your pie dough by hand (my preferred method). You can also mix it with a food processor (both techniques are covered in my Pie Making 101 Class). Either way, remember to avoid over-mixing, don’t handle the dough too much and keep the dough cold!
- Start by mixing the vinegar and water together and put it in the freezer to chill. Cube the butter, place in a small bowl and put in the freezer to chill as well. Chill the vinegar water and butter for about 10 minutes while you prepare the rest of your ingredients. Again, keeping your ingredients cold is key!
- Measure the flour, sugar and salt and incorporate together in a large bowl.
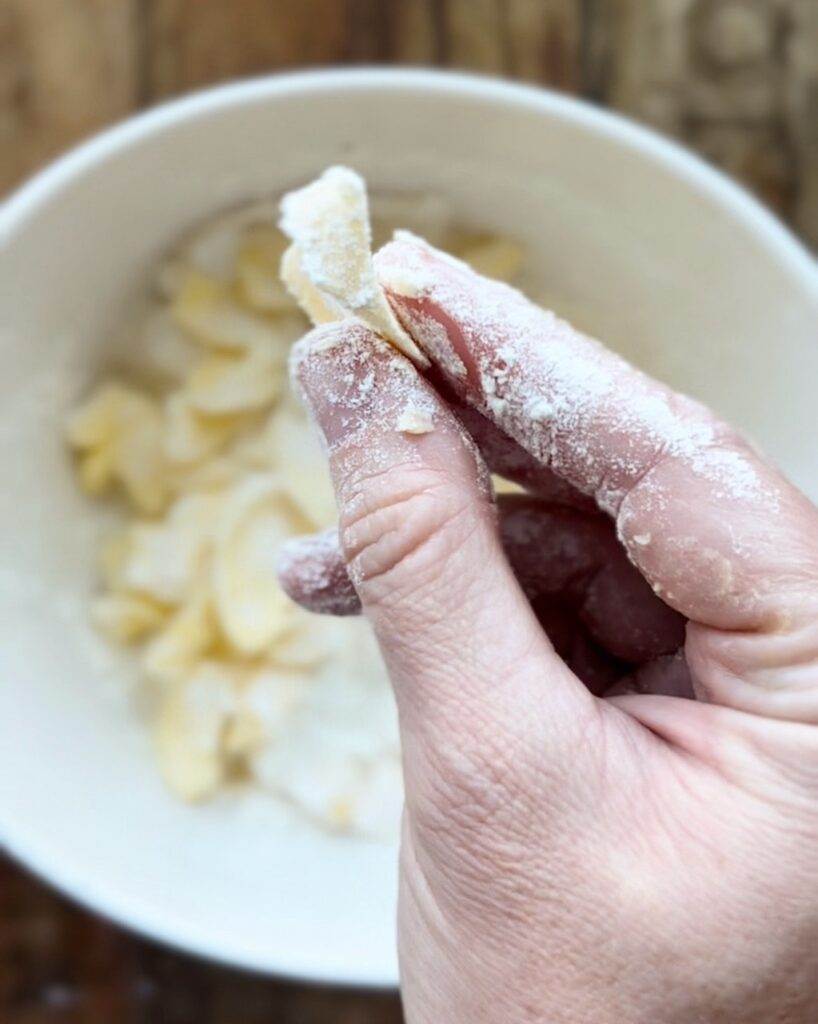
- Remove the chilled butter and toss it in the flour mixture. Flatten each cube between your fingers. Continue to massage and roll the butter between your fingers until it’s a coarse mixture with pea-sized to almond-sized pieces throughout.
- Add 3 Tablespoons of the vinegar water to the flour mixture and toss with your hands or a wooden spoon.
- Continue to add just enough water until dough is almost entirely hydrated. It should be in several larger size pieces, with a bit of loose flour in the bottom of the bowl. You may not need to use all of the water. When you pinch the dough, it should hold its shape.
- Turn the mixture out onto a work surface and pinch the dough together with your hands, gathering any loose bits of flour and pressing it into the dough. *If the dough isn’t coming together and is too dry, wet your hands with the ice water and work it into the dough to hydrate it a bit more. A well-mixed pie dough should show pieces of butter throughout, be soft without being too sticky, and should be pliable and cohesive. Work quickly and avoid over mixing!
- Divide dough into two equal pieces. Round and flatten each into a disc shape. Wrap each with plastic wrap and chill for at least two hours before rolling out.
- When rolling out, flour surface and roll out slightly, rolling from the center outwards. Turn dough a quarter turn and roll out a little bit more. Continue turning and rolling until dough is rolled out into a 12-inch circle, or at least 2 inches larger than the size of your pie pan. *Find a super helpful video of this on my Instagram HERE.
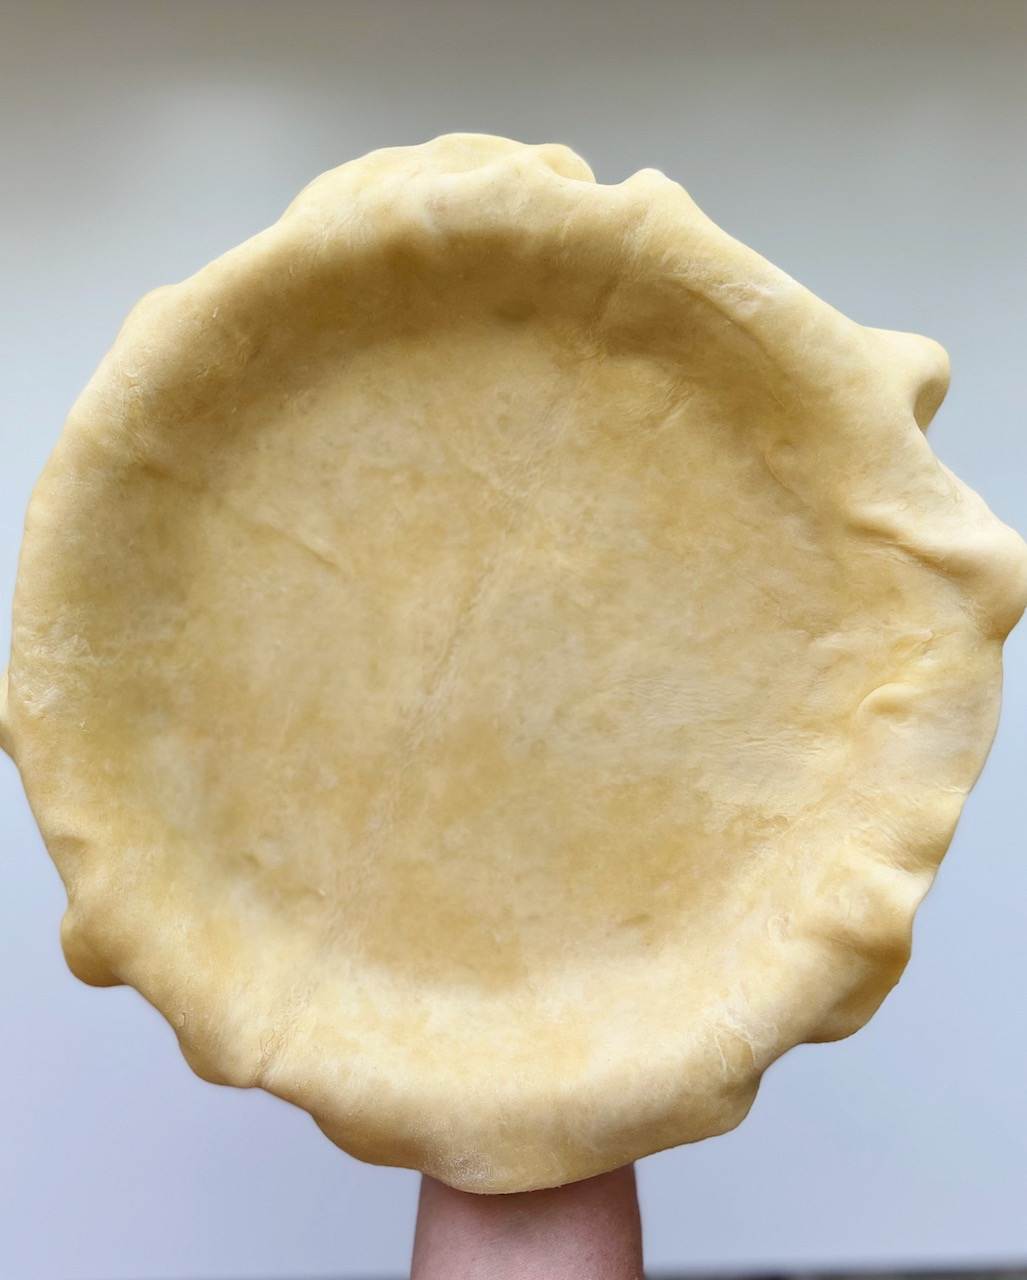
- Place in pie dish and trim off any extra dough around the edges with scissors, leaving about a 1/2-inch overhang for shaping the edges. For easy dough transfer to your pan, fold dough in half and then fold in half again. Place the folded dough with the pointy corner in the center of the pie pan and unfold. Center in pie pan. Gently fit the dough into the bottom and sides of the pie pan, making sure there is no empty space between the pie pan and the dough. Do not stretch your dough to fit the pan (if it’s not large enough, remove your dough and roll out a bit larger).

- Return the pie crust to the refrigerator to chill until you are ready to fill and bake it.
- Brush the crust with an egg wash.
- Bake as directed for your pie recipe. *See my recipe notes for blind bake instructions.
You will love how light and flaky this all butter pie crust bakes up! The buttery flavor it adds to your pies just can’t be rivaled!
Make it ahead of time
Store the pie dough in the refrigerator for 3 days or in the freezer for up to 3 months. If freezing, make sure it’s wrapped in plastic wrap and sealed inside a freezer zip top bag. When thawing it out, you can either defrost it in your refrigerator the night before, or leave it out on the counter for 1-3 hours – until it’s soft enough to roll out. Do not let it come to room temperature! You want to work with cold dough!

More recipes to try
Double Chocolate Zucchini Bread
Homemade Crescent Dinner Rolls Recipe
Like, Follow and Share
If you have a question or want to leave a comment about how you enjoyed this recipe, it helps my little blog so much! Be sure to follow me on Instagram @thatbreadlady and share your creations, tagging me. I love to see you enjoying my recipes with those you love!

All Butter Pie Crust
Ingredients
- 2 cups all purpose flour
- 1 Tablespoon sugar
- ½ teaspoon salt
- 1 cup unsalted butter 16 Tablespoons, cubed and chilled
- 1 ½ teaspoon vinegar
- ½ cup ice cold water
- egg wash for finishing
Instructions
- Start by mixing the vinegar and water together and put it in the freezer to chill. Cube the butter, place in a small bowl and put in the freezer to chill as well. Chill the vinegar water and butter for about 10 minutes while you prepare the rest of your ingredients.
- Measure the flour, sugar and salt and incorporate together in a large bowl.
- Remove the chilled butter and toss it in the flour mixture. Flatten each cube between your fingers and toss it in the flour mixture. Continue to massage and roll the butter between your fingers until it’s a coarse mixture with pea-sized to almond-sized pieces throughout.
- Add 3 Tablespoons of the vinegar water to the flour mixture and toss with hands.
- Continue to add just enough water until dough is almost entirely hydrated. It should be in several larger size pieces, with a bit of loose flour in the bottom of the bowl. You may not need to use all of the water. When you pinch the dough, it should hold its shape.
- Turn the mixture out onto a work surface and pinch the dough together with your hands, gathering any loose bits of flour and pressing it into the dough. If the dough isn't coming together and is too dry, wet your hands with the ice water and work it into the dough to hydrate it a bit more. A well-mixed pie dough should show pieces of butter throughout, be soft without being too sticky, and should be pliable and cohesive. Work quickly and avoid over mixing!
- Divide dough into two equal pieces. Round and flatten each into a disc shape. Wrap each with plastic wrap and chill for at least two hours before rolling out.
- When rolling out, flour surface and roll out slightly, rolling from the center outwards. Turn dough a quarter turn and roll out a little bit more. Continue turning and rolling until dough is rolled out into a 12-inch circle, or at least 2 inches larger than the size of your pie pan.
- Place in pie dish and trim off any extra dough around the edges with scissors, leaving about a 1/2-inch overhang for shaping the edges. For easy dough transfer to your pan, fold dough in half and then fold in half again. Place the folded dough with the pointy corner in the center of the pie pan and unfold. Center in pie pan. Gently fit the dough into the bottom and sides of the pie pan, making sure there is no empty space between the pie pan and the dough. Do not stretch your dough to fit the pan (if it’s not large enough, remove your dough and roll out a bit larger).
- Return the pie crust to the refrigerator to chill until you are ready to fill and bake it.
- Brush the crust with an egg wash.
- Bake as directed for your pie recipe. *See notes for blind bake instructions.
Notes
- If you are blind baking the pie crust, “dock” your pie by piercing the bottom and sides with a fork. This will release steam as the pie crust bakes, preventing air pockets from developing. Place a piece of parchment over the center of the pie crust and fill with your preferred type of pie weights (ceramic pie weights, dried beans or lentils, or rice). Fill the entire crust up to the pan level. Bake in a preheated 375°F oven for 20 minutes. Remove the crust from the oven. Lift the parchment and weights out of the pie and set aside. Brush the pie crust, including the edges with egg wash. Return to the oven for an additional 10-15 minutes, or until lightly golden. *If the edges of the crust are browning too quickly, place a pie shield around the crust for the remainder of the bake. Once removed, allow to cool completely before filling.
- Make sure your pie and/or crust is cold when putting it in the oven to bake. The butter in the crust needs to be cold to create light and flaky layers in the baked pie. A good rule of thumb is to keep your pie in the refrigerator right up until it’s time to put it in the oven.
- This recipe can be prepared with a food processor. Avoid over mixing.
- Store pie dough in the refrigerator for 3 days or in the freezer for up to 3 months.