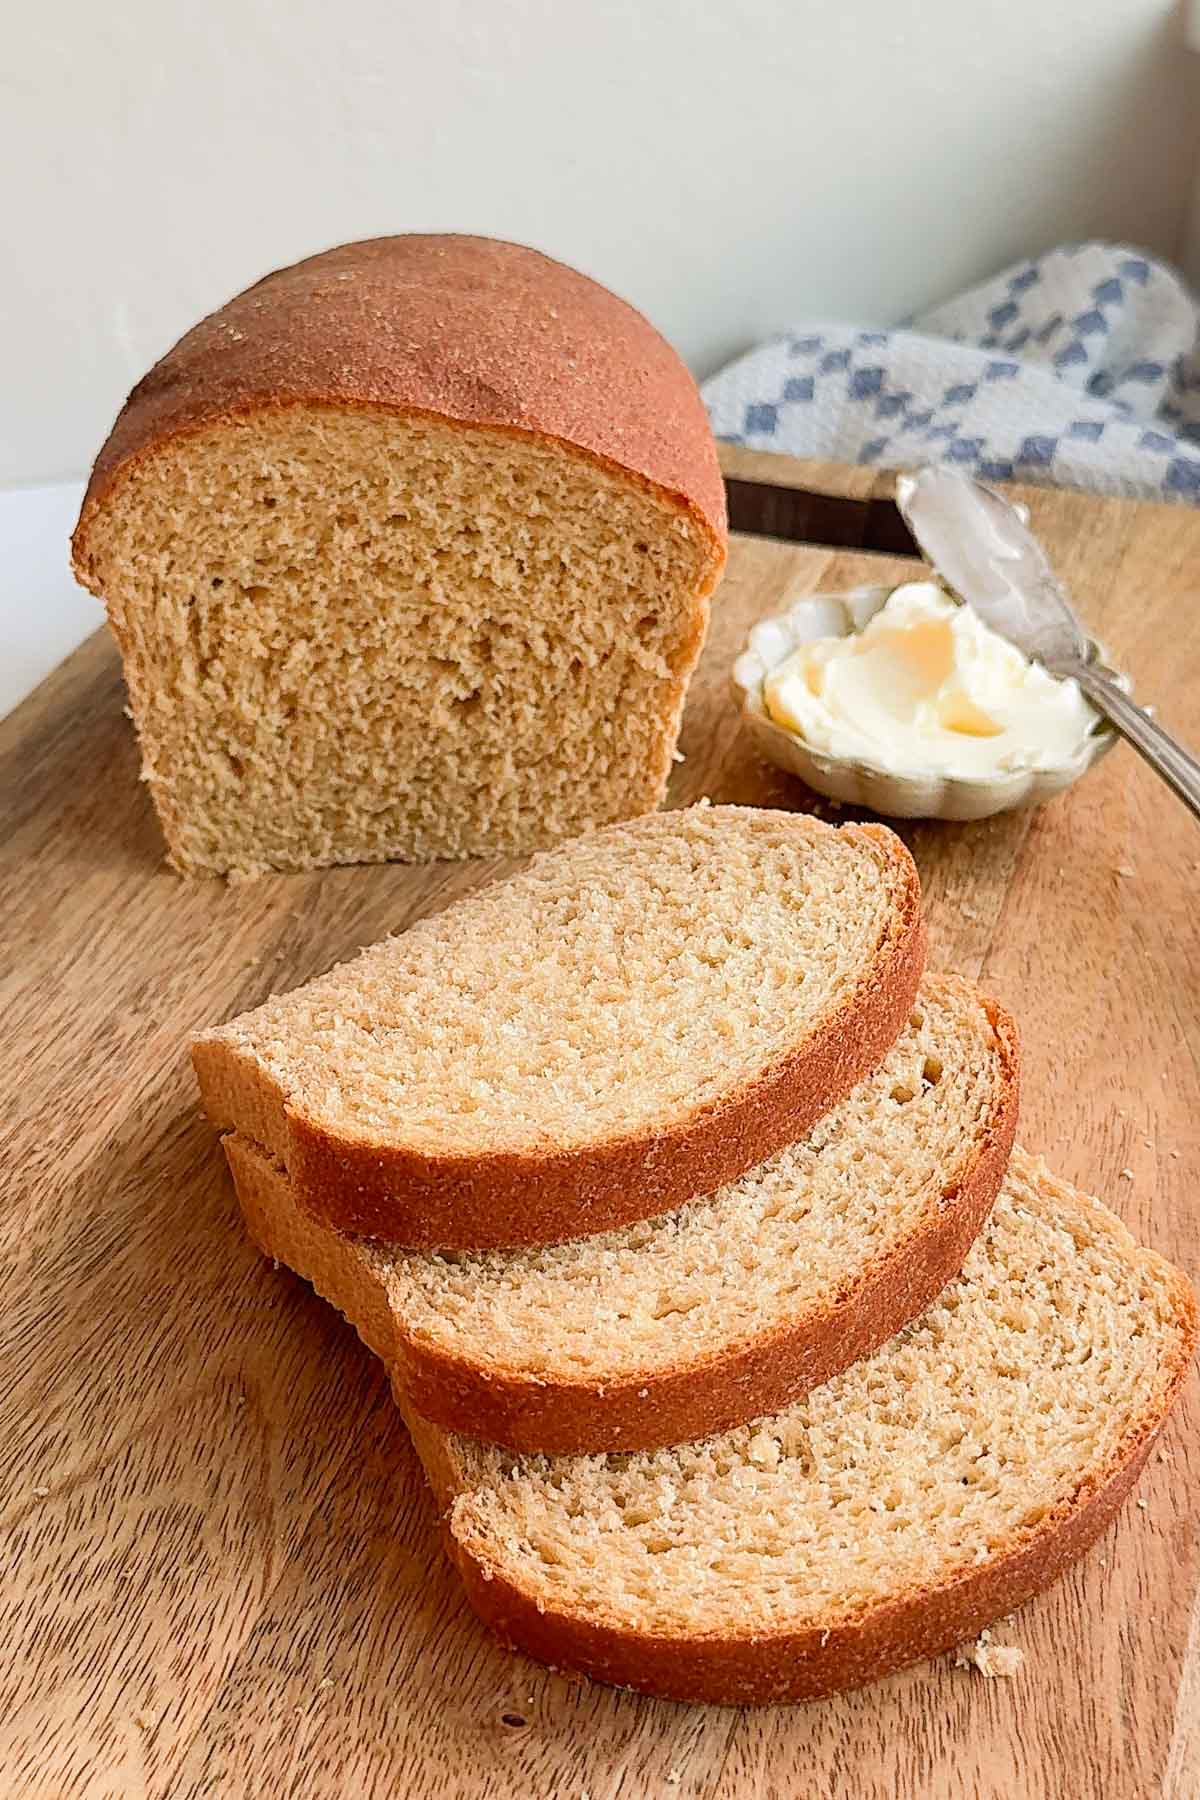
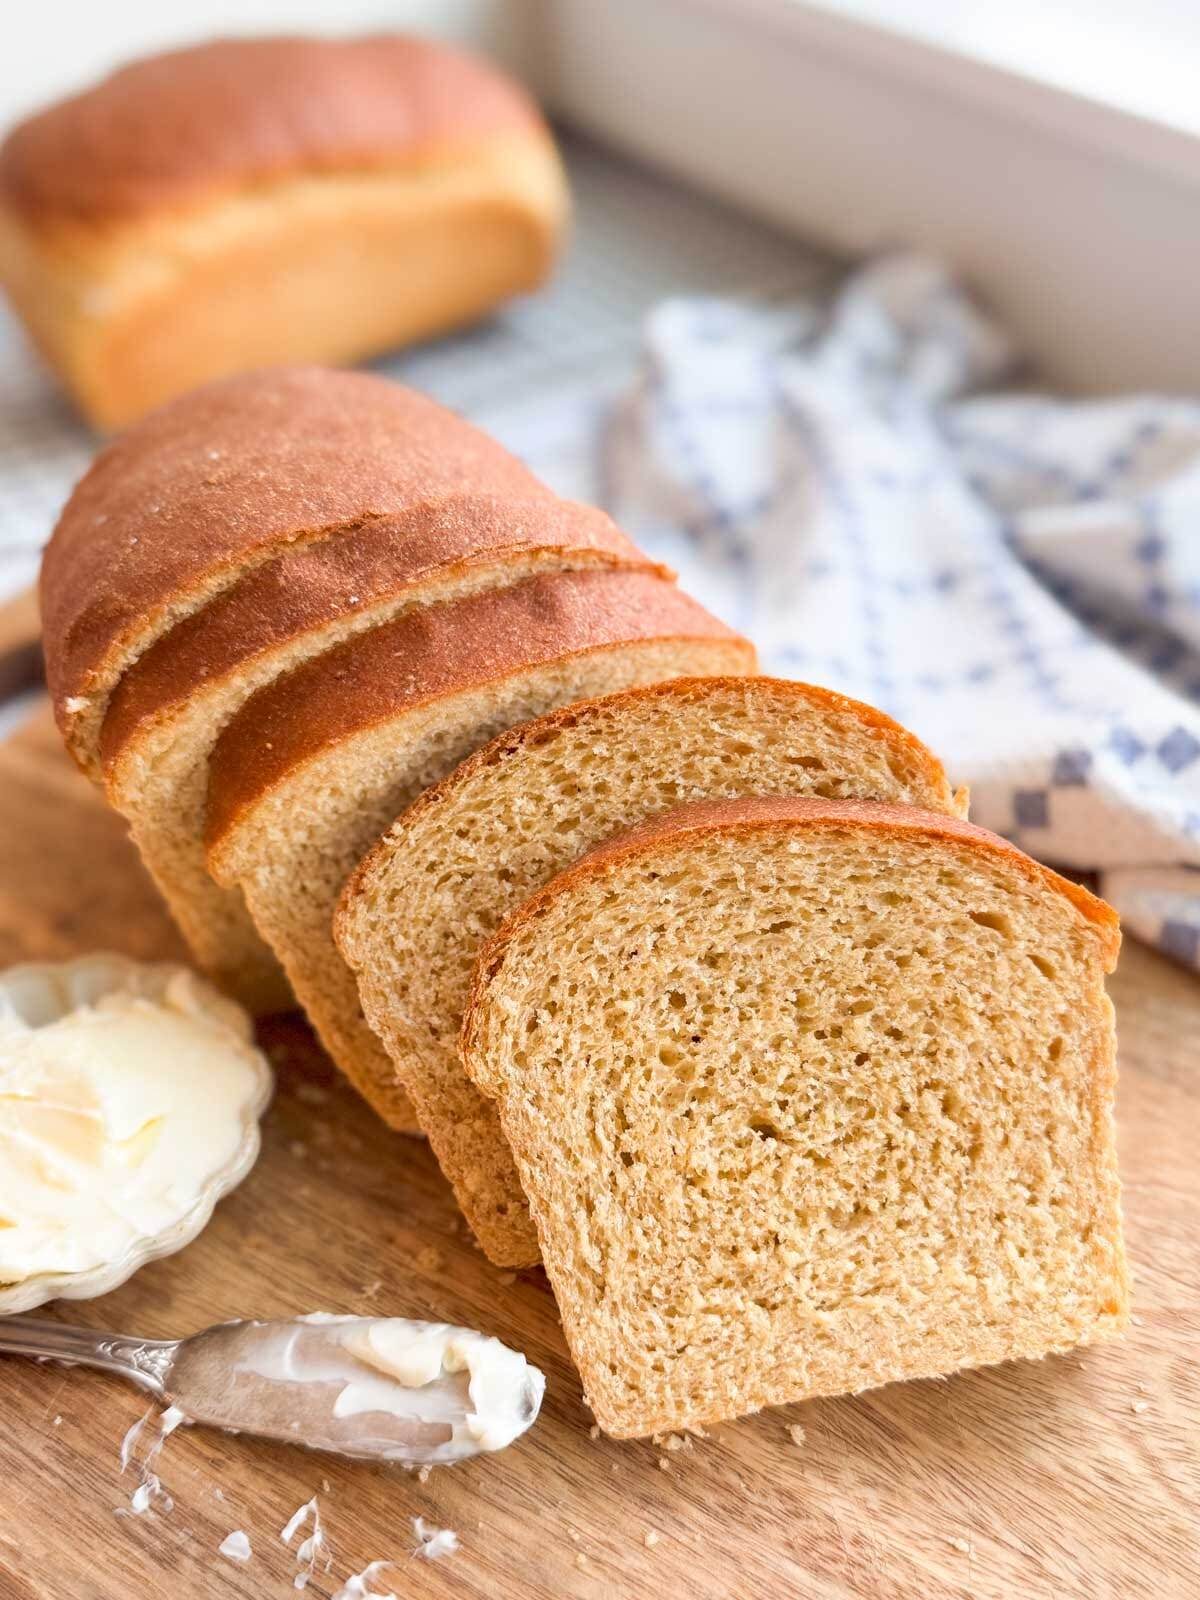
Honey Whole Wheat Sandwich Bread
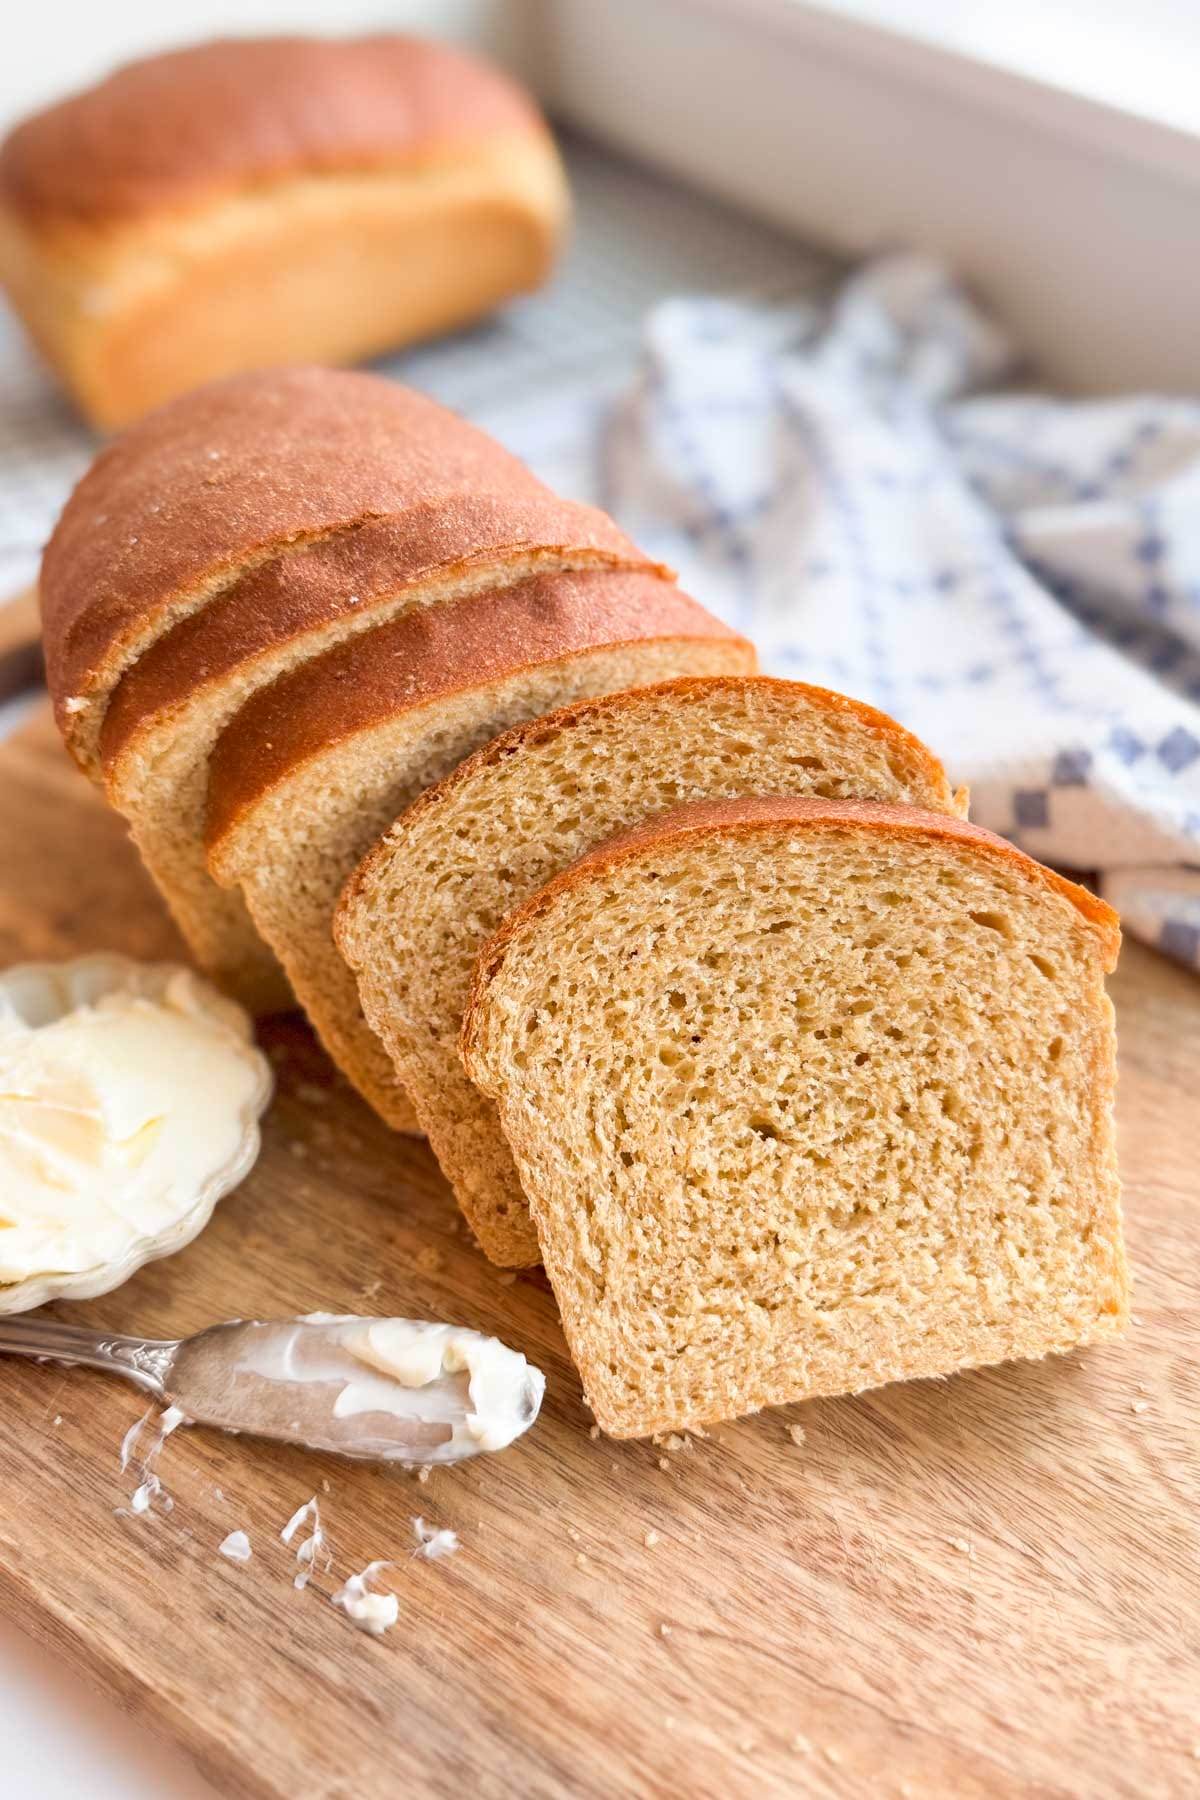
This honey whole wheat sandwich bread with instant yeast bakes up soft, fluffy, and so delicious! It’s easy to make and is the BEST honey whole wheat bread you’ll ever eat! Made with 100% whole wheat flour, not only is it delicious, but it’s a healthier bread option too! You’ll never want to buy store bought again! See my troubleshooting tips to help you make the perfect loaf!
(Recipe updated January 2025. The original recipe was named Whole Wheat Bread.)
This honey whole wheat bread recipe is about to become your new favorite! Its hearty flavor, but light and fluffy texture, will have you wondering how healthy bread can taste so good. While my family really loves my recipe for the Best Homemade White Sandwich Bread, or French Brioche Bread for French toast, this whole wheat bread is their favorite for toast and sandwiches!
Learning to make homemade bread
If baking with yeast intimidates you, you are not alone! Before I learned to bake bread, I was so confused by all the information. But believe me, once you smell that loaf baking in your oven, you’ll fall in love with bread making!
Starting with easy bread recipes will help you build your confidence as you begin. For easy, beginner recipes, you should definitely try my recipe for Beginner French Bread. Another really easy recipe you’ll love is my Quick and Easy Pizza Dough. And if you like make ahead recipes, my Easy Overnight Focaccia Recipe is a great one!
Why you’ll love this recipe
- Bakes up super soft and fluffy
- Amazing flavor
- All wheat flour makes this a healthier recipe
- Sweetened with honey
- Easy to make
- Making homemade allows you to control what goes into your bread
- Using homemade bread is the best for toast or sandwiches, but tastes extra amazing in Thanksgiving Dressing or Apple Pie French Toast Sticks!
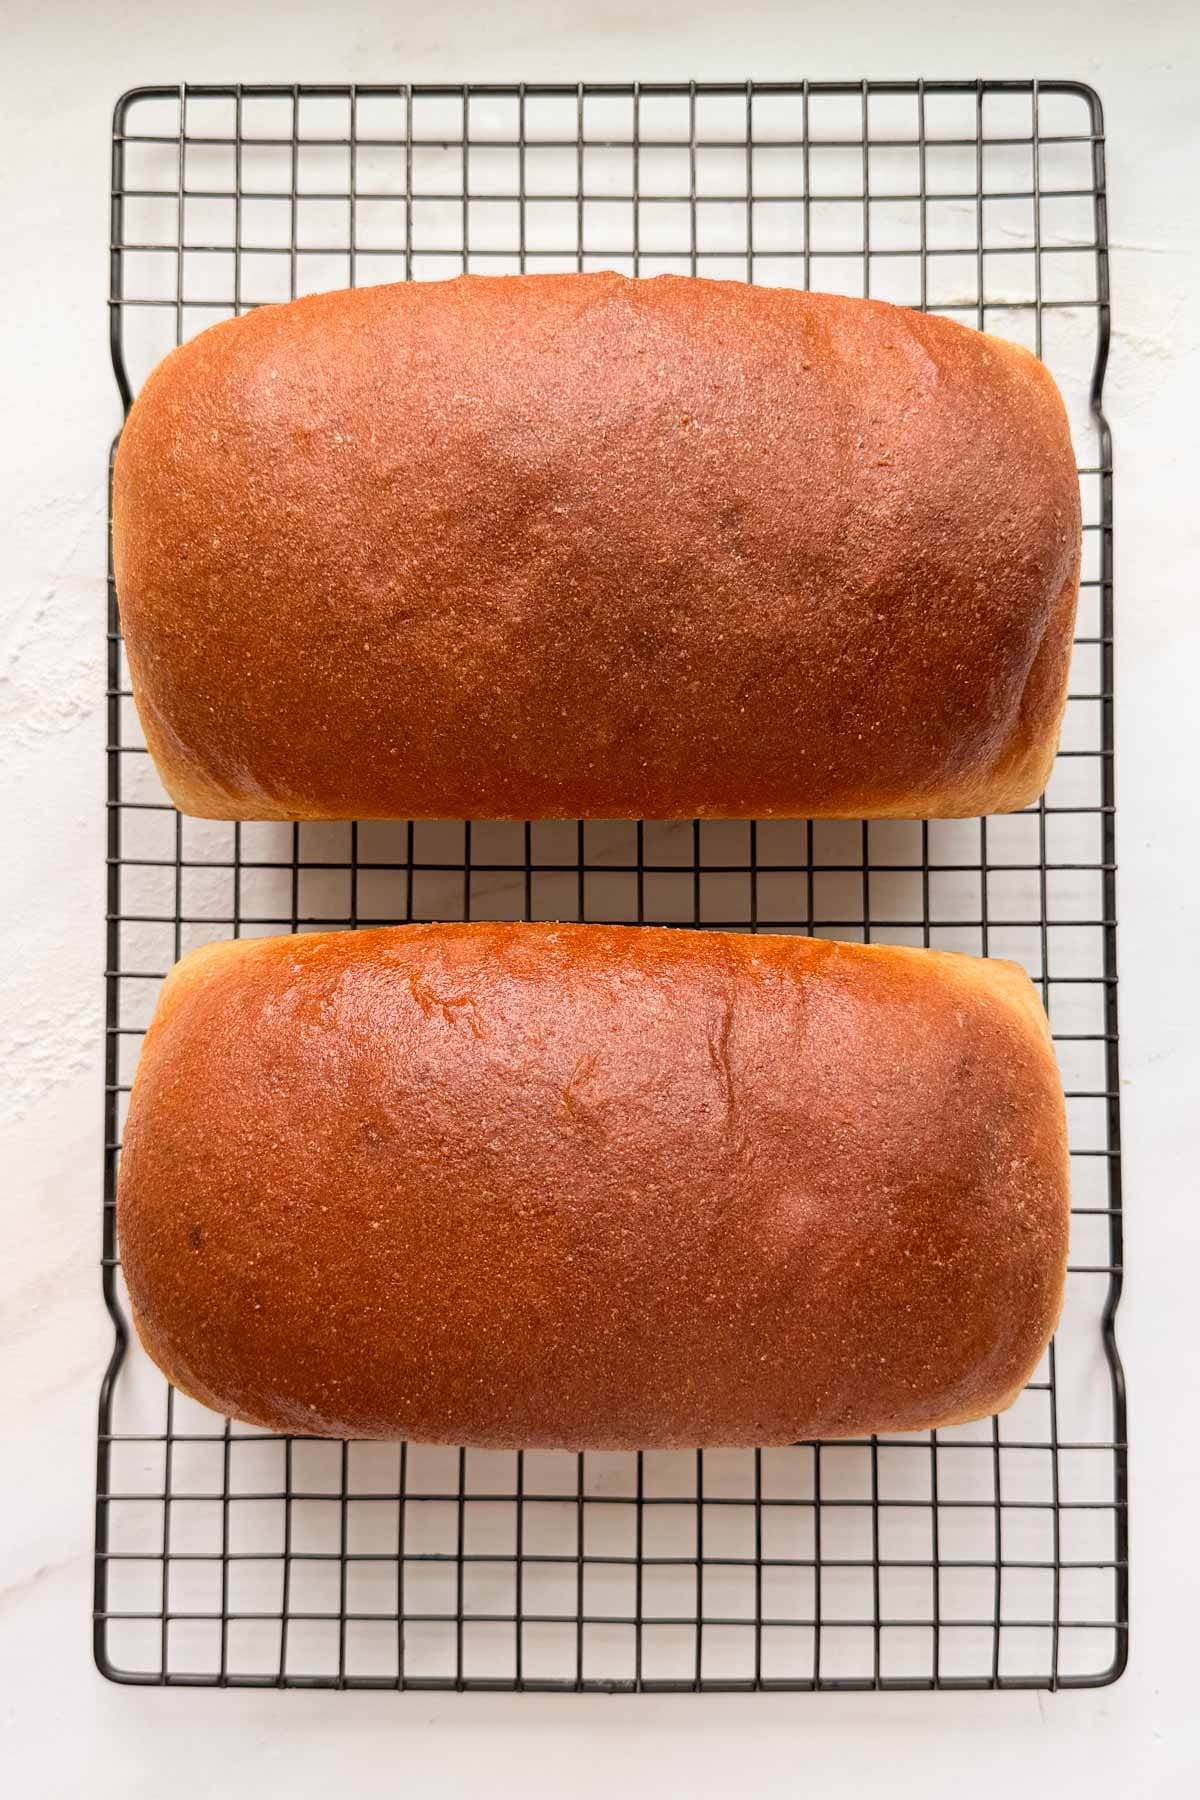
There’s really nothing like homemade honey whole wheat sandwich bread! This recipe makes two loaves, and can be easily doubled if your mixer can handle it. If you have a high capacity mixer like an Ankarsrum or Bosch, you can even triple this recipe, making 6 loaves at a time!
It’s also possible to mix this recipe by hand. It will just require some extra work, but it’s definitely doable!
Ingredients for Honey Whole Wheat Sandwich Bread

- Whole Wheat Flour: Using whole wheat flour means you’re including the entire wheat grain. This yields a bread with more nutrients than one made with white flour. You can use store bought whole wheat flour or mill your own wheat flour (my favorite). Check out my post about Baking with Whole Grains. You’ll find a video there to show you how to mill your own whole wheat flour. When milling my own flour, I prefer to use hard white wheat for a milder wheat flavor and lighter crumb texture.
- Water: Use warm water, around 110°F to activate the yeast.
- Instant Yeast: I prefer instant yeast over active dry yeast – you can just add it directly to the recipe without blooming it first. See my post about Active Dry Yeast vs. Instant Yeast to learn more about the difference.
- Honey: adds sweetness to this bread. Honey can be a healthier option than granulated sugar – it has more nutrients and a lower glycemic index. It is also a more flavorful option than sugar.
- Olive Oil: You can use another neutral oil like canola or vegetable oil, but olive oil will yield the best flavor. It’s also a healthier oil option.
- Powdered Milk: This is an important addition to the bread recipe! The protein and sugar in powdered milk helps improve the texture, flavor, and freshness of the bread. It also gives bread a more golden crust, just like in my Homemade Crescent Dinner Rolls Recipe.
- Vital Wheat Gluten: Using 100% whole wheat flour has many benefits, but it is not as good at developing gluten as white bread flour. This means whole wheat breads are often more dense than white. Adding vital wheat gluten gives the gluten in the bread dough a boost, yielding a bread with a softer texture and taller rise.
- Salt: Use fine sea salt to enhance the flavor of the bread.
- Soy Lecithin Granules: While I list this as an optional ingredient, I would highly suggest including it. Lecithin granules have many health benefits for the heart and brain, and aids in digestion. Lecithin also encourages a fluffier texture and higher rise. Lecithin can come in either a liquid form or a granular form, but are not interchangeable. Do not use liquid lecithin in this recipe. I get my lecithin granules on Amazon. You might be able to find them in a health food store too.
Start by making the sponge (the first rise)
We’re going to mix almost all of the ingredients together (except for the salt and some of the flour) and let it sit and sponge up. It’s an important step in this recipe. Using this sponge method will create a more flavorful loaf with a lighter texture – something that can be really beneficial when using all wheat flour.
Most bread recipes have two rises, one after mixing and the other after shaping. The sponge will count as the first rise in this recipe.
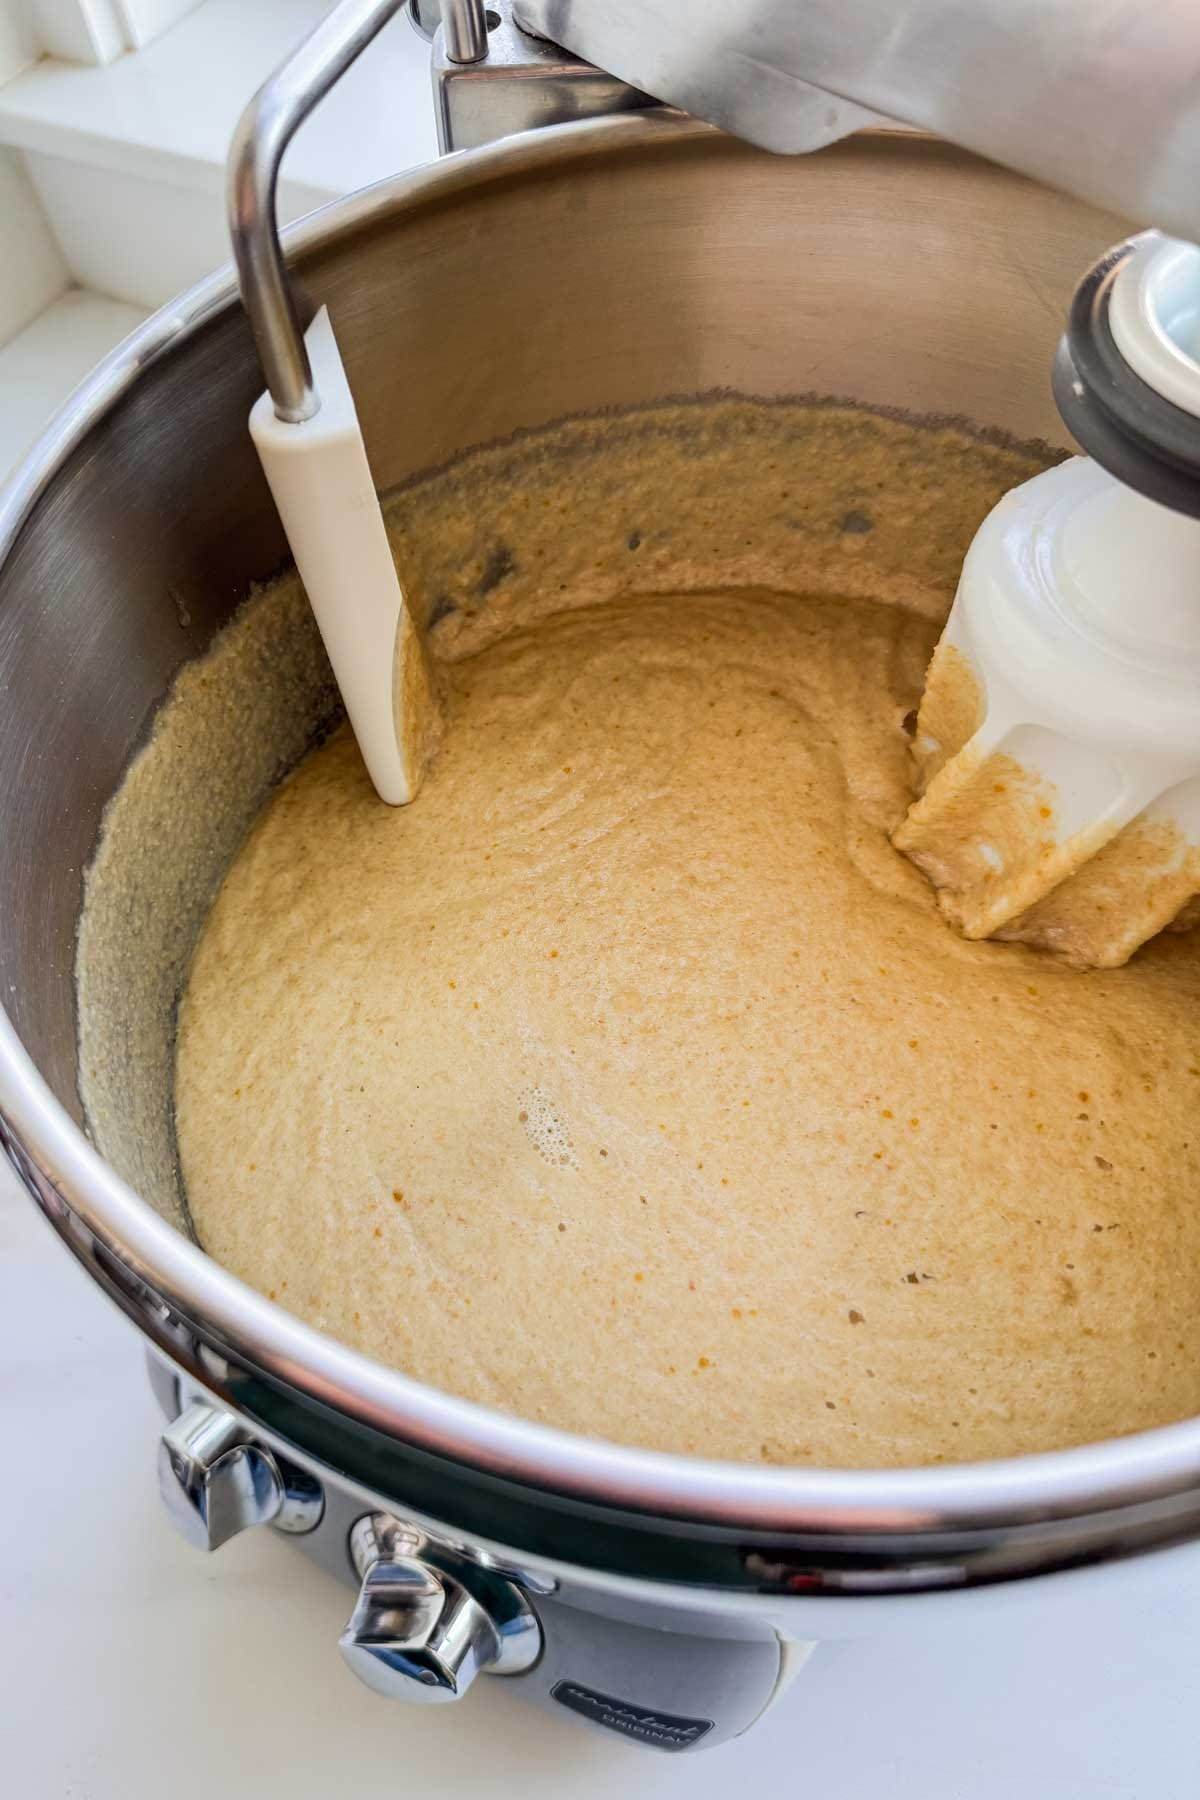
For the sponge, you’ll add the warm water, yeast, powdered milk, vital wheat gluten, lecithin granules, olive oil, honey and 3 cups of the wheat flour. Mix this together until it’s fully incorporated. It will be like a thick pancake mix. Let it rest for 30 minutes. During that time, you guessed it, it will sponge up and double in size.
Finish mixing the dough
After the mixture has rested for 30 minutes and sponged up, you’ll add the salt and start mixing on low. Gradually add in the remaining 2 cups of flour, letting each addition fully incorporate.

Once all the flour has been mixed in, stop your mixer and lightly tap on the dough with your finger. If it feels wet and sticky, add 1 more Tablespoon of wheat flour and mix it in. The dough should feel soft and will be slightly tacky. Knead the dough in your mixer on low speed for about 8 minutes. During this time, the dough will become smooth and cohesive. It should pull away from the sides of the bowl and concentrate around the dough hook.
Let the dough rest for about 15 minutes before shaping. Since it has been worked during kneading, the gluten needs time to relax – it will be much easier to shape the dough after a good rest.
Shaping the Loaves
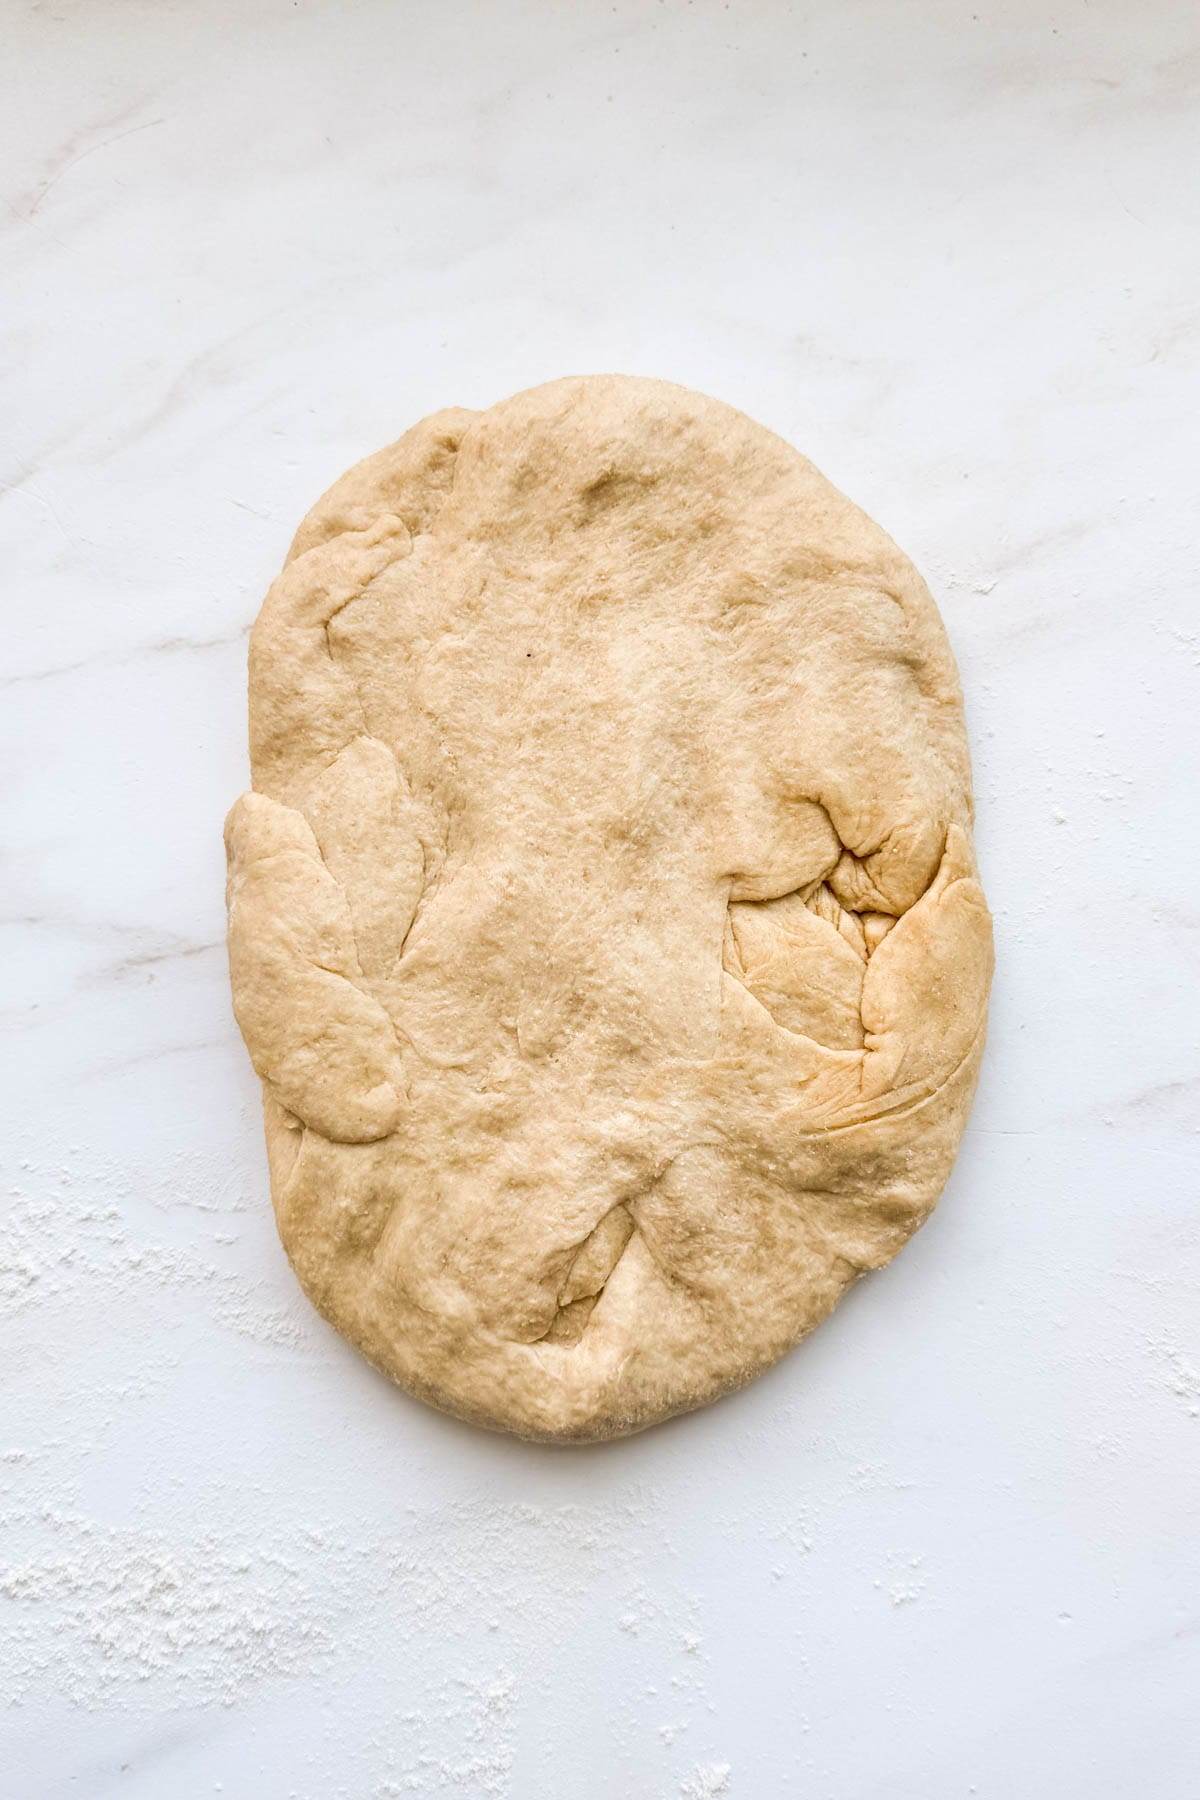


Turn the dough onto a lightly floured countertop. Divide it into two equal pieces, each should weigh around 600 grams.
Working with one piece of dough at a time, flatten it out into a rectangule. It should be about 8 inches wide. Then simply roll it up, pinching the seam together at the end.
The second and final rise


Place the loaves in the bread pans, with the seam side facing down. Cover them with a clean kitchen towel and let them rise until they are about 1 inch above pan level. Depending on the warmth of your dough and kitchen, this could take 45 minutes or more. Warmer temperatures will make the bread rise faster. Likewise, colder temperatures will cause the bread to rise at a slower rate.

Make sure you keep the loaves covered and away from any drafty areas as they are rising. If the tops dry out before baking, it could prevent them from rising fully in the oven. It could also cause them to split on the sides when baked.
How to know when the loaves are ready to bake
There is a way you can know when your loaves have risen enough and are ready to bake. We use a fun thing called the “poke test”.
The Poke Test:
- Gently poke the side of the risen roll with your fingertip.
- If the indentation holds its shape, it’s ready to bake.
- If it immediately springs back, it still needs a bit more time to proof.
- If the indentation stays and never springs back, you have let your dough rise too long.


Keep an eye on your bread during the final rise. You’ll want to make sure your oven is preheated by the time the bread is ready to bake.
What kind of bread pans to use
It’s important that you use the right size bread pan for the amount of dough you are using. If the pan is too large, the loaf will end up being flatter. If the pan is too small, the dough will be overcrowded and will spill over the sides of the pan, resulting in a loaf shaped more like a mushroom.
For this recipe, a standard size loaf pan works perfectly. The dimensions of a standard size loaf pan are 8.5 in x 4.5 in x 2.5 in. Another common size is a 9 in x 5 in x 2.5 in pan. This size could work too, but the loaf will be a bit flatter.
I prefer to use a heavy duty aluminized steel pan. They conduct heat very efficiently and evenly, yielding a perfectly golden loaf of bread. I like to use USA Pan or Nordic Ware bread pans.

How to know when it’s done baking
Each oven bakes differently, and for that reason, using an instant read thermometer for your bread will help you know exactly when it’s done baking.
Insert the thermometer into the center of the bread when you think it’s ready. You can insert the thermometer on the side of the loaf, so that you’re not ruining the top by poking a hole in it. The center of the bread should be at least 195°F.
Allow the bread to cool for 10 minutes before removing it from the pan. Then let it cool completely before slicing. As it’s cooling, it’s continuing to bake internally. Waiting for it to cool might be THE most difficult part of making homemade bread. If you slice into it too early, you may end up with a doughy, gummy center in your bread.
The best way to store homemade bread

- Don’t refrigerate your homemade bread! This will dry it out.
- Keep it in an airtight container, on the countertop. Using a ziplock bag or heavy duty bread bag with a twisty tie works best.
- Freeze any bread you’re not going to use within 5 days. You can slice it before freezing it, and then pull out a slice at a time as you need it.
- The best way to defrost a frozen loaf is to take it out of the freezer and let it thaw at room temperature overnight. You can also defrost it in the microwave by opening the bag and warming the bread at 50% power for about 90 seconds. This is not my favorite method, but works if you’re in a pinch.
Troubleshooting Tips for Homemade Bread
Your yeast might be too old. You can test it by sprinkling 1 teaspoon of yeast into a cup of warm water. Let it sit for 15 minutes. It should get bubbly. If it doesn’t do anything, you need to replace your yeast. Another reason your dough may not be rising is that your water is not the correct temperature. If it’s too cold, it won’t rise. If it’s too hot, it could kill the yeast. Use a temperature of around 110°F for this recipe.
Check the dough with your fingertip after you’ve mixed it, but before you knead it. It should feel soft and slightly tacky. A tacky dough means it slightly sticks to your finger, but it isn’t wet. The dough will become more cohesive after it has been kneaded. Resist the urge to keep adding flour. You can always add more if needed, later on. Too much flour will result in a dry, dense loaf.
Use the Poke Test. Go back in the post to read more about this. It’s always a great idea to go by how your dough feels.
This could be either a shaping issue or a proofing issue. Poor shaping will result in a misshapen loaf. Over proofing for the final rise will weaken the structure of the dough, causing it to collapse after it comes out of the oven.
This usually happens for one of two reasons. First, if the dough dried out during the final proof, it could keep it from properly rising in the oven – splitting on the side. Make sure you keep the loaves covered and away from any drafty areas during the final rise. Second, bread can split on the side if it is under proofed. An under proofed loaf will cause the loaf to rise too quickly in the oven, splitting the side.
If you over proof your loaves, they will be dry and crumbly. The bread may also have a slightly yeasty flavor. Another reason this can happen is you might have added too much flour to the dough.
In bread making, I cannot stress enough how important it is to weigh your ingredients. Using a kitchen scale will give you the most accurate and consistent results in your baking. If you don’t have a kitchen scale, I would suggest measuring your flour by spooning it into your measuring cup and leveling it off.
Homemade Bread is worth it!
- I grew up with my Mom making homemade bread for our family. There’s just something so warm and comforting about it! Making bread from scratch can be such an enjoyable experience. I learned through lots of practice and trial and error. But one thing is for certain, when you keep at it, the hard work pays off! As you practice more and more, you’ll get a feel for the process and it will become a ritual you love. Your family will be especially thankful for your hard work!
More Bread Recipes you’ll love
- The Best Homemade White Sandwich Bread
- Homemade Cinnamon Swirl Bread
- Easy Overnight Focaccia
- French Bread

Find more bread making help through my virtual baking classes
- Want helpful links for ingredients and a step by step video tutorial on how to make bread from start to finish? Get my WHOLE WHEAT CLASS to get my personal help in making the best bread ever – my pre recorded video will take you through the entire recipe from start to finish!!
- Get access to my entire class library for one low price! Join my BAKING ACADEMY!!
Honey Whole Wheat Sandwich Bread
Ingredients
- 2 cups warm water (110°F)
- 4 teaspoons instant yeast
- 2 Tablespoons powdered milk
- 2 Tablespoons vital wheat gluten
- 2 Tablespoons soy lecithin granules (optional)
- ¼ cup olive oil
- ⅓ cup honey
- 1 Tablespoon fine sea salt
- 5 cups wheat flour*
Instructions
- Make the Sponge: To the bowl of a stand mixer, add the water, yeast, powdered milk, vital wheat gluten, lecithin granules, olive oil, and honey. Whisk together to combine.
- Add half of the wheat flour. Mix on low speed with the dough hook attachment until combined. It should resemble a thick pancake batter. Let mixture rest for 30 minutes. It will sponge up and double in volume. This counts as the first rise.
- Add the salt and mix on low as you gradually add the remaining half of wheat flour. As you near the end of the remaining flour, look for the dough to pull away from the sides of the bowl and concentrate around the dough hook. Stop the mixer and lightly tap on the dough. It should feel soft and slightly tacky. If it feels wet, add 1 Tablespoon additional flour until dough reaches the right texture. You may or may not use all of the flour in the recipe.
- Knead the dough: Knead on low speed for 8 minutes, then cover and let the dough rest for 15 minutes. Spray two, 4.5×8.5-inch bread pans with non stick spray and set aside.
- Divide & Shape the Loaves: Turn dough onto a floured surface. Divide dough into two equal pieces (about 600g each), and shape into loaves. (See pictures in the recipe post for shaping technique).
- Final Rise: Place loaves in greased bread pans. Cover with a clean kitchen towel and let rise until it's about 1 inch above pan level. Depending on how warm your kitchen is, this will take about 45 to 60 minutes.
- Bake: Preheat oven to 350°F. Bake loaves for 30-35 minutes. Tops should be golden brown. Bread should be at least 195°F internally.
- Optional: After removing from oven, brush the tops of the loaves with vegetable shortening for a shiny crust.
- Allow the loaves to cool in the pans for 10 minutes before removing and cooling completely on a wire rack. Slice and enjoy! Store in heavy bread bags – they will stay fresh for 5-7 days. This bread freezes well!
Notes
- *If you are milling your own wheat flour, grind it at least 2 hours before using. It needs time to cool down and settle a bit. I prefer to use Hard White Wheat for a milder wheat flavor.
- *Bread made with all whole wheat flour is nutritious and tasty, but will be more dense than bread made with white flour. If you want a taller, fluffier loaf, you can replace 1 cup of the wheat flour with white bread flour.
- The dry lecithin granules are optional but provide extra nutrients and enhance the fluffy texture. If you can, they are a great addition!
- Avoid keeping your bread in the refrigerator. It will dry it out.
- Since it has fresher ingredients, homemade bread has a shorter shelf life – this is a good thing! I like to freeze loaves that I have pre-sliced and pull them out as needed.
- See recipe post for troubleshooting tips.
hi, I was wondering if the dough can be made ahead of time and then put in the fridge to slow the rise so I can cook it the next morning for fresh warm bread?
Hi Kim. You can refrigerate the dough overnight. If you do this, make sure you put it into a large enough container to triple in size. It most likely won’t get that big, but it may more than double. Make sure you cover it to keep it from drying out. Let me know how it turns out. I hope you enjoy!
Hi, wouldn’t 1 tablespoon of salt be too much?
Hi Emma, the salt is correct on the recipe. Thanks for giving it a try. Let me know how it works out.
Soy or sunflower lecithin?
You can use either. I get this soy lecithin from Amazon. https://amzn.to/3DiuRV4
I don’t see weight measurements only US measurements. Where do I find weight
On the recipe card, just below where it lists the ingredients, you can click on either US Customary or Metric. For the weights, you’ll choose metric.