These decorated Valentine’s Day sugar cookies are soft and puffy and taste amazing topped with a delicious buttercream frosting! Easy to make, these cut out cookies hold their shape in the oven. So fun to decorate for holidays, your family will love these cookies! Be sure to read through this post to find my helpful video, links for tools, and packaging ideas!

This soft sugar cookie recipe is one that my family has been enjoying for generations, and is the same Soft and Puffy Sugar Cookie recipe I made for my bakery customers for years! It is near and dear to my heart.
Sugar Cookies (you may know them as cut out cookies) are the best baking project to create some memories! I have so many sweet memories of my mom making Christmas sugar cookies, heart shaped cookies for Valentine’s Day, and green-themed St. Patrick’s Day Sugar Cookies. She would make what seemed like dozens of cookies to give to friends or neighbors and even sent some with us to school for our holiday parties. Of course, she always left a few unfrosted for us to make our own cookies at home – which was my favorite!
In this post, you’ll find a lot of helpful resources, including a step-by-step video, resources for tools and packaging ideas to give these cookies as gifts, and my top tips for making the best sugar cookies ever!
Why you’ll love this recipe
Family memories aren’t the only reason why this is, in my opinion, the best sugar cookie recipe. There’s lots of reasons why I think you’ll love making these!
- easy to make
- you can freeze the dough and bake later
- you can bake the cookies and freeze – frost them later
- the dough rolls out so easily
- the cookies are are puffy and soft
- this cookie holds its shape in the oven
- the buttercream frosting compliments the flavors of the cookie perfectly – if you don’t love the taste of royal icing cookies, you’ll LOVE these!
- the frosting is perfect for decorating for any holiday themed cookie
- they are de-licious!
My sugar cookie ingredients
Here’s why this recipe works so well:
- All purpose flour makes the best base for this soft sugar cookie dough recipe.
- Unsalted Butter creates a rich flavor.
- Vegetable shortening has a higher melting point, which helps these cookies to hold their shape when baked.
- Eggs are a binding agent in cookies.
- A small amount of Vanilla Extract and Almond Extract flavor this cookie perfectly without being too overwhelming.
- Baking Soda helps provide the leavening agent in the cookies, making them nice and puffy.
- Sour milk sounds strange, but it gives these cookies a soft and tender texture and rich flavor – buttermilk can be used as a substitute.
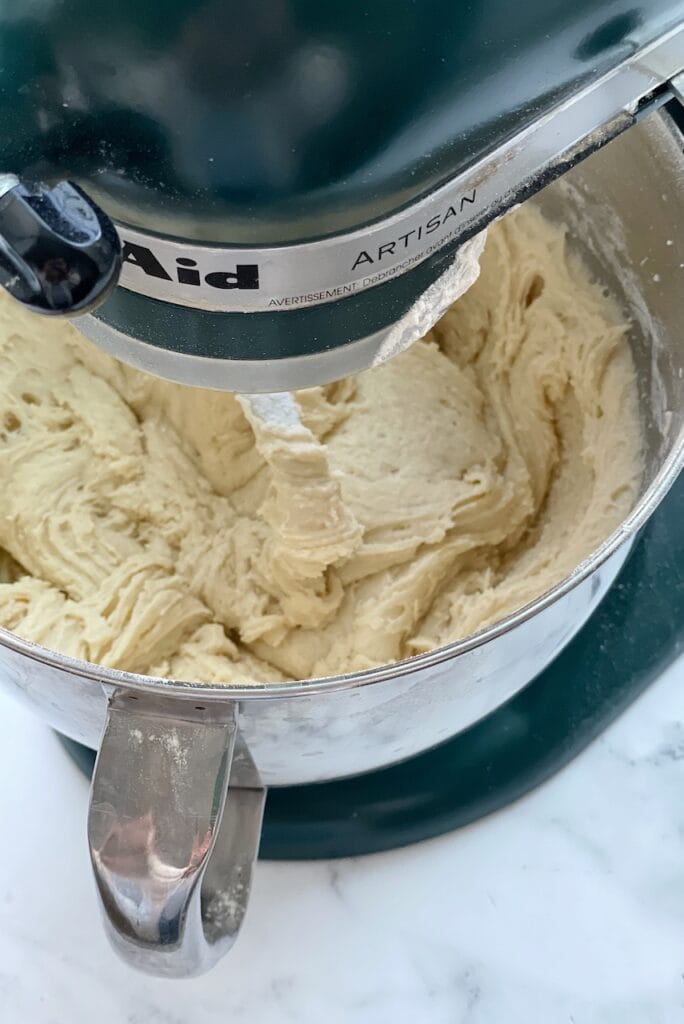
Making the sugar cookie dough
The cookie dough can be mixed in very little time, but you’ll need to plan ahead – the dough must be chilled for at least one hour before rolling out. You can find a detailed recipe below, but here’s a general run down.
- About 30 minutes before mixing, take the butter and egg out of the refrigerator to let them come to room temperature. You’ll also want to prepare your sour milk at this time too.
- Prepare the dry ingredients in a large bowl – combine the flour, baking soda and salt in a bowl and set aside.
- In the bowl of a stand mixer, cream together the butter, shortening and sugar with the paddle attachment. Add the egg and extracts and mix on medium speed until fluffy.
- Add the dry ingredients – alternate between the flour mixture and sour milk, beginning and ending with the flour mixture. Don’t over mix!
- Wrap the cookie dough in plastic wrap and chill for at least one hour before rolling out.
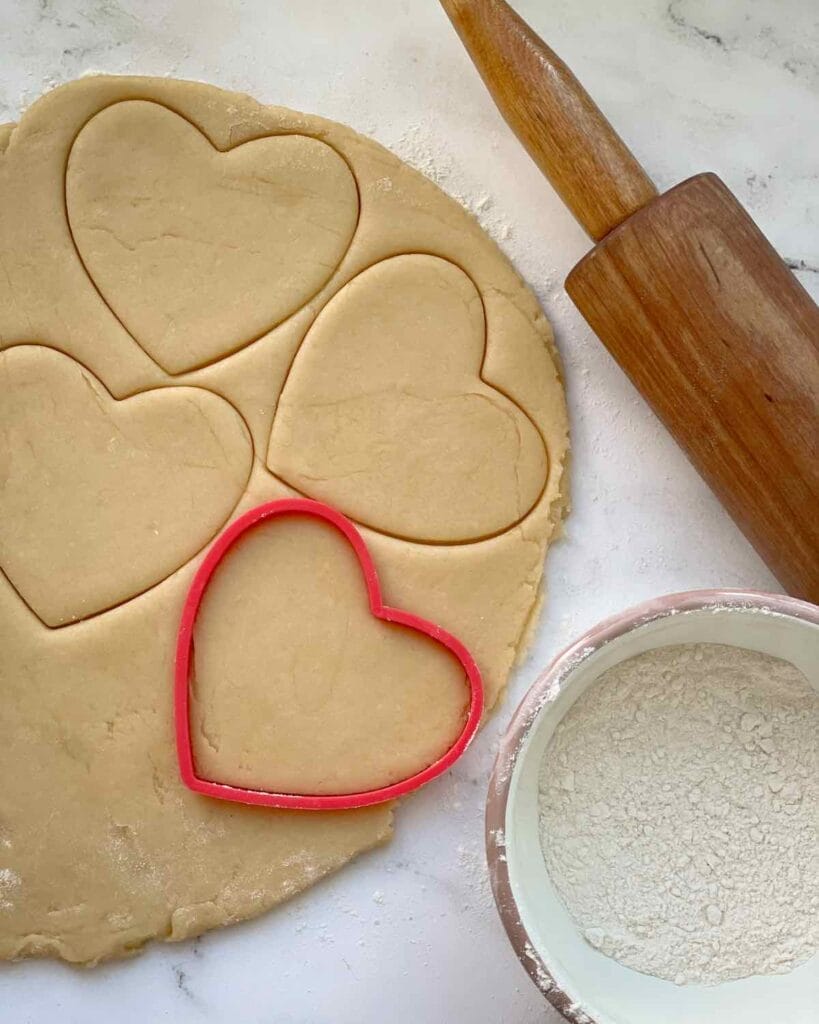
The best way to roll out sugar cookies
Rolling out sugar cookies is pretty straight forward, but here are a few helpful tips that will give you cookie cutting success!
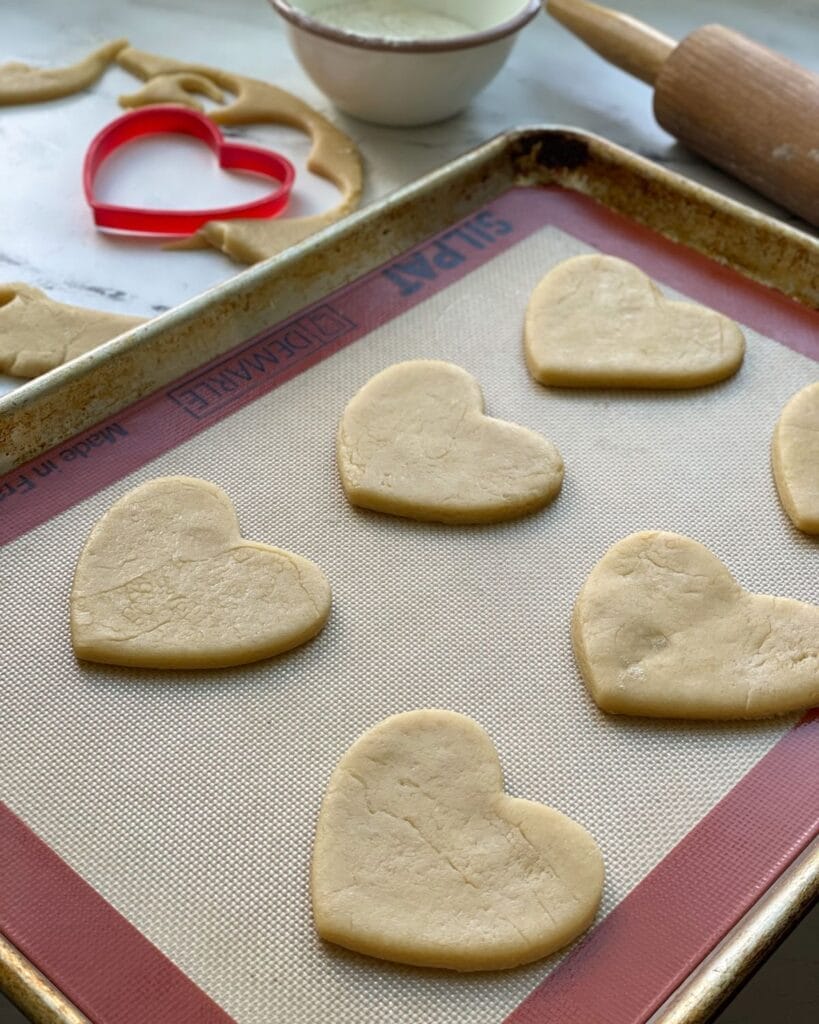
Prepare your baking sheet before you start rolling out. You’ll want to use either parchment paper or a silicone baking mats. These help keep your cookies from browning too much on the bottoms.
I highly recommend using this silicone pastry mat! It makes rolling out sugar cookies so much easier! I use it for so many other baking projects too like my Homemade White Sandwich Bread, Danish Pastries and Homemade Crescent Dinner Rolls Recipe!
Flour your work surface and gently start to roll out the cookie dough. Flour your rolling pin and both sides of the cookie dough. Flip the dough over a few times, flouring as you go to keep it from sticking to the work surface. Avoid adding too much flour, but use just enough to keep it from sticking.
Continue to roll out into a 1/4-inch thickness. These sugar cookies are best on the thicker side – roll them out too thin and your cookies will be crispy instead of soft and puffy. Cut out your cookie shapes using your favorite cookie cutters. For Valentine’s Sugar Cookies, I like to use different sized heart-shaped cookie cutter. Sometimes I will dip my cookie cutters in flour in between cutting the cookies – this helps to cut them out cleaner, without sticking to the cookie cutter. (Be sure to check the section towards the end of this post for recommended tools, including cookie cutters.)
Transfer the cookies to the cookie sheet and space them about 2 inches apart. They will puff up in the oven as they bake, but they won’t spread.
Watch my sugar cookie video
I recently did an Instagram LIVE, showing exactly how to make and roll out sugar cookies! You can go HERE to watch that video! You’ll find it really helpful!
Baking the sugar cookies
All ovens are slightly different, but generally ovens take about 30 minutes to truly preheat. Start preheating your oven before you roll out your sugar cookies so that it’s all ready by the time you have your cookies cut out.
Place your cookie sheet on the center rack of your oven. Bake them for 8 minutes or until you see the edges of the bottoms of the cookies begin to slightly brown. Be careful not to over bake! Let them cool on the pan for 5 minutes before placing them on a cooling rack. The baked cookies need to cool completely on the wire rack before frosting.
My number one tip
You’ll achieve the perfect cookie when you make sure to roll out the cookies to a 1/4-inch thickness. This will give you a soft and puffy, tender cookie! Rolling them out too thin will result in a dry, crispy cookie.

Tips for frosting sugar cookies
This sugar cookie tastes best with my buttercream frosting. I would not suggest using royal icing for this cookie. The buttercream frosting used in this recipe is a “crusting buttercream” recipe – meaning the top layer of the frosting will set, while the inside will remain soft. If you are using sprinkles, be sure to add them right after frosting – if you wait too long, the frosting will set and the sprinkles won’t stick.
You can frost your sugar cookies a couple of different ways, depending on how you want them to look:
- Frost with a knife or offset spatula: Simply spread the frosting onto the cookie. To create a smooth, finished surface, dip the spatula in hot water, tap off excess water and lightly smooth the top layer of frosting. The hot, wet spatula will slightly melt the frosting, making it easier to smooth out.
- Pipe the frosting with a pastry bag and frosting tip: This technique is best when wanting to create detailed designs with your frosting – again refer to my video above for tips on how to frost with a piping tip. You can get really creative with this technique!
Supplies you’ll need for Valentine’s sugar cookies
Not all of these tools are necessary, but you will find them very helpful when making your Valentine’s themed sugar cookies!
Click on the words in BOLD for the link!
Stand Mixer (this is my absolute favorite mixer of all time!)
Heart-shaped cookie cutters (includes several sizes)
Pink gel food coloring (the more you use to tint your frosting, the darker the pink color will be)
Red Hot candies are SO good on these buttercream frosted sugar cookies! Trust me!
Self-sealing clear cookie bags
Bakery boxes with windows (Make sure you wait until you are ready to deliver your cookies before boxing them – they can get dried out if they sit in the box for more than 12 hours. If you’d like them to stay fresher, longer, put each cookie in a self-sealing clear cookie bag and put those in the bakery box for a gift.)
Red Shredded Paper (Place this inside the gift box for an extra festive Valentine’s presentation.)
Red and White baker’s twine – Tie this around the bakery box for an extra Valentine’s touch to your gift!
Storing the cookies
Storing these cookies properly is important in keeping them nice and soft. Keep them in an airtight container for up to one week. I prefer to keep them in a thick ziplock bag.
More Recipes to try
If you like these sugar cookies, you’ll love these recipes too!
The Best Homemade White Sandwich Bread
Garlic Rosemary Pull Apart Bread
Share and follow along!
I love to see how you are enjoying my recipes! Please leave a comment below and let me know how it turned out for you! Follow me on Instagram @thatbreadlady, Facebook and YouTube for more baking tips and videos! Be sure to tag me #thatbreadlady when you try one of my recipes. I’d love to see your baking successes!
(This post contains affiliate links. I receive a commission on purchases made from affiliate links, at no cost to you.)
Need extra help with bread making?
Go HERE to find more about my Baking Academy and get ALL-ACCESS to my entire virtual baking class library for one super low price! It’s a great community of bakers just like you – bakers that love to spend time in the kitchen and improve their baking skills.
Soft and Puffy Sugar Cookies
Ingredients
Cookie Dough
- 3 cups all-purpose flour
- ½ teaspoon baking soda
- ½ teaspoon salt
- ¼ cup unsalted butter softened
- ¼ cup shortening
- 1 cup sugar
- 1 large egg room temperature
- ¼ teaspoon vanilla extract
- ¼ teaspoon almond extract
- ½ cup sour milk*
Buttercream Frosting
- ½ cup unsalted butter softened
- 1 cup vegetable shortening
- ¼ teaspoon salt
- 2 teaspoons vanilla extract
- 2 lbs powdered sugar sifted
- ⅓ cup cold water
Instructions
Make the dough:
- *Add ½ tsp. vinegar to milk to sour it. Set it aside while preparing other ingredients. As it sits, it will thicken up.
- Prepare the dry ingredients. In a mixing bowl, whisk together the flour, baking soda and salt. Set aside.
- In the bowl of a stand mixer, cream together the butter, shortening and sugar.
- Add the egg and mix well.
- Add the vanilla and almond extracts and mix well.
- Add the flour mixture alternately with the sour milk. Mix well after each addition.
- Turn out the dough onto a large piece of parchment or plastic wrap, flatten into a disc and completely cover the cookie dough.
- Chill in the fridge for at least one hour before rolling out. This will make it easier to handle.
Roll out the dough:
- Gather and prepare items for rolling out. You’ll need a small bowl of flour for your work surface, rolling pin, baking sheet lined with parchment or a silicone baking mat and cookie cutters.
- Remove cookie dough from fridge.
- Flour your work surface and rolling pin.
- Start rolling out your dough, flour the top and flip and continue to roll out until it’s about a ¼ inch thickness. Thicker cookies will yield a softer, puffy cookie. Thinner cookies will be crunchier.
- Cut out cookies with cookie cutters and place on baking sheet about 2 inches apart. Gather together the scraps and form back into a ball and repeat rolling out.
Bake cookies:
- Bake at 400°F for 8 to 10 minutes or until the edges of the bottom of the cookies are slightly brown.
- Allow to cool on the pan for 5 minutes before transferring to a wire rack.
- Frost when completely cooled.
Buttercream Frosting
- Cream butter, shortening, salt and vanilla for 3 minutes.
- While the mixer is on low speed, slowly add the powdered sugar and cold water alternately. Add enough water for desired consistency. Frosting should be thick but soft enough to easily frost cookies.
Frost Cookies
- Frost cookies generously by either spreading with a knife or piping designs with a pastry bag. Top with desired sprinkles.
- *Always go for an equal frosting to cookie ratio! Yum!!
Notes
- The baked cookies can be frozen in a ziplock freezer bag for up to 8 weeks.
- These cookies are really the best when you roll them out on the thicker side.
- When frosting, I like to make sure there is an equal cookie to frosting ratio!
- Store frosting in an airtight container in the refrigerator for up to 2 weeks. Allow it to come to room temperature and stir before frosting.
- This recipe can easily be doubled in a stand mixer. I like to double the recipe and freeze any extra cookie dough for later. You can store in freezer for up to two months in an airtight container.
- Store frosted cookies in an airtight container to keep from drying out. If stored right, they will stay fresh for up to one week!
- See my post for a how-to video, tool recommendations and packaging ideas!


Sour milk, do you mean Buttermilk?
Please ignore my question, I just read you put vinegar in the milk. Can’t wait to try these. They look delicious!