In this post, learn how to decorate four festive Christmas sugar cookies frosted with fluffy buttercream frosting. Follow my step-by-step pictures and watch my video tutorial to see exactly how you can make the cutest buttercream frosted sugar cookies this holiday. See my list of useful items to help make frosting sugar cookies easy!

Why you’ll love this recipe
Is it even Christmas without sugar cookies decorated like Christmas trees, stars, and snowmen? It’s a holiday tradition in our home, and if you haven’t adopted that tradition yet, it’s time! These Christmas sugar cookies are:
- Easier than you think. My Soft and Puffy Sugar Cookies are so easy to make and roll out, and decorating with buttercream frosting is much more forgiving that using royal icing! If you’re not an experienced cookie decorator, it’s helpful to know that you can start over if you make a mistake! Often, you can simply scrape the buttercream off the cookie and start over! You can also set aside a few extra cookies to practice with. Once you’re feeling confident, you can move on to the cookies you want to share and brag about!
- You get to be creative. Decorating sugar cookies can be so much fun -it’s almost like being a kid again and coloring in a brand new coloring book. Even if you don’t think you’re creative, you’ll find yourself getting lost in the process and love making beautifully decorated sugar cookies! Once you master the simple techniques for these Christmas sugar cookies, explore some more ideas and decorate however you feel inspired.
- Delicious. These sugar cookies are super soft and puffy! They won’t melt and spread when baked. The fluffy buttercream frosting is so delicious and compliments the slight hint of almond extract in the cookie dough. It’s always a win when you can serve something that’s beautiful AND delicious!
Tools you’ll need
In this post, I’ll show you how to make four different Christmas sugar cookie designs. While these designs are not too complicated, you’ll have a much easier time when using the suggested tools to help you.
Be sure to scroll to the end of this post to find my recipe for Soft and Puffy Sugar Cookies. You’ll also find links for each of these suggested tools towards the end of this post too.
- Stand mixer. If you don’t have a stand mixer, an electric hand held mixer could work, but will be more difficult as the final dough is quite thick. Either a stand mixer or electric hand mixer would work for the buttercream frosting.
- Piping bags and tips. I suggest using a 12-inch to 18-inch piping bag (my preference is 12-inch). You’ll need 3 bags. Use a small to medium sized piping tip – Ateco 7 or Wilton 12. It would be easiest if you have two round piping tips.
- Offset spatula. This is so helpful for smooth out the frosting after piped on the cookie. If you don’t have one, a simple butter knife will do.
- Rolling pin.
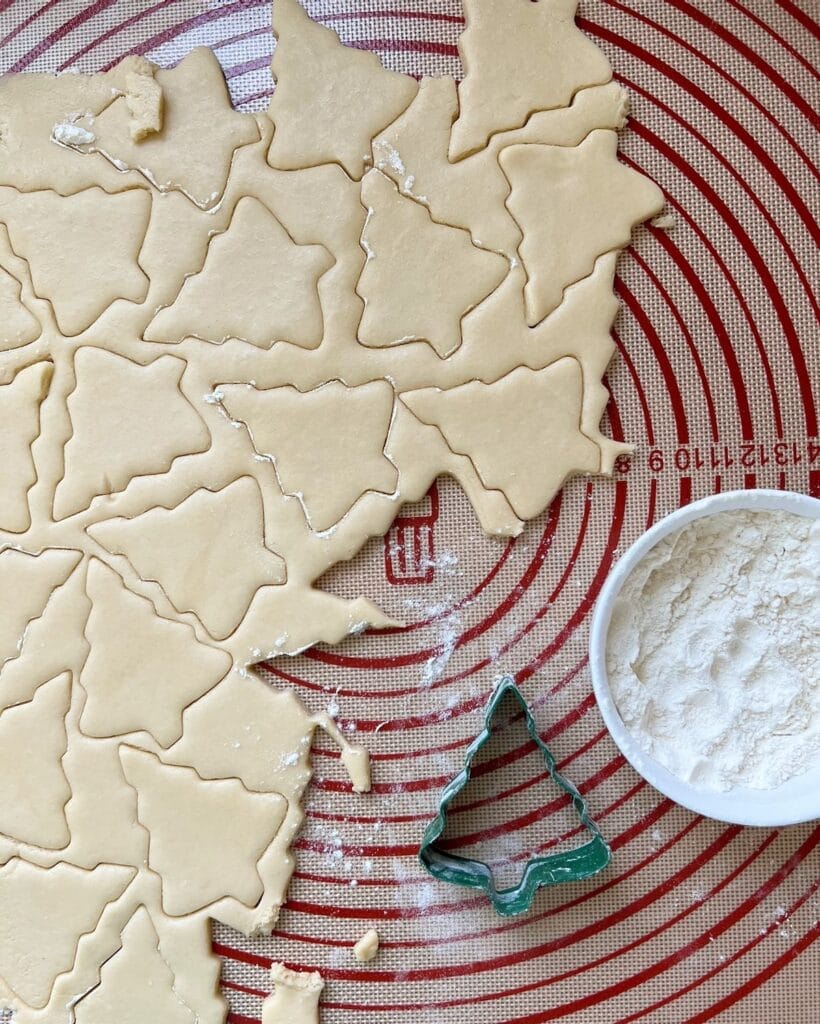
- Cookie cutters. Remember the smaller your cookies, the faster they bake!
- Silicone pastry mat. This is optional but is so helpful when rolling out cut out sugar cookies!

Ingredients
- My Soft and Puffy Sugar Cookie dough. Note that it needs at least one hour of chill time before rolling it out. You could also refrigerate it for up to 24 hours before rolling it out.
- Buttercream frosting. This frosting is a “crusting” buttercream recipe, meaning the outer layer will slightly crust but the interior will remain soft. This recipe has always been my go-to and tates delicious!
- Gel food paste coloring. This will create a much more vibrant color than a liquid food coloring. You’ll find that you use much less than you typically would need with liquid. You’ll need Americolor Leaf Green, Burgundy and Super Red to create this look.
- Sprinkles. The color and type is up to you, but here I’m using a gold sanding sugar and white nonpareils.
How to frost with buttercream using a piping bag and tip
If you aren’t experienced with using a piping bag and tip to frost your sugar cookies, don’t be discouraged. It takes a bit of practice to get the hang of it. Don’t feel like a failure if it doesn’t turn out great your first try. Here’s a few tips that will really help you:
- Practice first. You can do this a couple of different ways. You could practice on a piece of parchment or baking sheet. Simply practice squeezing the buttercream out of the piping tip and making short, straight lines. This will help you get a good feel for how much pressure you need to apply. After you start to get more confidence, start practicing on a few extra sugar cookies. If you make a mistake, you can simply scrape off the frosting and start again.
- Filling the bag. With the piping tip fixed on your bag, put it inside a large cup and fold over the edges. Fill the bag about half full with buttercream. If you fill it too full, it will be difficult to frost. Fold the bag back over and slide the icing down towards the piping tip. Twist the bag tightly to remove any air pockets inside.
- Frosting. Hold the filled bag in your dominant hand You’ll squeeze the frosting out with this hand and guide with your nondominant hand. When you finish a stroke, gently let go of the pressure as you lift up on the bag. Squeeze towards the top of the bag (away from the piping tip). As the bag gets less full, slide the frosting down towards the tip and twist your piping bag tightly to keep it from escaping as you frost.
- Frosting too thick? If the frosting is too difficult to squeeze out of the piping bag, thin it with a tiny bit of cold water and whip it by hand until it’s fully incorporated.
Decorating Christmas sugar cookies with buttercream
Option 1: Christmas Tree with snow
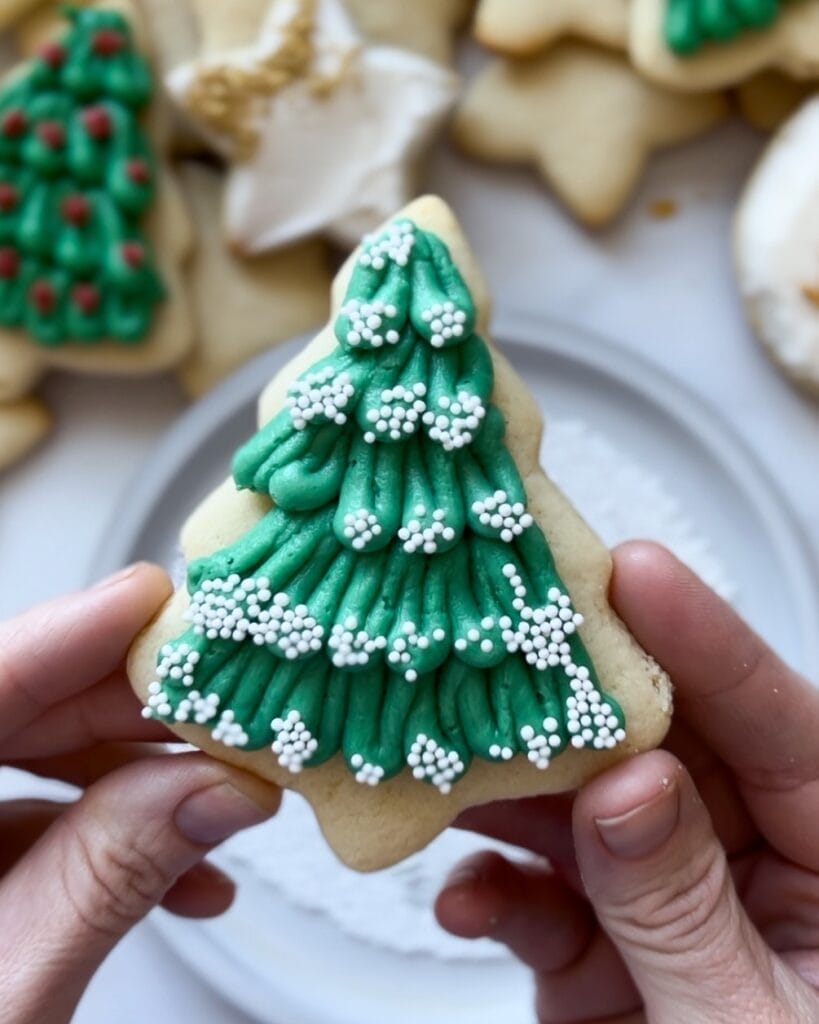
These are so adorable and not overly decorated. The strategic placement of the white nonpareils resembles a tree just as it’s starting to snow.
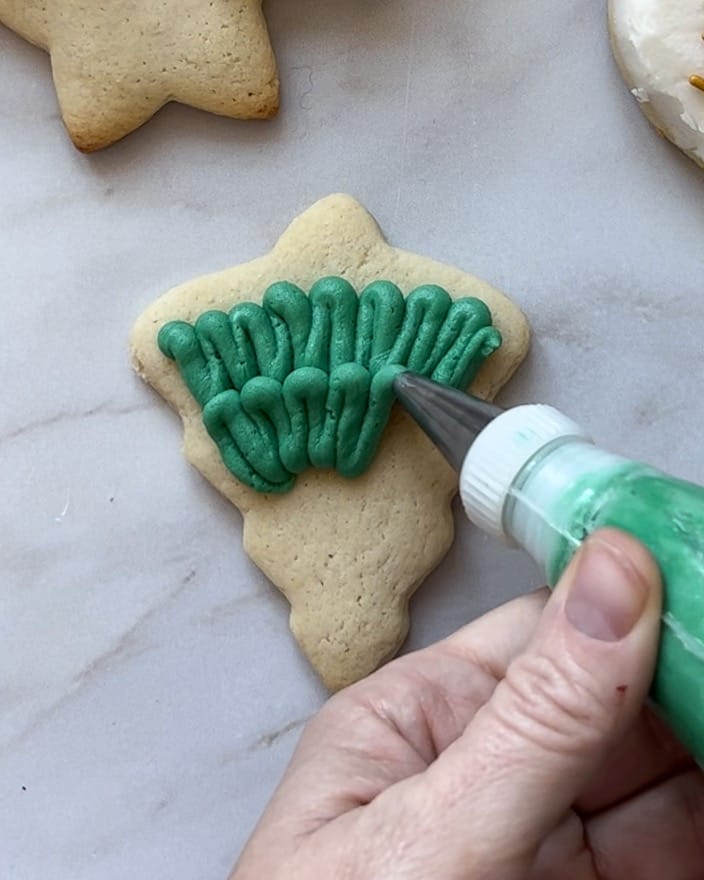
- Fit the piping bag with the round tip (Ateco 7). Fill the bag half full with the green buttercream frosting.
- Start with the cookie upside down – it’s easier to create the layered look this way.
- At the bottom of the cookie, create a zig zag pattern that follows that row of the cookie cut out.
- On the next row, repeat that same zig zag pattern, but slightly overlap it with the first row.
- Continue this pattern, row by row until the entire Christmas tree cookie is frosted. Before the frosting dries, you’ll need to add the sprinkles.
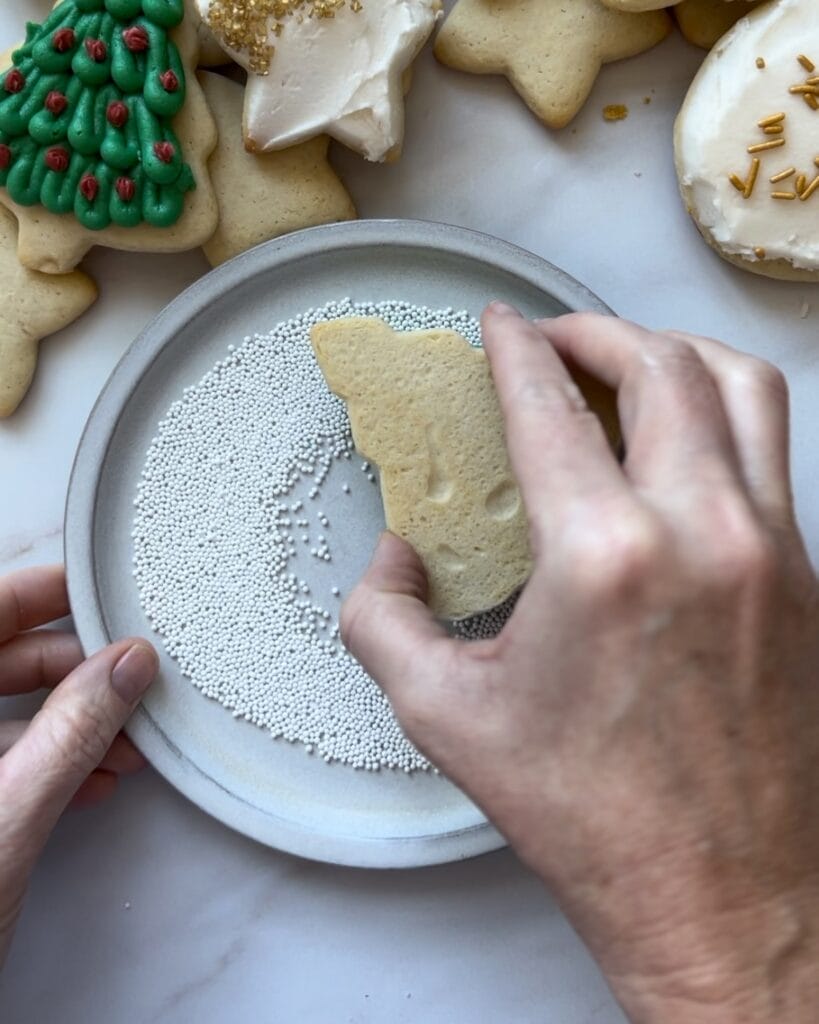
- Place the white nonpareils on a small plate. Gently dip the frosted tree in the sprinkles, frosting side down. Only allow the raised parts of the frosting to barely touch the sprinkles – this gives it a snow-kissed look.

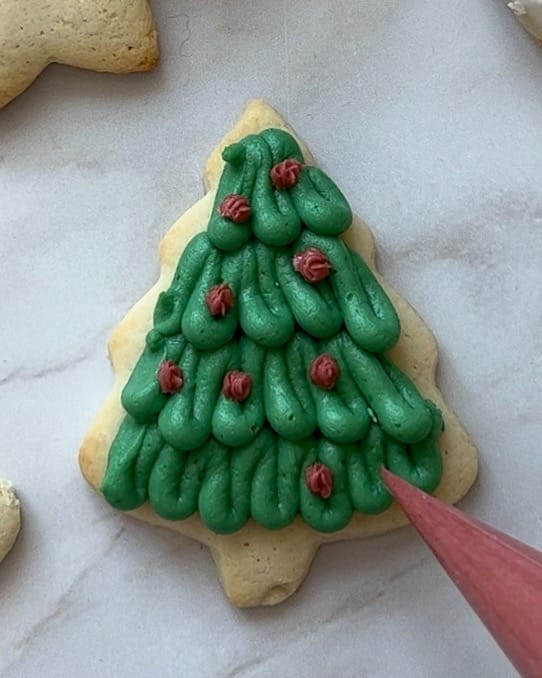
Option 2: Christmas Tree with red dots
This is a great way to add a pop of color and tie it into your overall color scheme. You could definitely opt for different colors here to resemble ornaments. Get creative!
- Repeat the same zig zag pattern as you did for the Christmas tree with snow.
- Fill a piping bag with the cranberry colored frosting and clip the pointed end just slightly. You want a very small opening.
- Squeeze several dots of the cranberry frosting in various places on the Christmas tree cookie. Release the frosting in one spot, squeeze and release as you lift up. The idea is to make it look random and not too perfect. These could look like berries, flowers or ornaments…however you imagine!
Option 3: The round cookie with the holly and berries
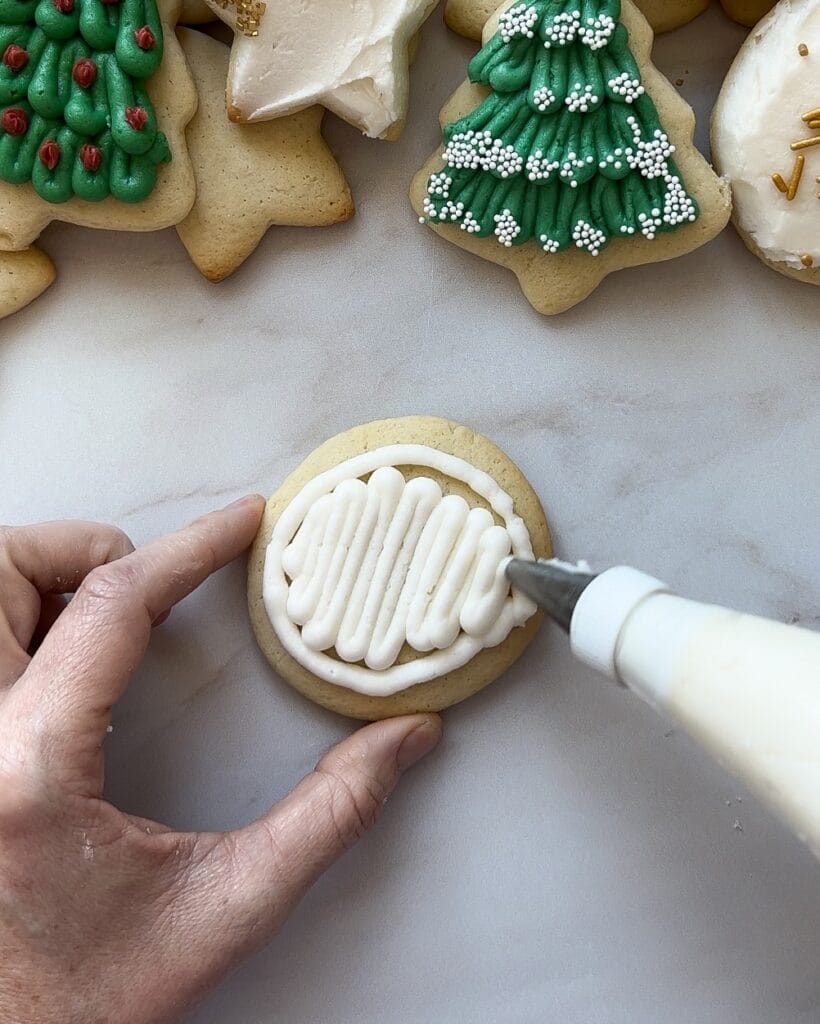
This is such a pretty way to tie in all of the colors together – the white, green and cranberry. You’ll need all three colors for this one. Prepare one bag of white and one bag of green, each fitted with the round tip. Plus you’ll also be using the cranberry tinted frosting with the clipped opening that you used for Option 2.
For this option, you’ll also need your offset icing spatula and a glass of warm water.
- Using the white frosting, pipe an outline of a circle around the diameter of the round cookie. Go back in and fill the center of the circle with more frosting. No need to make this look perfect – you’re going to smooth it out next.
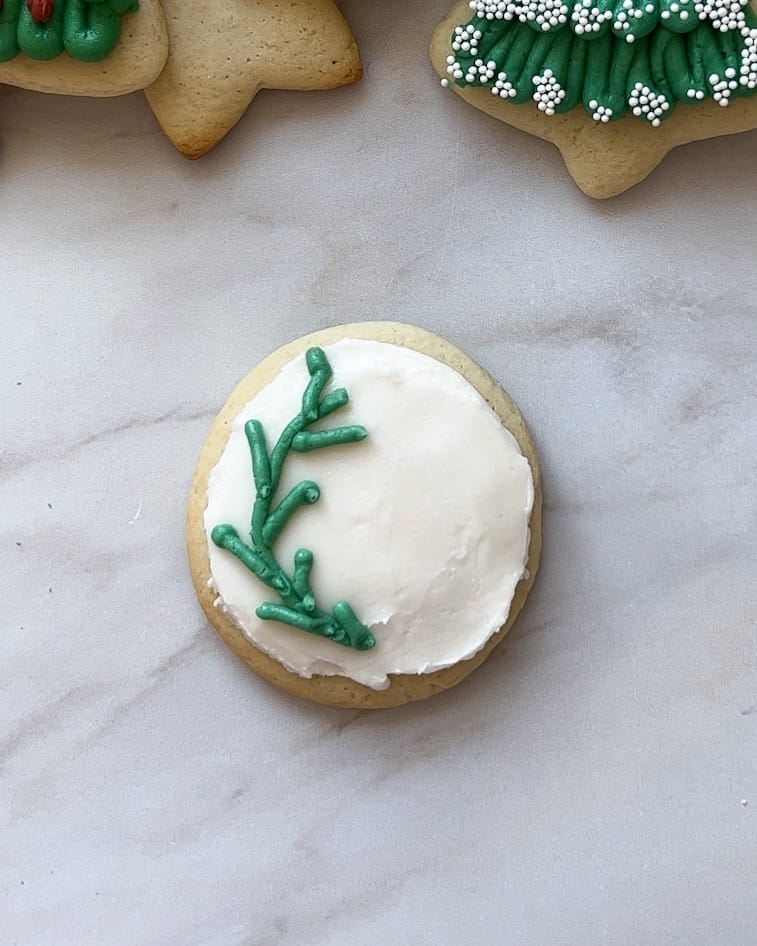
- Dip the icing spatula in the warm water and tap it a couple of times on the side of the glass. Gently smooth out the white frosting, creating a flat surface. The warm water slightly melts the frosting, making it easier to smooth out.
- Using the green frosting, make a crescent shape on the left hand side of the cookie. Create several “branches” along the crescent.
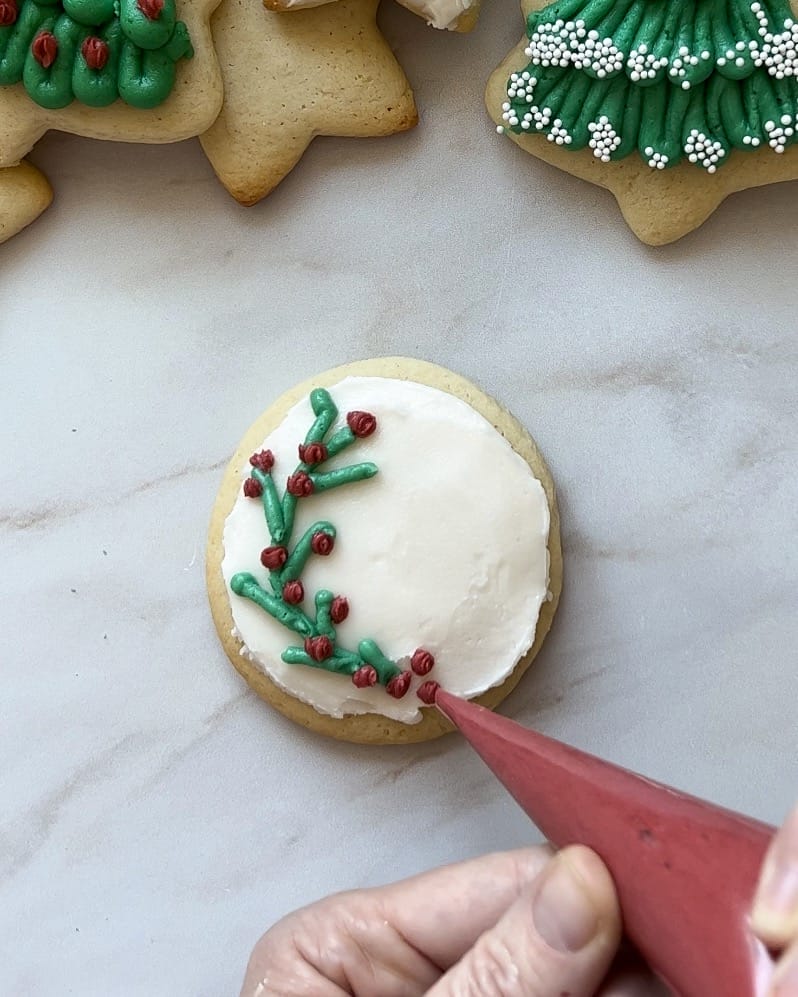
- Using the cranberry tinted frosting, place several small dots in and out of the branches. This creates the cutest holly and berries look!

Option 4: White and gold star
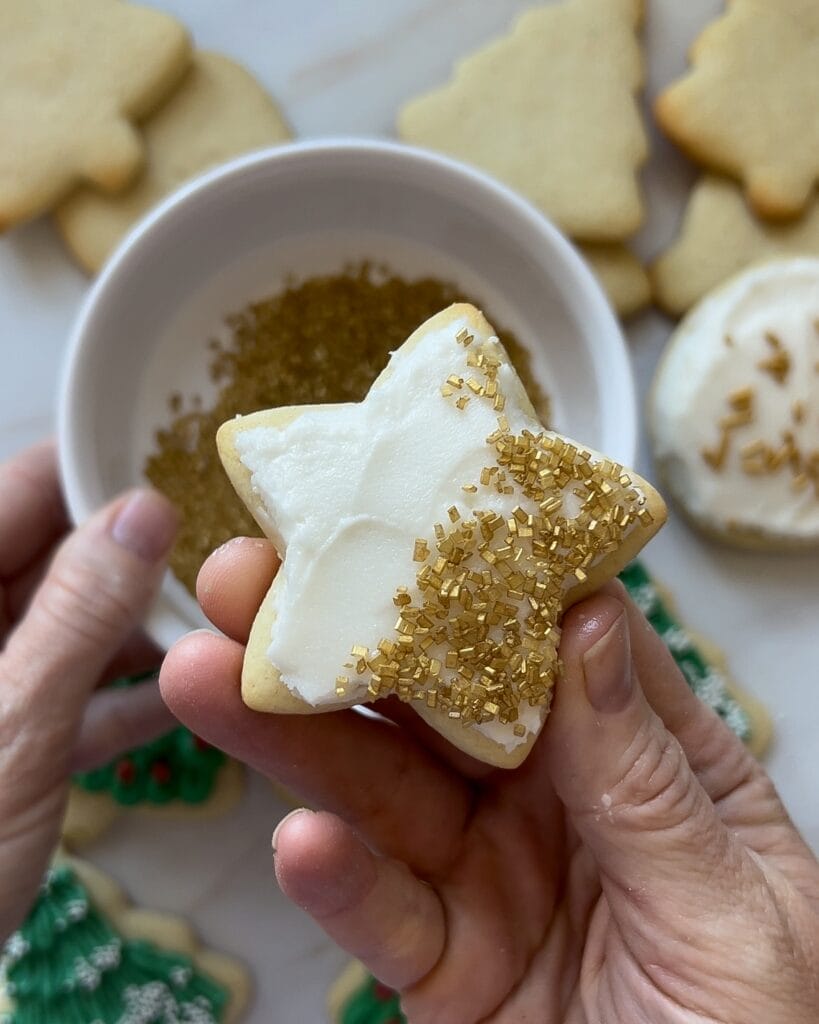
These stars are such a simple process but look extra fancy. You’ll need the white frosting and a small plate full of the gold sprinkles.
- Similar to Option 3, first pipe an outline of the star on top of the cookie. Fill it in with white frosting.
- Dip the icing spatula in warm water and smooth it out creating a flat surface.
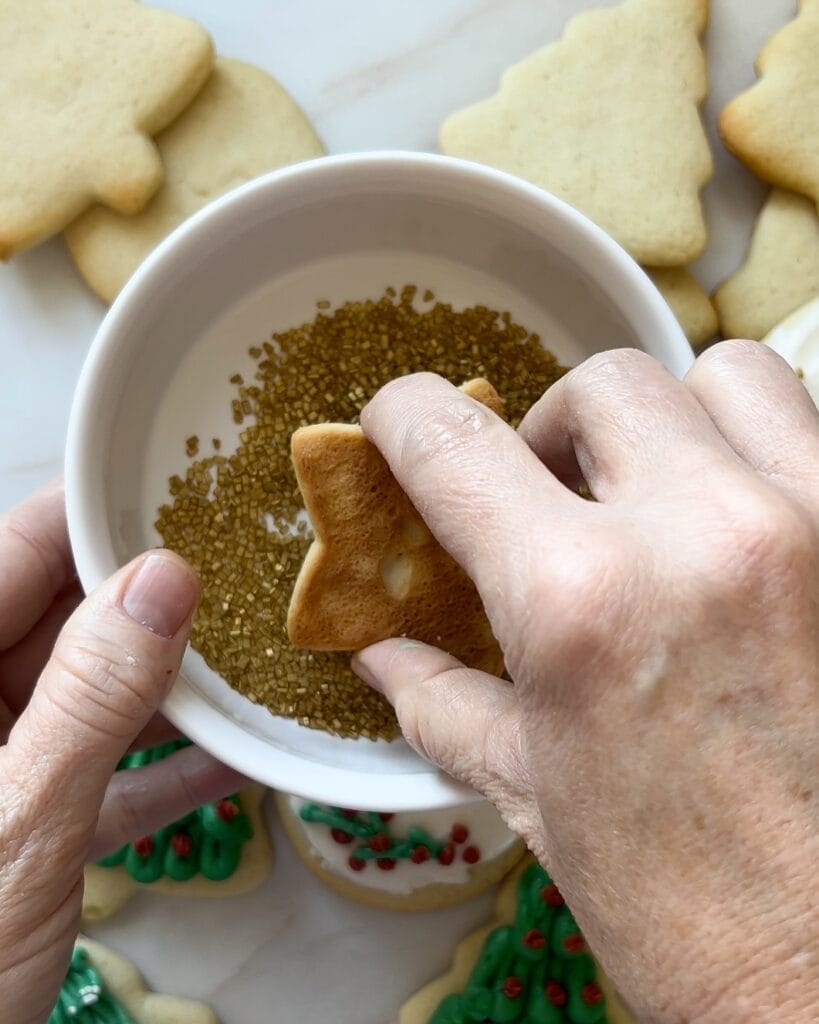
- Gently dip one side of the star in the sprinkles, frosting side down. Only allow about one-third of the cookie to get coated in sprinkles. Again, we’re not going for a perfect look here – the more random looking the better!
Make ahead options
We all know that while sugar cookies are so fun to make and decorate, they can be quite time consuming. Here’s a few different ways you can break up the process so that you don’t have to make them from start to finish, all in one baking session:
- Make the dough ahead of time and refrigerate. Keep the dough in the refrigerator for up to 24 hours before rolling out. It’s best to roll out when it’s cold, so no need to let it warm to room temperature first.
- Make the dough ahead of time and freeze. Wrap the dough in plastic wrap and then place in a freezer ziplock bag. Freeze for up to 3 months. Before rolling out, remove the dough the night before and let it thaw in the refrigerator. Make sure the dough is chilled but soft enough to easily roll out before proceeding.
- Bake the cookies and freeze. After the baked cookies have completely cooled, place them in a freezer ziplock bag and seal shut. Freeze the baked cookies for up to 3 months. About 3 hours before frosting, let the cookies thaw in the bag at room temperature.
- Make the frosting and refrigerate. Keep the frosting in an airtight container in the refrigerator for up to two weeks. About 3 hours before frosting, remove the buttercream frosting from the refrigerator, let it soften and come to room temperature. Stir the frosting a few times by hand with a rubber spatula. This will help improve the consistency in case it has separated.
My video tutorial
How to store sugar cookies
Keep the cookies, frosted or unfrosted in an airtight container for up to one week. Avoid stacking frosted sugar cookies as the frosting will get smashed. I do not recommend freezing frosted sugar cookies as this can dry them out.
Recipes to make Christmas sugar cookies
Soft and Puffy Sugar Cookies (this also includes my recipe for buttercream frosting)
Where can I get the tools to make these cookies?
Click on the item in bold. It will take you to the Amazon link where you can purchase.
Ankarsrum mixer – My favorite mixer! See more about it on my Instagram.
Kitchen Aid mixer – Not as much of a favorite of mine, but still a great option for cookies.
Silicone Pastry Mat – I love the XL size!
Cookie Cutters – Christmas Tree, Round (use a 3-inch or 4-inch), Star
Other Holiday recipes you’ll love
Share and follow along!
I love to see how you are enjoying my recipes! Please leave a comment below and let me know how it turned out for you! Follow me on Instagram @thatbreadlady, Facebook and YouTube for more baking tips and videos! Be sure to tag me #thatbreadlady when you try one of my recipes. I’d love to see your baking successes!
(This post contains affiliate links. I receive a commission on purchases made from affiliate links, at no cost to you.)
PrintChristmas Sugar Cookies with Buttercream Frosting
Four beautiful, delicious and easy-to-make Christmas sugar cookie ideas! Find all the pictures and video tutorial in the blog post to help you make these festive sugar cookies decorated with fluffy buttercream frosting!
- Prep Time: 90 minutes
- Cook Time: 8 minutes
- Total Time: 1 hour 38 minutes
- Yield: 2 dozen sugar cookies
Ingredients
- Soft and Puffy Sugar Cookie dough
- Buttercream Frosting
- Americolor Gel paste food coloring: leaf green, burgundy and super red
- White nonpareils sprinkles
- Gold sugar dusting sprinkles
Instructions
- Roll out, cut and bake the sugar cookies.
- While cookies are cooling, mix the buttercream frosting. Tint about one cup of the frosting with 2 drops Burgundy and 1 drop Super Red gel paste food coloring (this creates a cranberry shade of red). Cover with plastic wrap and set aside. Tint about one-third of the remaining frosting with 3-4 drops of the leaf green gel paste (add more for a darker color). Reserve about two-thirds of the frosting without tinting.
- Prepare the piping bags: Fit two, 12-inch piping bags each with an Ateco 7 round tip. Fill one bag, half full, with green frosting. Fill the other bag, half full, with white frosting. Place all of the red frosting in one bag and make a small cut at the tip of the bag. Keep bowls with extra frosting covered with plastic wrap until ready to refill bags.
Option 1: Christmas tree with snow
- Start with the cookie upside down – it’s easier to create the layered look this way.
- At the bottom of the cookie, create a zig zag pattern that follows that row of the cookie cut out.
- On the next row, repeat that same zig zag pattern, but slightly overlap it with the first row.
- Continue this pattern, row by row until the entire Christmas tree cookie is frosted. Before the frosting dries, you’ll need to add the sprinkles.
- Place the white nonpareils on a small plate. Gently dip the frosted tree in the sprinkles, frosting side down. Only allow the raised parts of the frosting to barely touch the sprinkles – this gives it a snow-kissed look.
Option 2: Christmas tree with red dots
- Repeat the same zig zag pattern as you did for the Christmas tree with snow.
- Squeeze several dots of the cranberry frosting in various places on the Christmas tree cookie. Release the frosting in one spot, squeeze and release as you lift up. The idea is to make it look random and not too perfect. These could look like berries, flowers or ornaments…however you imagine!
Option 3: The round cookie with the holly and berries
- Using the white frosting, pipe an outline of a circle around the diameter of the round cookie. Go back in and fill the center of the circle with more frosting. No need to make this look perfect – you’re going to smooth it out next.
- Dip the icing spatula in the warm water and tap it a couple of times on the side of the glass. Gently smooth out the white frosting, creating a flat surface. The warm water slightly melts the frosting, making it easier to smooth out.
- Using the green frosting, make a crescent shape on the left hand side of the cookie. Create several “branches” along the crescent.
- Using the red frosting, place several small dots in and out of the branches. This creates the cutest holly and berries look!
Option 4: White star with gold sprinkles
- Similar to Option 3, first pipe an outline of the star on top of the cookie. Fill it in with white frosting.
- Dip the icing spatula in warm water and smooth it out creating a flat surface.
- Gently dip one side of the star in the sprinkles, frosting side down. Only allow about one-third of the cookie to get coated in sprinkles. Again, we’re not going for a perfect look here – the more random looking the better!
See Notes for make ahead and storing options.
Enjoy!
Notes
Make ahead options
-
- Make the dough ahead of time and refrigerate. Keep the dough in the refrigerator for up to 24 hours before rolling out. It’s best to roll out when it’s cold, so no need to let it warm to room temperature first.
-
- Make the dough ahead of time and freeze. Wrap the dough in plastic wrap and then place in a freezer ziplock bag. Freeze for up to 3 months. Before rolling out, remove the dough the night before and let it thaw in the refrigerator. Make sure the dough is chilled but soft enough to easily roll out before proceeding.
-
- Bake the cookies and freeze. After the baked cookies have completely cooled, place them in a freezer ziplock bag and seal shut. Freeze the baked cookies for up to 3 months. About 3 hours before frosting, let the cookies thaw in the bag at room temperature.
-
- Make the frosting and refrigerate. Keep the frosting in an airtight container in the refrigerator for up to two weeks. About 3 hours before frosting, remove the buttercream frosting from the refrigerator, let it soften and come to room temperature. Stir the frosting a few times by hand with a rubber spatula. This will help improve the consistency in case it has separated.
How to store:
- Keep the cookies, frosted or unfrosted in an airtight container for up to one week. Avoid stacking frosted sugar cookies as the frosting will get smashed. I do not recommend freezing frosted sugar cookies as this can dry them out.
Be sure to go to see this blog post for step-by-step pictures!

