Celebrate summertime with this patriotic pastry!
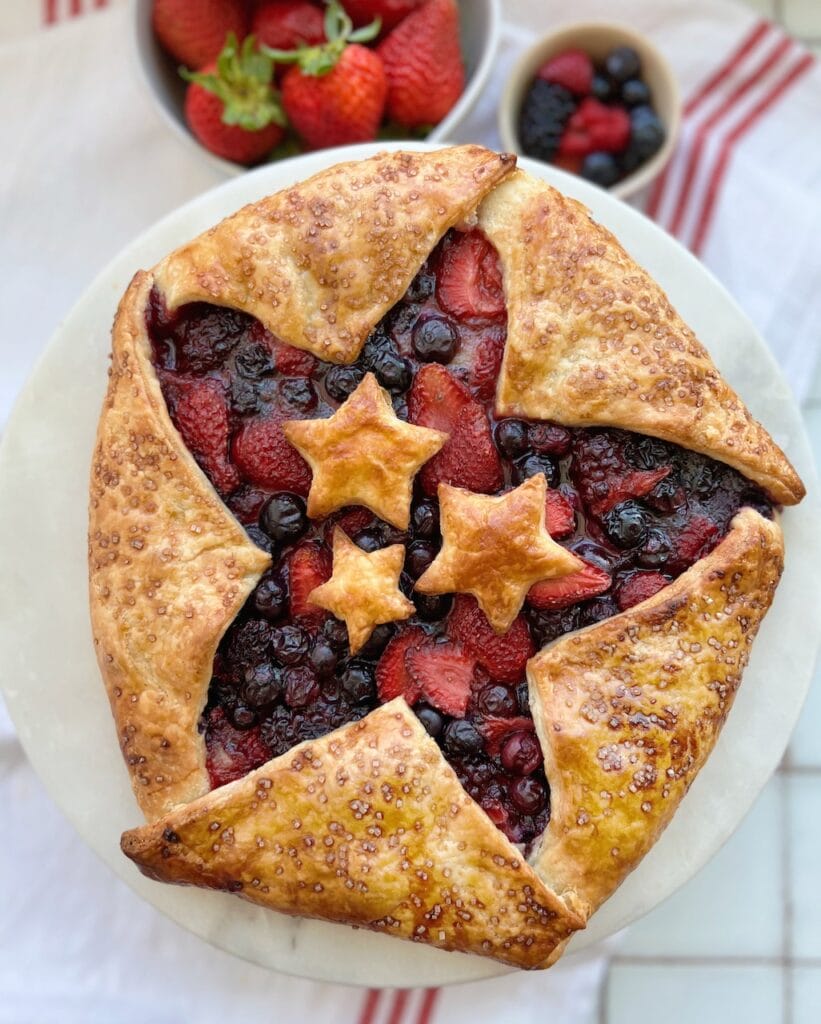
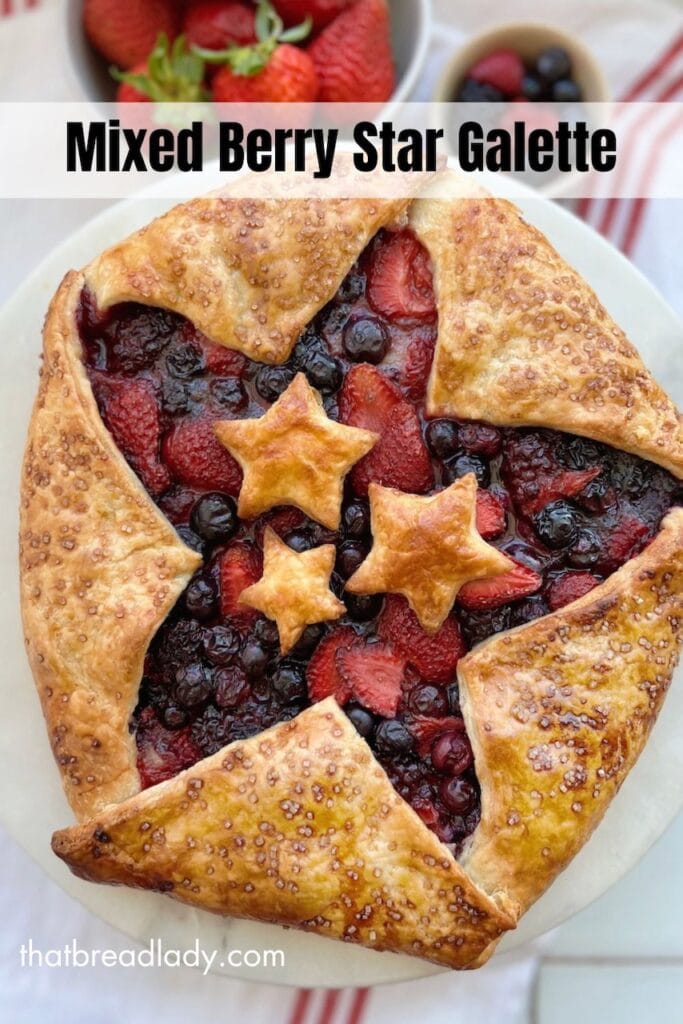
Galettes are free-form pies that are easy to put together with a variety of different fillings. This star shaped galette is made by trimming your pie crust with straight edges and slits to form a star when folded towards the center. Filled with an almond flavored pastry cream called frangipane and piled with loads of red and blue mixed berries. This star shaped red and blue galette is the perfect Fourth of July dessert!
What is a galette?
If you love homemade pies, but don’t love the stress of getting them into a pie pan, then galettes are for you! A galette is simply a pie that is baked freeform, meaning it’s not baked in a pie pan. Baked on a parchment lined baking sheet, you’ll simply roll out your pie crust, place the filling in the middle, and fold the sides up, leaving the center filling exposed. Just like a pie, you can fill it with almost anything your heart desires! And unlike pies, you only need to wait 10 minutes for this to cool before serving!
I love the results I get from using a homemade pie crust, but you could definitely use a store bought pie crust to make it even easier! Galettes can also be made with puff pastry, but I love the rustic look of a fruit galette with pie crust!
What is Frangipane?
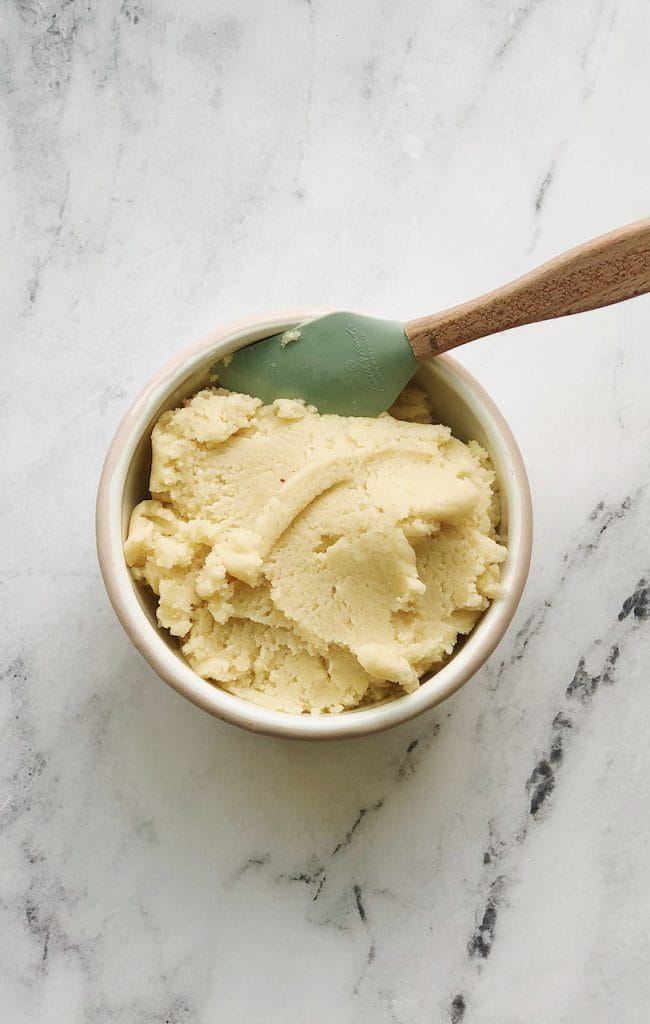
Frangipane is like almond paste, but creamier! I use it to fill my Almond Croissants. It’s SO easy to make! All you’ll need to do is cream together butter and sugar. Add eggs and almond extract. Mix in almond flour and all-purpose flour until smooth and creamy. Refrigerate it for 1 hour before using. You’ll LOVE the way this sweet, almond flavored cream compliments the fruit in this galette! You won’t use the entire recipe for this galette – you can either half my frangipane recipe, use it for other sweet, fruit dishes or freeze it for later use. Using frangipane is an optional step for this galette, but well worth it!
How to make a mixed berry star shaped galette
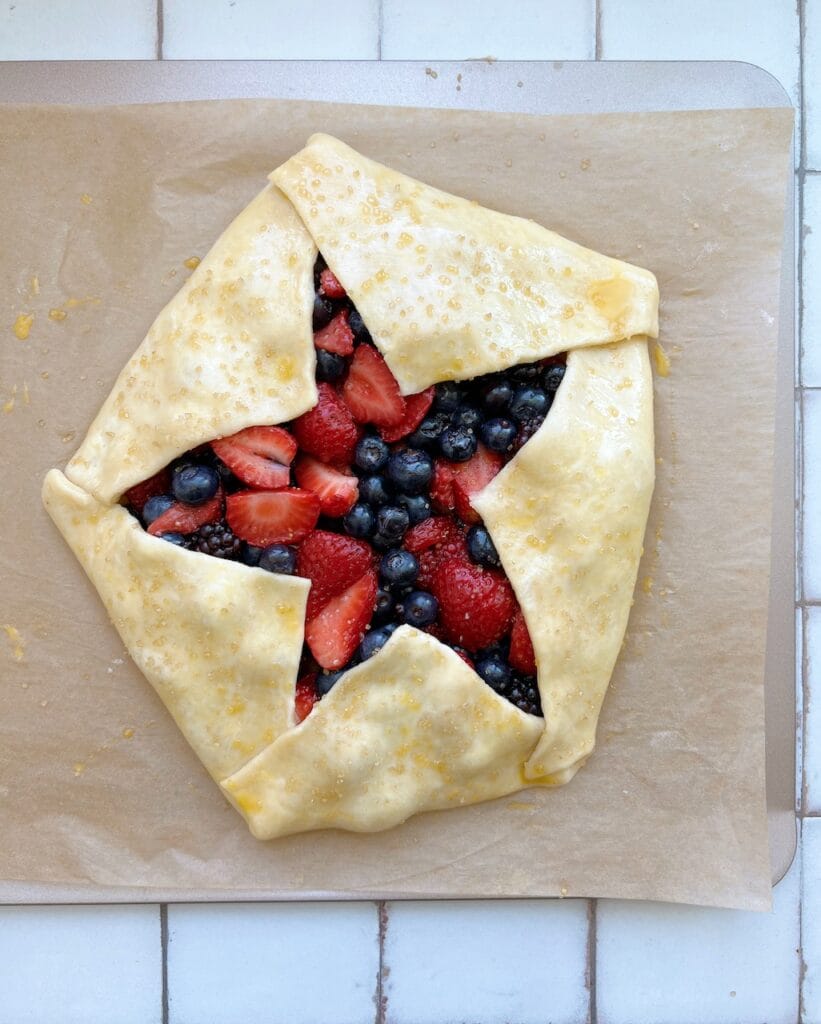
Galettes are a laid back approach to making a homemade pie, but I couldn’t resist making it a bit more patriotic for a Fourth of July dessert! With just a few extra steps, you can create a star shape in the middle of your fruit galette! See the pictures below to show each step.
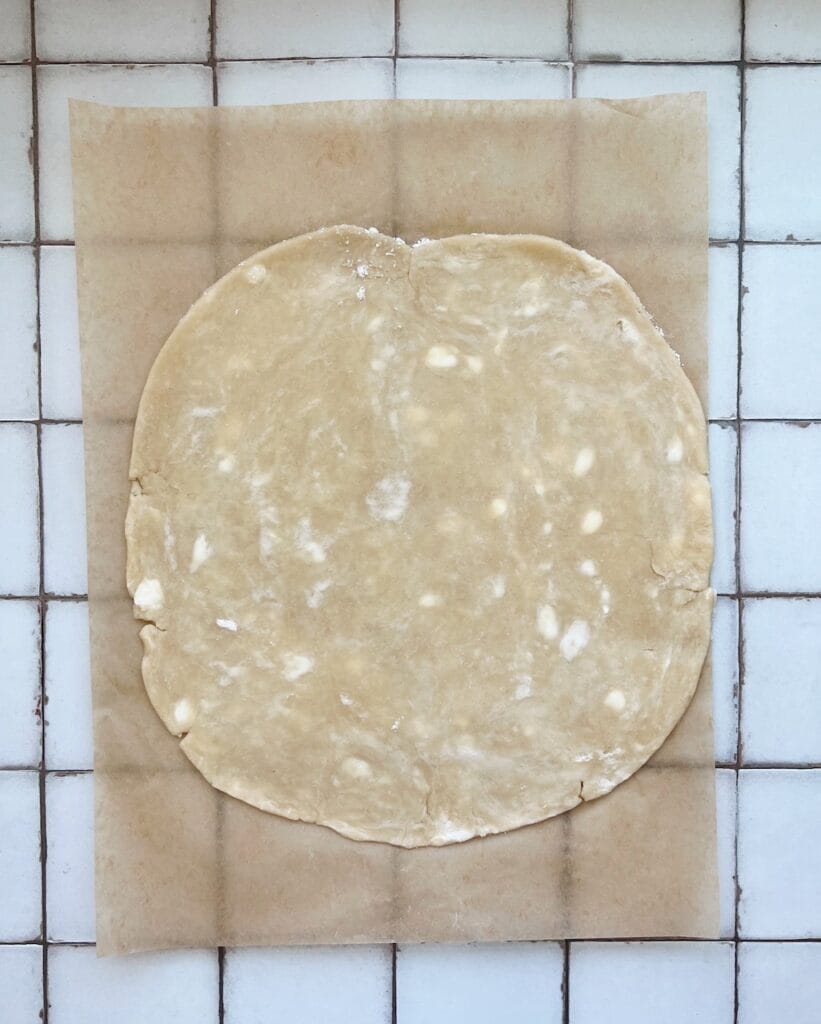
- Roll out chilled pie crust to a circle and transfer it to a sheet of parchment paper. I love using a homemade pie crust. I find it easiest to move the rolled out pie crust by flouring it, folding it in half twice (it will be a triangle), place it on top of the parchment and unfold.
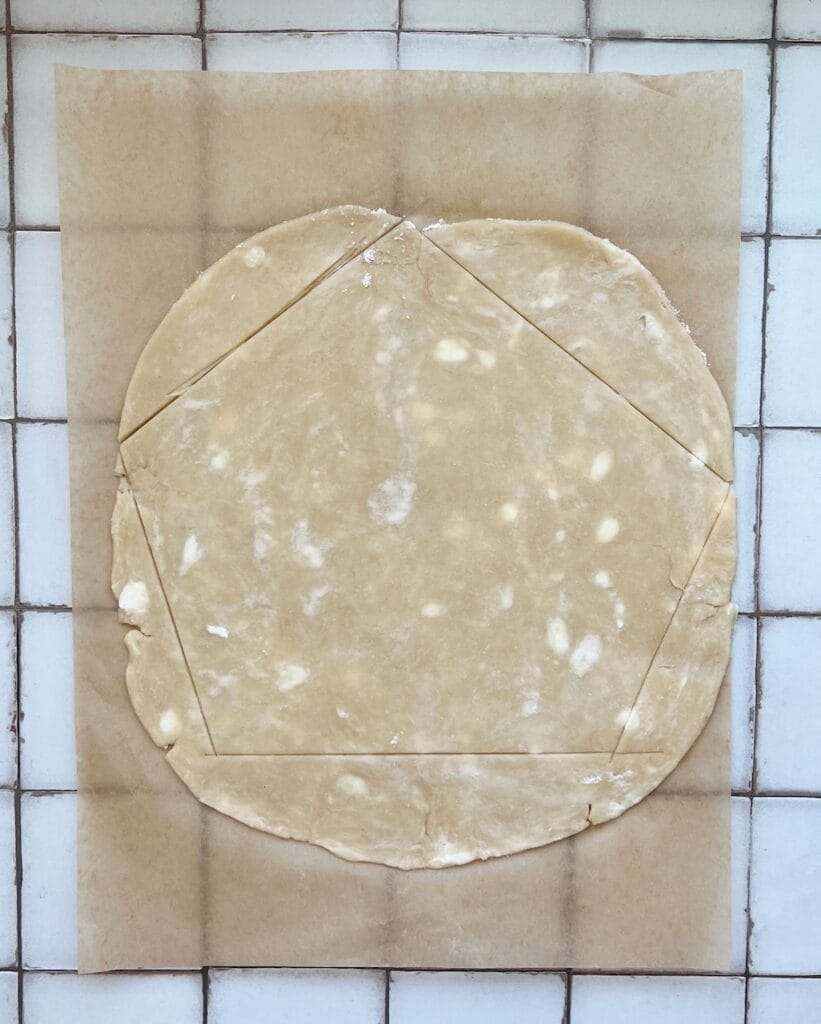
- Cut a pentagon (a 5 sided shape) out of your dough, utilizing as much of your dough as possible. Using the long, straight edge of a dough scraper works really well! Peel away the excess dough and set aside.
- Cut 1-inch slits in the center of each side. These slits will allow the sides of the dough to fold over and spread apart, making an interior star shape.
- Slide the parchment onto a baking sheet. It’s much easier to transfer BEFORE you add all the berries.
- Spread the homemade frangipane in the center. You’ll love the subtle almond flavor this adds! It also helps to soak up some of the fruit juices as it bakes! It’s a yummy addition but can be left out if you like.
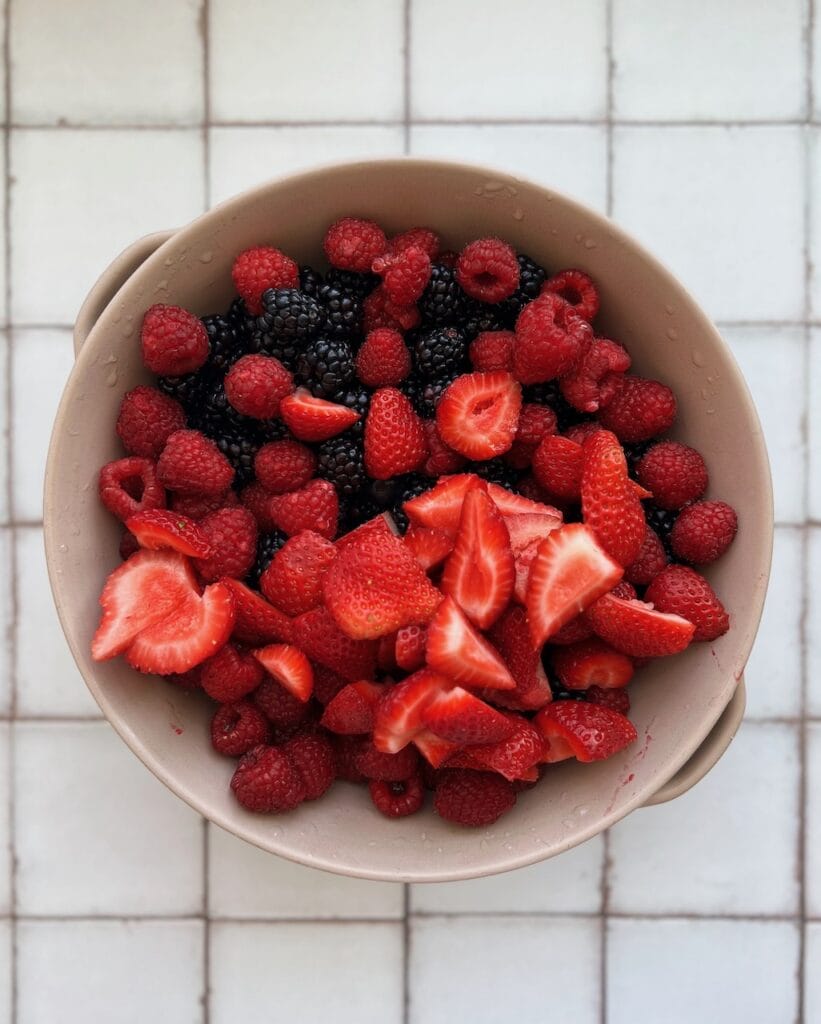
- Pile on the fruit! Use whatever combination of fruit you like, as long as you use about 4 1/2 – 5 cups in total. For this galette, I used strawberries, raspberries, blackberries and blueberries. Fruit reduces as it bakes, so you’ll want to use more than you think you’ll need.
- Fold the edges of the pie crust towards the center. Fold in the corners as needed to create the star in the center.
- Place it all in the refrigerator to chill for 30 minutes while you preheat the oven. It’s always best to bake pie crust COLD to help it keep its shape.
- Before baking, brush the pie crust with egg wash (whisk together an egg and a splash of water). Add sugar on top. You can use a granulated sugar or a more crystal sugar like turbinado.
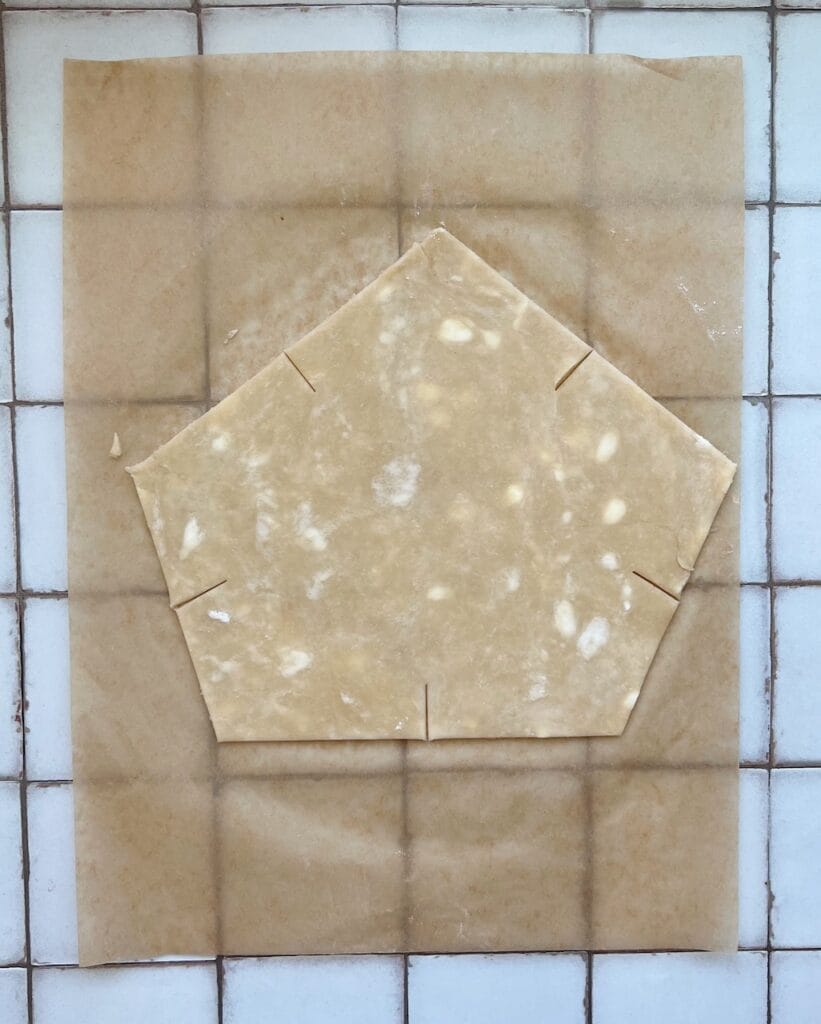
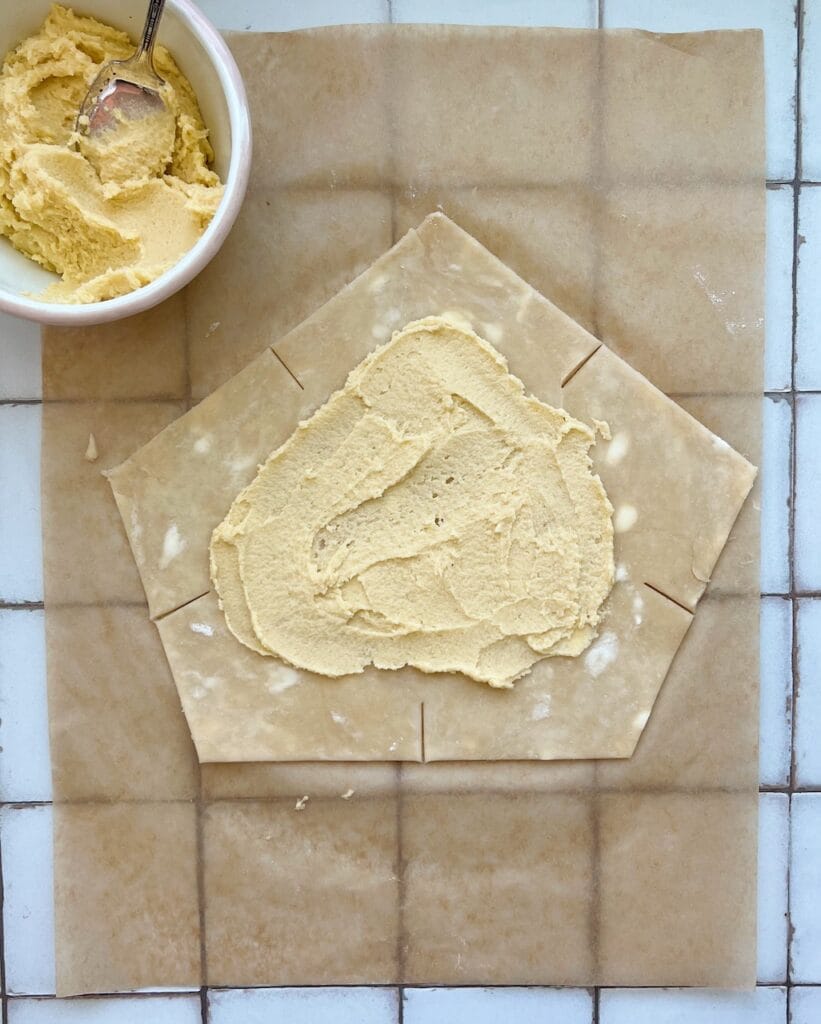
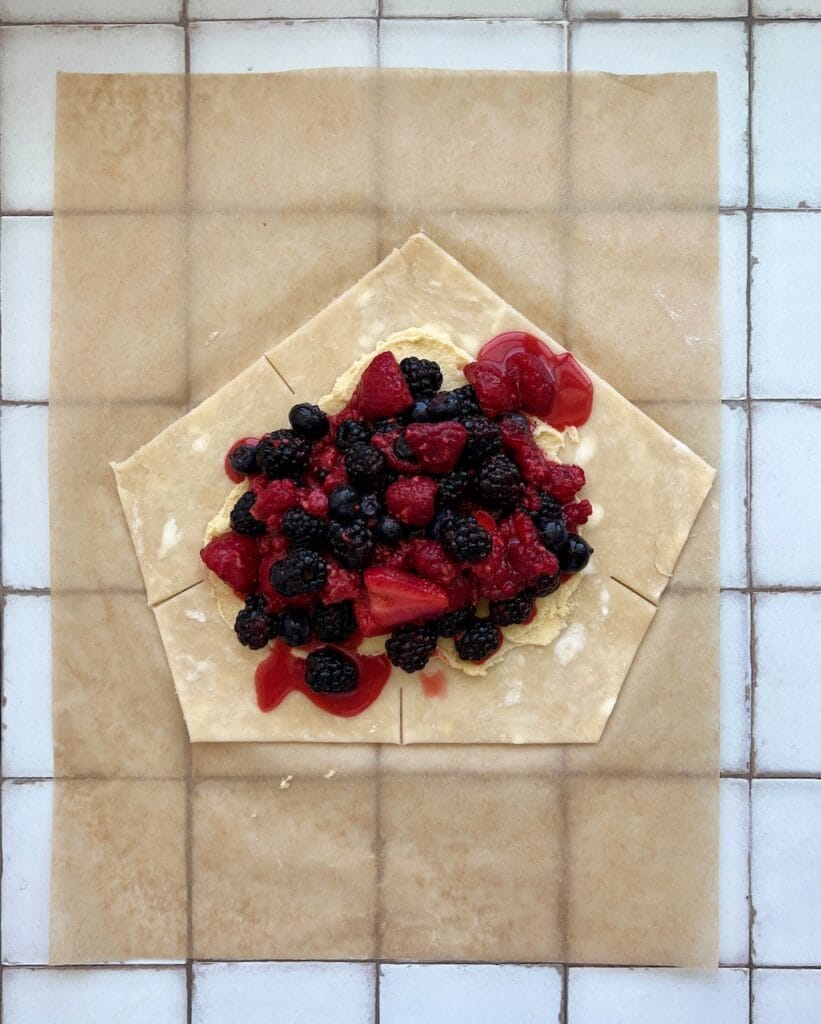
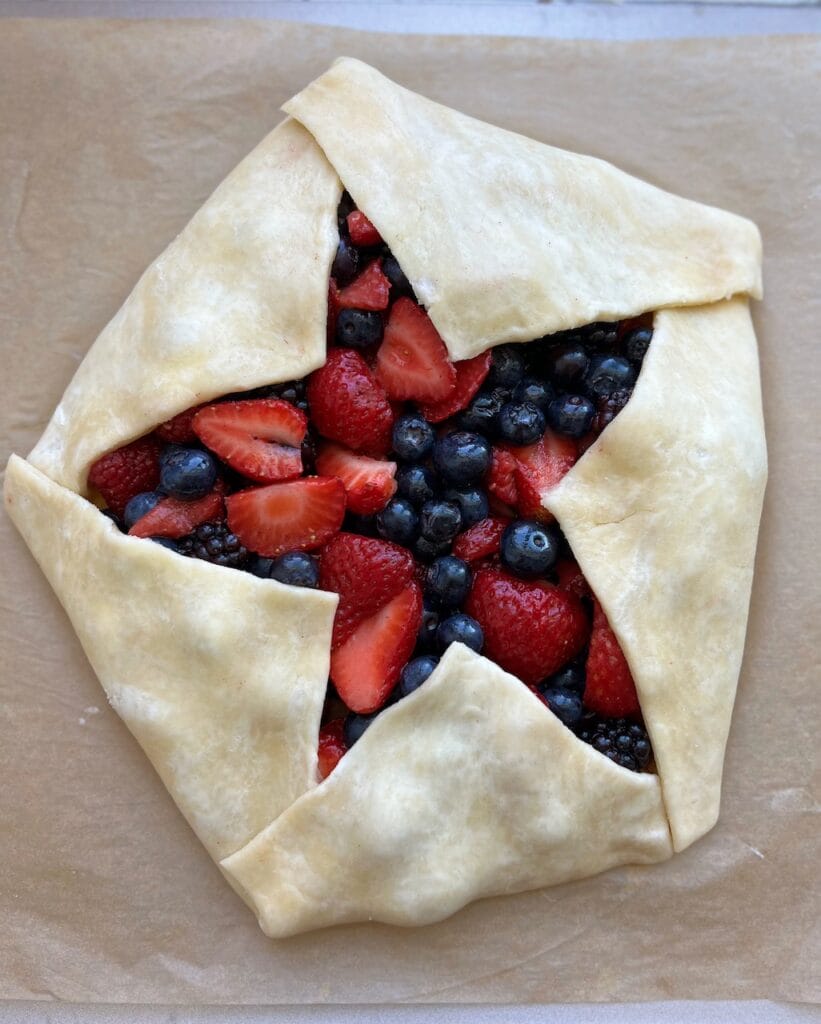
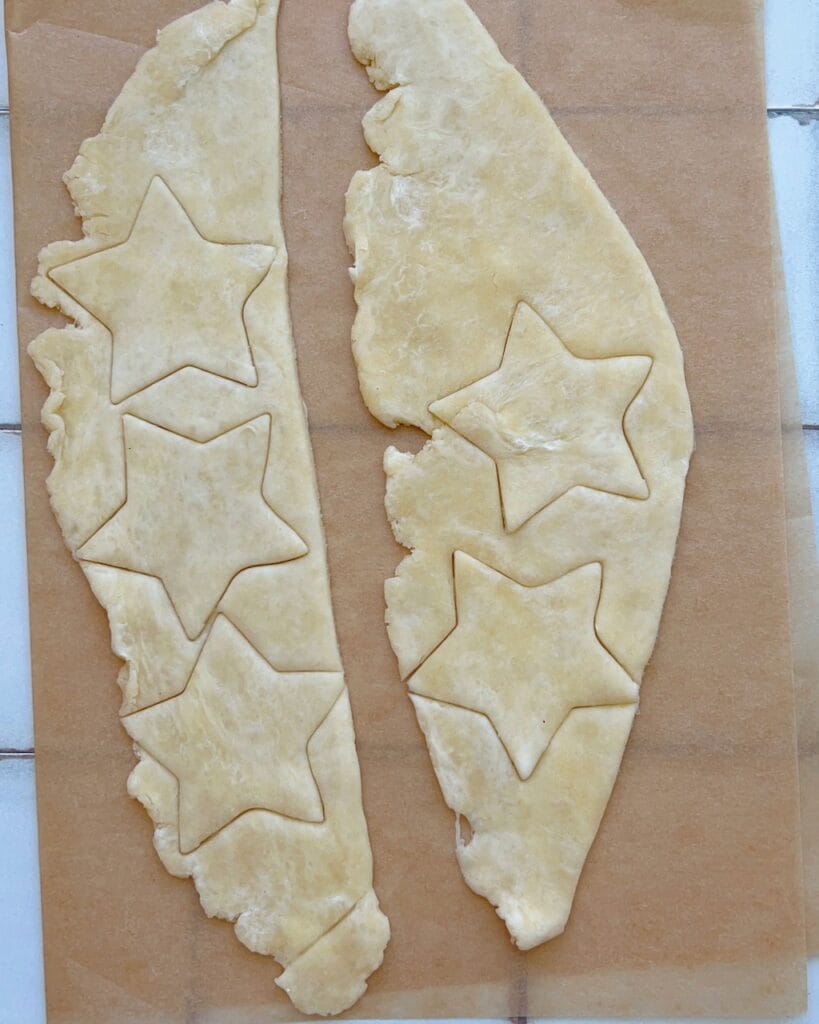
Remember those pie crust scraps you set aside? You can either refrigerate or freeze this extra crust for later use. Or you can cut out some small stars to bake separately and garnish your galette with them. If you decide to go this route, refrigerate them until you’re ready to bake them. Baking small stars will only take about 10-15 minutes at 400°F/204°C.
How to make a successful pie crust
Homemade pie crust is notorious for being finicky. I have a lot of tips about how to successfully mix and roll out a homemade pie crust on my Homemade Flaky Pie Crust post HERE. If you’re looking for even more help, I have a virtual Pie Making 101 Class HERE. The video is prerecorded so that you can watch the class on your own schedule and you can watch it as many times as needed! If you always seem to struggle with pie making, you’ll learn SO much in this class!!
A few important tips to remind you of:
- Use COLD ingredients for mixing.
- Handle the pie dough as little as possible.
- Chill the dough if it’s warming up during roll out.
- Pick up the dough and frequently rotate it a quarter turn when rolling out. This keeps it from sticking and tearing.
- Chill your pie/pie crust before baking. Baking a cold pie crust will help it keep its shape!
Typically a pie crust cracks because it is too dry. To add moisture to your dough, try watering your hands with ice cold water and pinch the dough together a few times. This will incorporate moisture into the dough without adding too much. Silicone baking mats are also really helpful for rolling out pie crust. You’ll be able to roll it out without using too much flour and it helps to keep your dough from sticking. Find more really helpful tips for making beautiful pies in my Pie Making 101 Class! 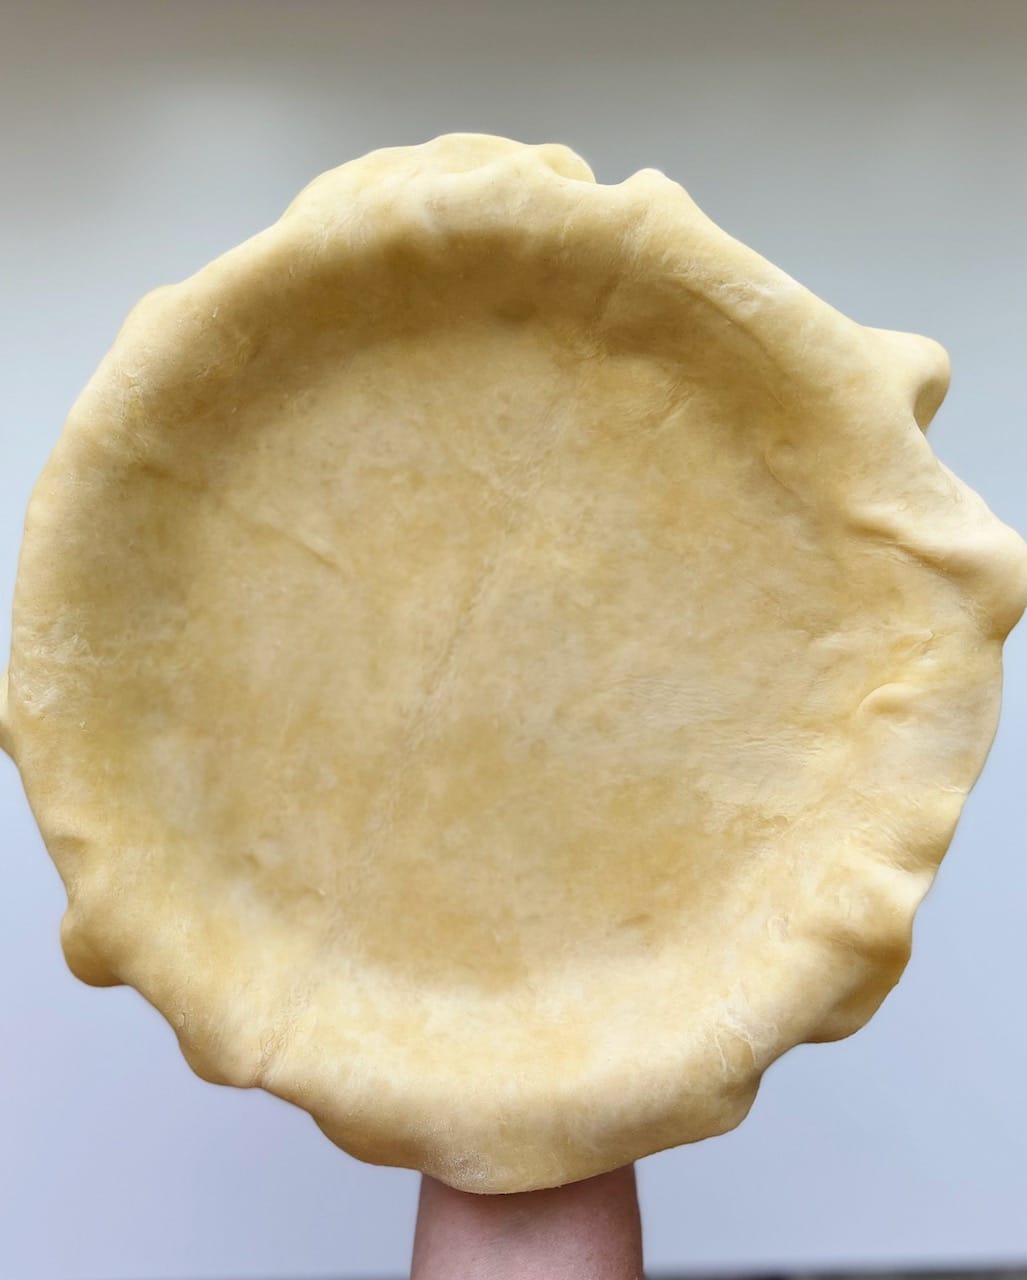
How to fill a fruit galette
There are so many different fillings you can use for a galette! Stone fruits like peaches, apricots, plums, nectarines and cherries work really well! Apple and pear slices look beautiful arranged in a unique pattern and design. You can also mix a stone fruit with berries, like peach and raspberry or nectarine and blueberries. The fun thing about galettes is you can play around with flavors, make it artistic and pretty much whatever you want!
Serving a fruit galette
You’ll know your galette is fully baked when the fruit is bubbling and the outer crust is golden. Let it cool for 10 minutes before slicing it up. This gives the filling time to set up and lets the crust continue to bake internally.
If you made some pie crust stars with your extra dough, you can use the cooling time to quickly bake them! Then you’ll place them in the center of your star-shaped fruit galette.
Serve your Galette with whipped cream or a scoop of vanilla ice cream! Slice it just as you would a pie. This mixed berry galette is so yummy when served warm with cold vanilla cream on top!

The patriotic star shape is an extra step, but makes this so much fun for American holidays! If you want to make this galette without the star shape, it will be fairly large. You may want to split the dough in half and make a slightly smaller galette (freezing the other half of the pie dough for later, or you could make two!).
Share and follow along!
I love to see how you are enjoying my recipes! Please leave a comment below and let me know how it turned out for you! Follow me on Instagram @thatbreadlady for more baking tips and videos! Be sure to tag me #thatbreadlady when you try one of my recipes. I’d love to see your baking successes!
(This post contains affiliate links. I receive a commission on purchases made from affiliate links, at no cost to you.)
PrintMixed Berry Star Galette
Galettes are free-form pies that are easy to put together with a variety of different fillings. This star shaped galette is first filled with homemade frangipane to add a subtle almond flavor. Pile on some red and blue mixed berries and then cut the pie crust to make a star shaped galette for the perfect Fourth of July dessert!
- Prep Time: 2 hours 10 minutes
- Cook Time: 40 minutes
- Total Time: 2 hours 50 minutes
- Yield: 8–10 servings 1x
Ingredients
- 1 batch of my Homemade Flaky Pie Crust
- 4 & 1/2 – 5 cups of berries of your choice – I like to use strawberries, blackberries, blueberries & raspberries
- 1/3 cup (66g) granulated sugar
- the juice of one lemon
- 1 Tablespoon cornstarch
- 1/4 teaspoon ground cinnamon
- 1/4 teaspoon ground nutmeg
- a pinch of salt
- 1 egg, beaten with a splash of water for the egg wash
- Optional: Homemade Frangipane (you will only use half this recipe)
- Optional: 2 Tablespoons granular sugar, or turbinado sugar for finishing
Instructions
- Prepare pie crust dough and chill for at least 2 hours before rolling out. (*See notes for using this pie crust)
- If making the frangipane, prepare it before rolling out the pie dough.
- In a large bowl, add the berries, granulated sugar, lemon juice, cornstarch, cinnamon, nutmeg and pinch of salt. Gently combine until all the berries are coated in the mixture. Set aside.
- On a lightly floured work surface, roll out pie dough to about a 16-inch circle. Flour the top of the dough, fold it in half. Flour it and fold it in half again. Your dough should be in a triangle shape. Using a dough scraper, lift the dough onto a piece of parchment paper.
- Unfold the dough and center it on the parchment. Using a knife or dough scraper, trim the dough to create a 5-sided shape (a pentagon). See recipe post for picture. Save the dough scraps and set aside (see notes for using these). Cut 1-inch slits in the center of the edge of each of the 5 straight sides. Slide parchment and dough onto a rimmed baking sheet.
- Spread the frangipane in the center of the dough, generously using about 1 cup of it. Leave a 2-inch border unfilled. Drain the mixed berry filling from any juices and add them on top of the frangipane, again leaving a 2-inch border around the edge of the dough. Fold the edges of the dough towards the center. Fold in the dough at the slits, as necessary, to create a center star shape. Place the baking sheet with the galette into the refrigerator for 30 minutes while the oven preheats.
- Arrange the oven rack on the slot just below the center position. Preheat oven to 400°F/204°C.
- Before baking, brush the pie crust with the egg wash. Top with granular sugar for more sweetness and extra crunch.
- Bake galette for 40-50 minutes. The berry filling should be bubbling, and the crust should be a golden brown. If the crust is browning too quickly, lightly place a sheet of aluminum foil over the top of the galette. Allow it to cool for 10-15 minutes.
- Serve with whipped cream or vanilla ice cream. Enjoy!
- Cover and store any leftovers in the refrigerator for up to 4 days.
Notes
- *This recipe uses both pie crusts to make one big galette. If you choose to divide the pie crust into two, and make a smaller galette, you will only use half of the suggested frangipane and berry filling for each smaller galette. You will also need to reduce the bake time by about 5-10 minutes. Check your galette at 25 minutes and then gauge additional bake time from there.
- To use the leftover dough scraps, use a small star cookie cutter to cut out shapes. After the galette comes out of the oven and is cooling, brush the cut out stars with egg wash, bake for 10-15 minutes, until golden brown. Arrange the stars on the center of the galette, over the berries, for an extra patriotic look! If you still have extra dough scraps, you can press them into a ball, wrap in plastic wrap and freeze for later use.
Keywords: star shaped galette, pie, berry galette


This looks so good! Would you change anything if using frozen berries?
I would keep everything the same with frozen berries. But if you get liquid in the bottom of your bowl as the fruit sits before filling, be sure you don’t pour that into the galette.
Ok there it is!! Thanks, no juice.
Hi Gail, I am glad it was yummy! Practice some more with the star shaping. It really is easier to shape when your pie crust is COLD. And yes, it would definitely be challenging to cut out stars by hand! A cookie cutter makes that job much easier! Kudos to you for giving it a try! Thank you for sharing how it went for you. I have updated my recipe to hopefully make it a bit clearer about how much pie crust to use and to drain the berry filling before adding it. Thank you! Happy baking!
I’m making it now, Waiting for oven to preheat. My attempt at the large star is weak, and the little stars – without a cutter, was a lost cause. I found the berry mixture to be very juicy and was unclear about the juice. I think maybe until I master this, not cut away all that gorgeous home made dough! Esp since I can’t make stars. Will make this recipe again, next time just round the edges up in a circle. Made your frangipani too! Yummmm. Hope it turns out edible if not a star lol
Super yummy!!! Not especially pretty to look at it but awesome flavors!! Going to get more berries and do it again using the 2d crust into an organic roundish shape. My guess – scoop fruit with slotted spoon to minimize juice?