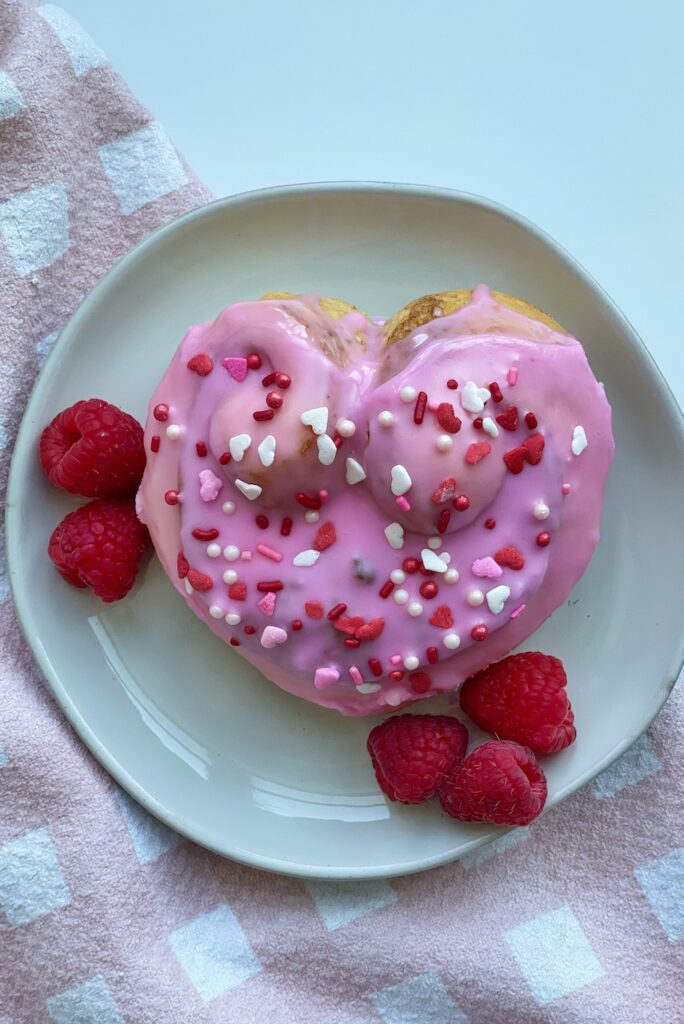
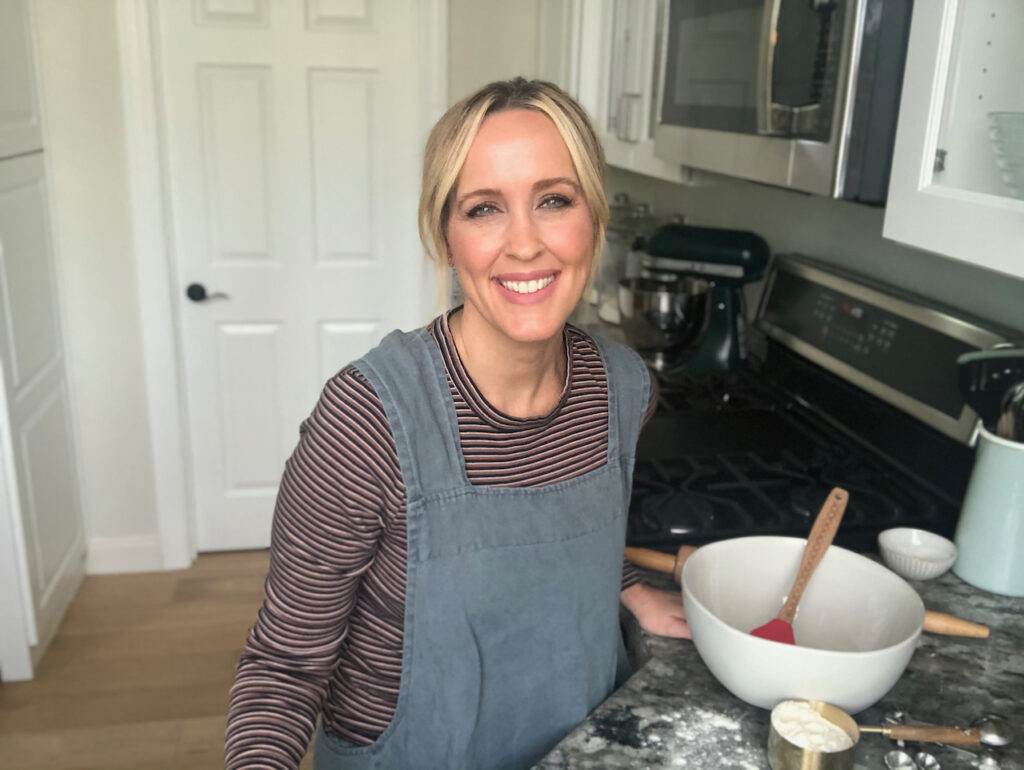
Heart Shaped Cinnamon Rolls
These adorable heart shape cinnamon rolls are so much fun for a special day to show some love! Made with an easy cinnamon roll dough recipe, filled with a brown sugar and cinnamon mixture and topped with a pink sweet icing – they’ll be sure to impress your sweetheart!
In this blog post, I’ll share every step of this sweet roll recipe with you! From making the soft dough to shaping the hearts, I’ll tell you how make these successfully! If this is your first time making a roll dough or if you aren’t confident in your bread making skills, you might find my virtual Cinnamon Roll Class helpful! I have several recipes that I offer as a virtual class with a pre-recorded video, to help guide you through the recipe from start to finish! It really helps remove any apprehensions you might have about bread making! You can go HERE to find more about my classes!
This cinnamon roll recipe is one I’ve been using for years! It’s one of my most favorite easy recipes! In fact, it’s the recipe I used to make my famous cinnamon rolls for my bakery! I’ve made tens of thousands of cinnamon rolls, but still never tire of them! They’re just the most delicious cinnamon rolls!
Making these amazing cinnamon rolls into the shape of a heart is a great way to change up this classic sweet roll and show some love!
How to bake with yeast
First thing’s first – if you’re new to working with yeast, here’s a quick run down. Working with yeast dough can be intimidating at first, but the more you do it, the more comfortable you will get! Yeast is a living organism that just needs the right conditions to thrive. It feeds off of sugar and starches. When it feeds, it releases carbon dioxide gas in the form of air bubbles in the dough. This process is also known as “fermentation”. This is what gives bread dough its volume and airy texture.
If you want more information about yeast, check out my article about Active Dry Yeast vs. Instant Yeast. I also have a Guide to making Sourdough Starter, which is how to make a natural yeast.
Ingredients
There are some unique ingredients in this recipe that makes it so delicious! Each serves an important role in how this dough and these cinnamon rolls will turn out. Each ingredient in bold is linked in case you want to find it on Amazon.
- Bread flour: Most bread recipes will use bread flour. It has a higher protein content (11-13%) than an all-purpose flour. Higher protein flours also mean a higher gluten flour – yielding a bread with a strong crumb structure.
- Powdered milk: In baked goods it provides a creamier flavor and helps yield a more golden brown color when baked. Look for powdered milk that is fine in texture. If you are looking for a non dairy option, try using a milk powder substitute like coconut, soy or rice powder.
- Eggs: Eggs in bread help to create a fluffy, big rise. They are perfect for these rolls!
- Potato Flakes: Potato flakes in bread make the crumb more moist and tender. They also extend the shelf life of homemade bread.
- Butter Flavor Shortening: Vegetable shortening has a high melt point, allowing it to create more steam in the dough when baked. This produces a lighter, airy texture bread. The butter flavor gives it a more rich, butter flavor. If you can’t find the Butter Flavor Shortening, use plain shortening – it will still turn out amazing!
Mixing the Homemade Dough
I love baking with this dough! It’s such a pillowy, soft dough that’s so easy to work with! I use it in several other recipes like my Homemade Orange Sweet Rolls, Traditional Cinnamon Rolls, Crescent Dinner Rolls and S’mores Sweet Rolls! You’ll see it is so easy to mix up and use.
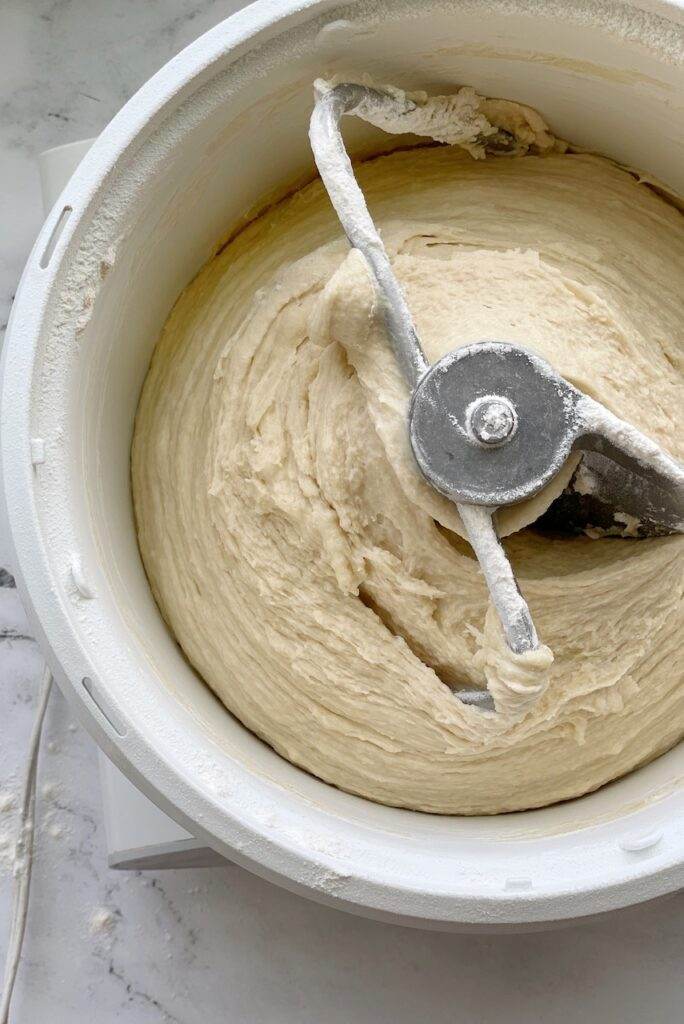
You will need to use some type of a stand mixer to make this dough. My favorite mixer to use for bread doughs is by far my Bosch Universal Plus mixer! It is widely known as one of the best home kitchen mixers for mixing bread dough with ease. It has a high mixing capacity and high performing motor – making it an excellent option for mixing denser doughs like bread. It also allows you to mix larger quantities. I will usually double this recipe if using my Bosch mixer. Go HERE to learn more about my favorite mixer that I’ve baked with for over 20 years!
If you don’t have a Bosch mixer, the recipe I’m providing you with will fit nicely in a Kitchen Aid type stand mixer. Whichever mixer you use, be sure to use your dough hook attachment.
Measure out all of your ingredients ahead of time. I always do this when making a recipe – it helps to prevent me from making any mistakes in measurements or leaving out ingredients. It also makes the mixing process go much smoother. I always suggest weighing out your ingredients with a food scale – you will get much more accurate results!
In a large bowl, combine the warm water, powdered milk, potato flakes, sugar, salt, yeast. Whisk them together – this helps to break up the powdered milk and potato flakes and gets all of those ingredients incorporated before adding the heavier ingredients. Pour the yeast mixture into the bowl of a stand mixer.
Add the eggs, room temperature butter and shortening. Add 3 cups of the flour (about half) and mix on low, just until all of the ingredients are combined and smooth.
While the mixer is on low, gradually add two cups of the remaining flour, 1/2 cup at a time, mixing well after each addition. This is where getting to know your dough comes into play. You’re looking for the dough to clean the sides of the bowl as it’s mixing. It should be concentrated around your dough hook. Once you get it to this point, stop the mixer and lightly tap on the dough with your finger. If it feels soft, but not wet and sticky & is cleaning the sides of the bowl, it’s ready to knead. Return to mixing it on low and allow your mixer to knead it for 5 minutes.
My number one tip for mixing this dough
Avoid the urge to add more flour. This dough is very soft and easy to work with – it’s very forgiving! You may see a little bit of dough sticking to the sides of the bowl when it’s kneading – don’t panic! Go by how it FEELS. You want to use just enough flour so that it doesn’t feel wet or excessively sticky. Too much flour in your dough will give you dry, dense rolls. You can always add a bit more flour after it has kneaded if it’s too sticky to work with.
Double Rise
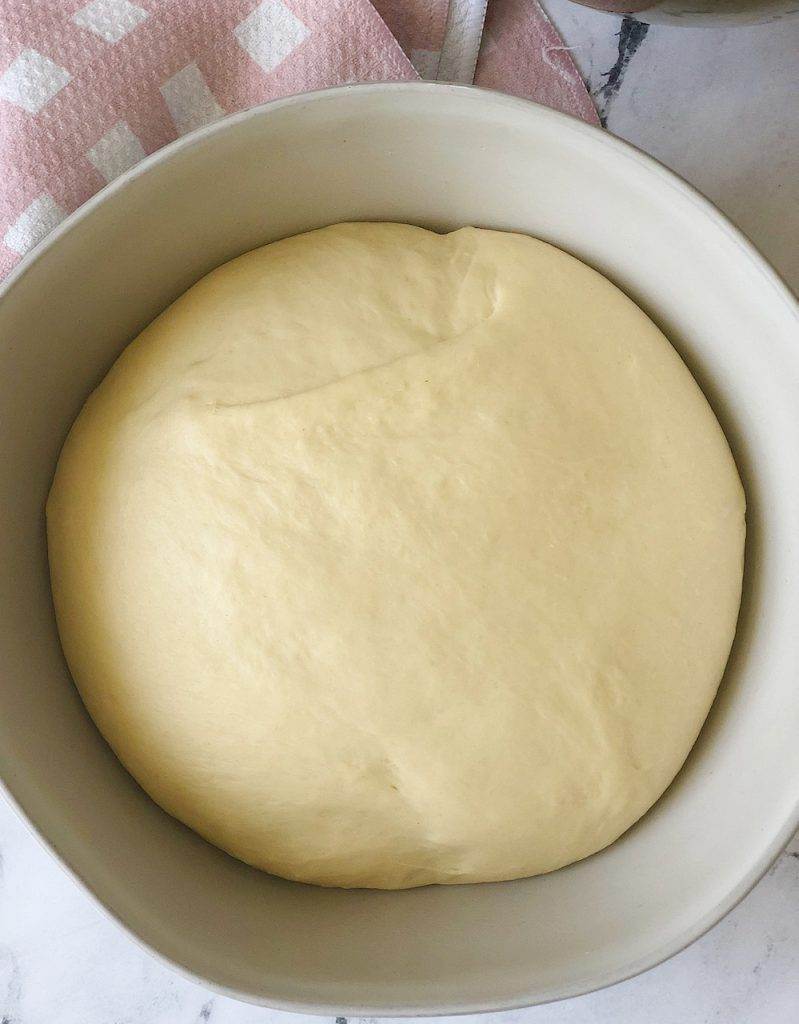
Like most bread doughs, this roll dough will have a double rise – meaning you will let it rise twice. Remember, the process of “rising” is simply allowing the yeast to feed and create those magical air bubbles in the dough.
The first rise happens right after the kneading is over, but before you divide and roll out the cinnamon rolls. The first rise in bread making is called the “Bulk Fermentation”. It is vital to the development of your dough structure. It creates important volume and gluten development. You’ll see that after the bulk fermentation, your dough will be much easier to work with!
For the first dough rise, place the dough in a greased bowl and cover with a clean kitchen towel or plastic wrap. Put it in a draft-free place in your kitchen. The first rise typically takes about 60-90 minutes, depending on the ambient temperature of your kitchen. You want to keep your dough covered, in a warm place in your kitchen. You are looking for your dough to double in size.
The second rise happens after you have shaped the rolls and place them onto the pan. This is called “proofing”. The second rise will usually take about half of the first rise time. Your beautiful rolls will puff up to double in size at this point, usually taking about 45 minutes.


Shaping the hearts
Get your work space all ready with everything you need at your fingertips. You’ll need a small bowl with flour, a rolling pin, floss, your cinnamon brown sugar mixture and melted unsalted butter.
- Divide the dough into two equal pieces, about 28-30-ounce portions. Round each portion to an oval shaped ball by pulling and tucking the dough under. This will make it easier to roll out into a rectangle.
- Flour your work surface and roll the dough out to a rectangular shape, about 10 inches by 18 inches and 1/4 inch thick.
- With a silicon brush, spread the melted butter on the dough. Sprinkle on a generous amount of cinnamon sugar and spread it out to the edges.
- Place a piece of floss in the center of the dough, lengthwise, creating a visual guide.
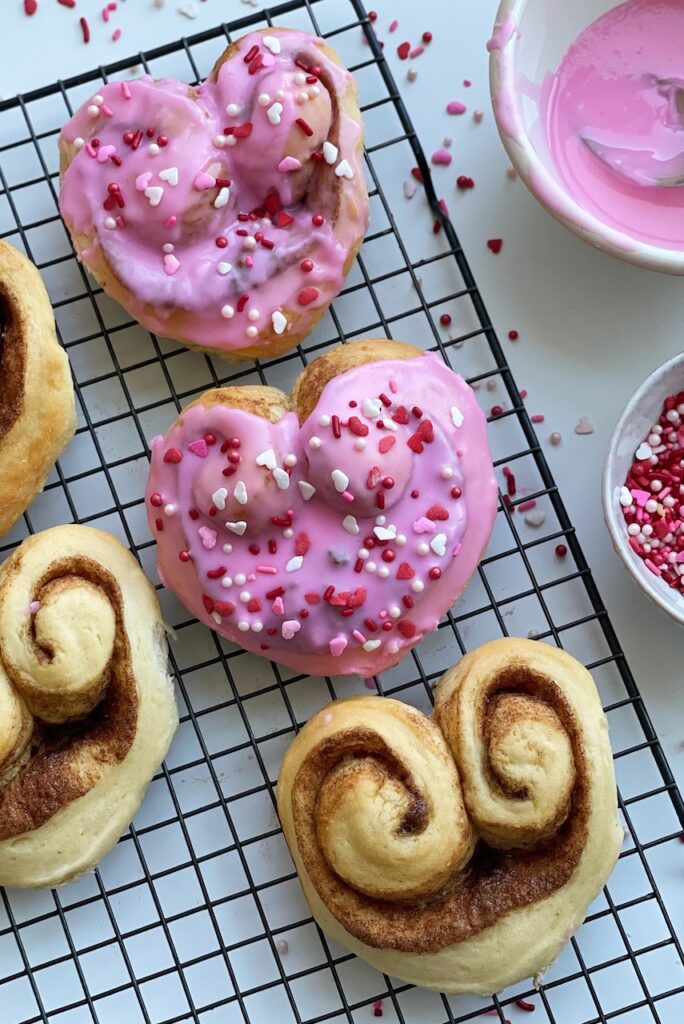
- Start with the long side, closest to you and working from left to right begin to roll the dough up. You can tug and pull as you go which will tighten the roll and make more swirls. Roll towards the center where the floss is. Stop rolling when you get to the center and roll up the other side towards the center – meeting them both in middle.
- Pull the floss out and use it to cut cinnamon rolls around
- When ready to make your cuts, slide the floss under one end of the dough, bring the ends of the floss up, cross them over and tug to cut through the dough to make a 2-inch-wide roll. There should be two side-by-side swirls connected at the bottom. Continue to cut to get 9 equal sized sweet rolls.
- Place the rolls on a baking pan Lined with parchment paper, about 2 inches apart. With lightly floured fingers, gently flatten the rolls while pinching the bottom into a point, forming a heart. Once all of your cinnamon rolls are shaped, cover them with a clean kitchen towel and let them rise until doubled in size, depending on how warm your kitchen is, it should take about 45 – 60 minutes.

Baking
Be sure to fully preheat your oven. It typically takes a good thirty minutes for an oven to preheat. My baking changed so much when I started using an oven thermometer like this one. I love to use my Convection option on my oven for baking breads – it circulates the air, cooking all sides evenly. Some ovens will automatically change the oven temperature to compensate for convection baking. Check your oven manual, but using an oven thermometer will take out the guess work for you.
Place your cookie sheet on the middle rack of your oven and bake the cinnamon rolls at 350°F for 20-22 minutes, or until the edges are slightly golden. Let the cinnamon rolls cool on the pan for 10-15 minutes before removing them to a wire cooling rack.
Icing
I like to wait for the cinnamon rolls to mostly cool, about 30 minutes, before icing. If you ice them while they’re still hot it will melt the icing and won’t give your cinnamon rolls much coverage.
This icing is super simple and can easily be mixed by hand in just a few minutes! If you prefer a cream cheese frosting, try my delicious Cream Cheese Frosting recipe! You could tint it and sprinkle on some Valentine sprinkles to make it extra adorable! Be sure to store any extra cinnamon rolls in an airtight container or covered with plastic wrap to keep them from drying out.
Whether you’re making your sweetheart cinnamon rolls for Valentine’s Day or making your kids a special treat, anyone you share these with will love them, and YOU!
Share & Follow
Be sure to follow me on Instagram (@thatbreadlady) for more tips, videos and recipes! And post your results if you try this recipe!
Also, be sure to leave a comment below and let me know how you like these adorable cinnamon rolls!
(This post contains affiliate links, but good news – I only recommend products I love!)
More recipes to try
Have you heard about my baking membership?
If you are new to bread making, or just looking to improve your baking skills, be sure to check out my Virtual Baking Classes! They are pre-recorded videos, showing you how to complete a recipe from start to finish! Included in my Class Library is Cinnamon Rolls so if this recipe seems a bit daunting, my video will help you to make these yummy rolls successfully!
If there’s several classes you’re interested in, my Baking Academy is a great option for you – you can get access to ALL of my classes for one low price!
You can go HERE to learn all about it!

Heart Shaped Cinnamon Rolls
Ingredients
Dough Ingredients:
- 2 cups warm water (about 115°F)
- ¼ cup nonfat powdered milk
- ½ cup boxed potato flakes
- ½ cup granulated sugar
- 1 Tablespoon plus 1 teaspoon instant yeast*
- 1 ½ teaspoons salt
- ¼ cup unsalted butter, room temperature
- ½ cup butter flavored shortening
- 2 large eggs
- 5-6 cups bread flour
Filling Ingredients:
- ¼ cup salted butter melted
- ¾ cups dark brown sugar
- 4 Tablespoons ground cinnamon
Pink Icing:
- 2 cups powdered sugar
- ½ teaspoon vanilla
- 2-4 Tablespoons milk or enough to yield a thick glaze (use 2%, whole or cream)
- 1-3 drops pink gel food coloring
Topping:
- Your favorite sprinkles or small candies for an extra sweet touch!
Instructions
Prepare the dough:
- In a large bowl, combine warm water, powdered milk, potato flakes, sugar, yeast and salt. Mix well with a wire whisk. Pour into the mixer bowl and secure the dough hook attachment to your mixer.
- Add the butter, butter flavored shortening and eggs. Add 3 cups of the bread flour. Mix for about 30 seconds until ingredients are incorporated. Stop the mixer and scrape down sides of bowl with a spatula.
- Turn mixer on low and add 2 more cups of the bread flour, 1/2 cup at a time. After adding the 2 cups of flour, let dough continue to mix for about 1 minute. Stop and scrape the sides of the bowl as needed. If dough is not mostly cleaning sides of the bowl, add more flour 1/4 cup at a time until it cleans the sides of the bowl. Stop the mixer and check the dough by gently pressing your finger into it. The dough should feel soft but not wet or sticky. *When in doubt, it’s always best to go lighter on the flour. You can always add more flour, but you can’t take flour away. Too much flour in your dough will give you dry, dense rolls.
- Knead on low speed for 5 minutes.
- Remove dough from mixer and place in a greased bowl. Cover with a clean kitchen towel and let rise until doubled in size, about 60-90 minutes.
Prepare the filling:
- Melt 1/4 cup salted butter and set aside.
- In a separate bowl, combine the brown sugar and cinnamon. Set aside.
It’s time to roll:
- Divide dough into two 28-30-ounce portions. If you don’t have a scale, you can eyeball it. Round each portion to an oval shaped piece of dough by pulling and tucking it under. This will make it easier to roll out into a rectangle.
- Flour your work surface and roll dough out to a rectangular shape, about 10 inches by 18 inches.
- Spread butter over the surface of the dough. Sprinkle about 1/3 cup of the cinnamon sugar mixture on top of the butter.
- Place a piece of floss in the center of the dough, lengthwise, creating a visual guide.
- Start with one corner and along the 18-inch side, begin to roll the dough up. You can tug and pull as you go which will tighten the roll and make more swirls. Roll towards the center where the floss. Stop rolling when you get to the center. Then repeat with the other 18-inch side towards the center – meeting them both in middle.
- Pull the floss out and use it to cut 9, 2-inch cinnamon rolls. Simply wrap each end of the floss around your index fingers, slide it under the dough, bring each end of the floss up, cross and tug. It will create a clean cut without smashing your cinnamon rolls. There should be two side-by side swirls connected at the bottom.
- Place the rolls on a baking pan lined with parchment paper, about 2 inches apart. With lightly floured fingers, gently flatten the rolls while pinching the bottom into a point, forming a heart. Once all of your cinnamon rolls are shaped, cover them with a clean kitchen towel and let them rise until doubled in size, depending on how warm your kitchen is, it should take about 45 – 60 minutes.
Bake:
- Bake in a fully preheated 350°F oven for 18-22 minutes or until edges are just golden brown. Allow to cool for 15 minutes on the pan before transferring them to a wire rack. Let them cool completely before icing.
Make the Pink Icing:
- In a medium bowl, sift the powdered sugar. Add the vanilla. Add 1-2 Tablespoons of milk at a time and mix with wire whisk. Continue to add just enough milk to get it to a thick glaze. Tint with pink gel food coloring.
- Drizzle over cooled cinnamon rolls. Add sprinkles before the icing sets. It should set up within 10-15 minutes. Using a thick glaze like this will prevent the icing from getting absorbed by the rolls.
- Serve and enjoy!
Notes
- Store any leftover cinnamon rolls by covering with plastic wrap. They will stay fresh for 2-3 days.
- To save time, roll them out and place in the refrigerator the night before. This will slow down the rise, allowing you to bake them in the morning. Take them out and preheat your oven for 30 minutes before baking.
- This dough is the same base dough for my Crescent Dinner Rolls. It can also be used for various sweet rolls by switching up the filling and the frosting.
- Be sure to let them rise until doubled in size. Not letting them rise long enough will result in smaller, dense rolls. On the other hand, letting them rise too long will cause them to collapse and flatten after baked.