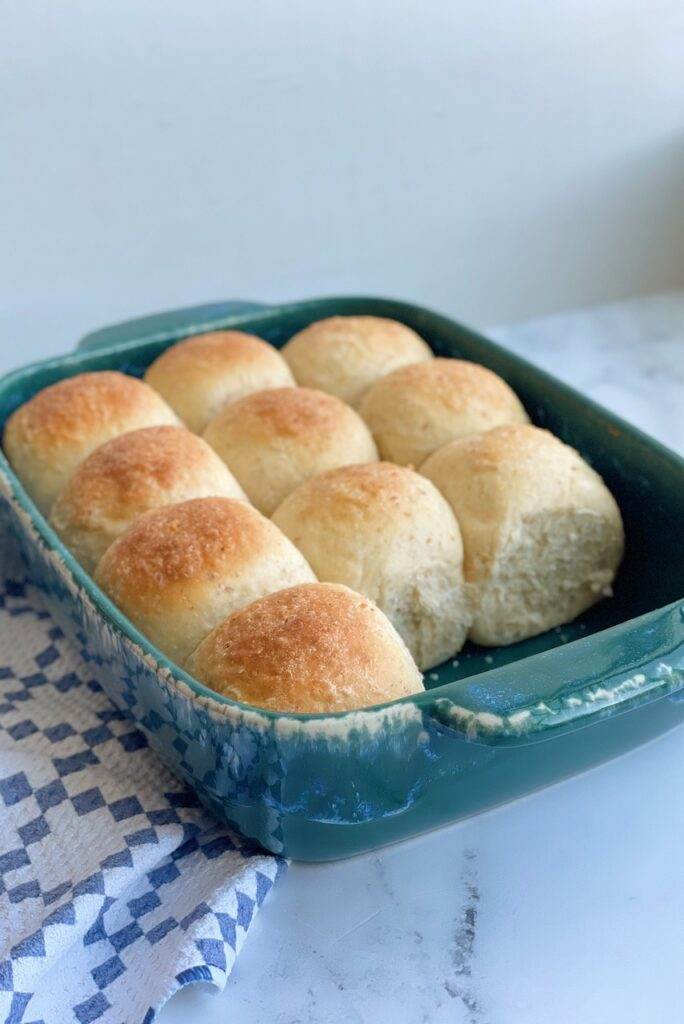
Super Fluffy Whole Grain Dinner Rolls
These super fluffy whole grain dinner rolls are so delicious, it’s hard to believe they’re on the healthier side! Lightly sweetened with honey and packed full of whole grains, they are a hearty dinner roll everyone will love!

Whole grain rolls have a bad rap – let’s face it. Most of them are really dry and crumbly, or are extremely dense and anything but fluffy. I love this recipe because it tackles all of those issues! You will be pleasantly surprised at how fluffy and delicious they are!
This is a healthier take on another one of my classic recipes that I love, my Skillet Dinner Rolls. If you like these fluffy wholegrain dinner rolls, you’ll love the skillet rolls too!
There are a few key ingredients that make these rolls extra fluffy.
Ingredients
- Buttermilk – In baking, the results from using buttermilk can create incredible results! Buttermilk adds a soft, fluffy texture and a rich flavor that can’t be beat!
- Eggs – They are known for creating structure and rise in baking recipes. Add eggs to this dough gives us all of those benefits!
- Bread flour – It’s really the way to go if you want to get a bread structure that has an amazing rise. Bread flour has a higher protein content than an all purpose flour, meaning it will yield a lofty rise. I love to combine bread flour with whole wheat flour – it helps to give a fluffier texture as opposed to using 100% whole grains. Finding bread flour shouldn’t be too difficult. You can usually find it in your grocery store. I always like to go with an unbleached bread flour like this one.
- 10-grain hot cereal mix – I like to use this mix from Bob’s Red Mill. It’s a mixture full of good-for-you whole grains that is fairly fine in texture. It has grains like wheat, rye, oats, barley and flaxseed.
- Whole Wheat Flour – This adds extra nutrition and hearty flavor! I use this Nutrimill Flour Mill to mill my own whole grain flour at home. You can find my favorite grain here. It’s super easy to use! If you don’t have the capability to mill your own flour, you can grab some white whole wheat flour here.
How to bake with yeast
First thing’s first – if you’re new to working with yeast, here’s a quick run down. Working with yeast dough can be intimidating at first, but the more you do it, the more comfortable you will get! Yeast is a living organism that just needs the right conditions to thrive. It feeds off of sugar and starches. When it feeds, it releases carbon dioxide gas in the form of air bubbles in the dough. This process is also known as “fermentation”. This is what gives bread dough its volume and airy texture.
If you want more information about yeast, check out my article about Active Dry Yeast vs. Instant Yeast. I also have a Guide to making Sourdough Starter, which is how to make a natural yeast.

Mixing the Dough
I prefer to mix most of my bread doughs with an electric mixer. It makes my life a whole lot easier! My Bosch Universal Plus Mixer is my favorite mixer for making bread dough. It has a super strong motor, large mixing capacity and superior kneading capability. If you don’t have a mixer, you could definitely mix this dough by hand. The kneading process may take a little bit longer, but it’s worth the pay off!
This recipe can be made in three hours. In this post, I’ll share some time saving tips to help you make freshly baked rolls without having to start from scratch every time!
- In a small bowl, combine the 10-grain cereal mix and boiling hot water. Let it sit and hydrate for about 15 minutes. During this time, the grains will soak up all of the water and cool slightly. Make sure it has cooled to around 100°F before mixing the recipe. If it’s too hot (more than 130°F) it could kill the yeast and prevent your dough from rising.
- In the bowl of a stand mixer and on low speed, combine the hydrated and cooled 10-grain cereal, room temperature buttermilk, instant yeast, salt, melted butter, honey and eggs. Mix them with your paddle attachment until they are fully incorporated.
- Add your bread flour and whole wheat flour. Using the dough hook attachment combine until it’s all fully mixed together and a soft dough forms. Stop your mixer and let is rest for about 10 minutes. Cover it with plastic wrap or a kitchen towel to keep it from drying out. This rest time allows the dry ingredients to get fully absorbed before kneading.
- Knead the dough on low speed for 5 minutes. If the dough is not cleaning the sides of the bowl after about two minutes of kneading, stop the mixer and lightly tap on the dough with your finger. It should feel soft and pliable but not be excessively sticky or wet feeling. Add 1-2 Tablespoons of flour if needed and mix on low speed until fully incorporated. Stop your mixer and check the dough with your fingers again. As soon as it feels right, continue kneading on low speed. *You really want to avoid adding too much flour to your dough – it will cause your rolls to be dry and dense.

Dough Rise
Like a lot of bread recipes, this dough has a double rise. The first rise happens after the dough is kneaded. The second rise happens after the rolls are shaped and in the baking pan. You will notice that the dough will change quite a lot in texture and volume after the first rise – making it much easier to work with! So, if your dough seems a bit tacky and sticky after kneading it, don’t worry – it will become much easier to manage after its first rise!
When you are rising your dough, you should place it in a warm spot in your kitchen. Keep it away from extreme temperatures – don’t place it next to a drafty window or a hot stove. Often times I will place my dough in my oven with the light turned on. The light gives it a slightly warm, constant temperature.
- After kneading, put the dough in a large bowl greased with olive oil or nonstick spray. Turn the dough to grease all surfaces. Cover the bowl with a kitchen towel or plastic wrap, put it in a warm place in your kitchen and let it rise until doubled in size. Depending on how warm your kitchen is, it will take around 60-90 minutes.
- Divide the dough into 12-24 equal pieces (depending on how big you want your rolls). Weigh each roll on a food scale to help make them all the same size. Round out the dough balls – be sure to watch my roll shaping video below for my easy and works-every-time technique to make perfectly round, beautiful bread buns!
- Place them in a greased baking pan (I use either a ceramic baking dish or metal deep dish baking pan – like a cake pan). Space them close, so that they are just barely touching each other – this will force them to rise and bake nice and tall!
- Cover with plastic wrap or a kitchen towel and let rise until doubled in size, about 45-60 minutes.
Shaping the rolls
Watch this short video for my easy tips to make perfectly smooth and round bread buns!
Baking
Be sure to fully preheat your oven! I use an oven thermometer like this one! I recommend that you always preheat your oven for at least 30 minutes before baking.
- Brush the rolls with melted butter and for an added treat, sprinkle on some sea salt flakes!
- Bake until they’re golden brown and brush with more melted butter after they come out of the oven!
- Pull apart and enjoy!
Time Saving Tips
Baking from scratch gives the yummiest, best breads! There are times where I want to serve homemade rolls but don’t have time to make them from start to finish. Here are a couple of things I do that save me time and allow me to serve homemade!
- Mix your dough and place in a large bread bag, plastic ziplock bag or airtight container. Make sure there is room for it to double in size. Place it in your refrigerator for up to 24 hours. In the refrigerator, it will puff up and rise, but the colder temperature will slow the rise process and give you some extra time to use up your dough. When you are ready to make your rolls, remove the dough from the refrigerator, divide and shape your rolls, rise and bake. This process will save you some time and is a great option if you like to prepare things ahead of time.
- Shape your rolls and place on a metal baking sheet. Before they rise, place the baking sheet with the rolls in your freezer. Freeze the rolls for 24 hours. Once frozen, remove and place the frozen rolls in a ziplock freezer bag. Store them in your freezer for up to 4 weeks. When you want freshly baked rolls, remove them from the freezer, place on your baking sheet, cover and let rise. The rise time will be about twice as long as when you are baking freshly made rolls, so keep that in mind. I love this option for dinner! I’ll usually start thawing/rising my rolls around 3 hours before I want to bake them.
- Bake your rolls, let them cool completely, bag them in a ziplock freezer bag and freeze them. They will stay fresh in the freezer for up to 4 weeks. To serve, remove the rolls from the freezer, open the bag and microwave the rolls in the bag for 60-90 seconds.
Any of these options help so much to save time! I like to have a bake day once every couple of weeks where I make a good supply of a variety of breads, dinner rolls and sweet rolls. Using any of these time saving tips helps me to keep a good supply on hand at all times!
Storing
If by any crazy chance you have leftover rolls, be sure they have cooled completely before placing them in a bread bag or ziplock bag. Store the baked rolls in your freezer for up to 4 weeks.
These super fluffy wholegrain rolls are so delicious served alongside your favorite soup or holiday meals. Make some yummy sandwiches with them! Your family is going to love them!
Want extra help for bread making?

I have several bread recipes that I offer as a virtual class with a pre-recorded video, to help guide you through the recipe from start to finish! It really helps remove any apprehensions you might have about bread making! You can get ALL-ACCESS to my entire class library for a super low price! Go HERE to find more about my Baking Academy! It’s a great community of bakers just like you – bakers that love to spend time in the kitchen and explore and improve their baking skills.
More recipes to try!
If you like my Super Fluffy Wholegrain Dinner Rolls, you’ll love these recipes!
Try & Share!
Be sure to leave a comment if you like this recipe! Or ask me a question! We can all learn from each other! I’m here to help! Be sure to follow me on Instagram @thatbreadlady, post and tag me in your recipe creations! I love to see how you are enjoying these recipes!
(This post contains affiliate links. Good news – I only recommend products I love!)

Super Fluffy Whole Grain Dinner Rolls
Ingredients
Dough:
- 3 Tablespoons Bob's Red Mill 10-grain hot cereal mix
- ⅓ cup boiling water 200°F
- 1 cup buttermilk room temperature
- 1 Tablespoon instant yeast
- 1 teaspoon fine sea salt
- 4 Tablespoons unsalted butter melted
- ¼ cup honey
- 2 large eggs room temperature
- 1 cup whole wheat flour
- 3 ½ cups bread flour plus up to 60g more as needed
Optional Topping
- 4 Tablespoons melted butter
- sea salt flakes as desired
Instructions
- In a small bowl, combine the 10-grain cereal mix and boiling hot water. Let it sit and hydrate for about 15 minutes. During this time, the grains will soak up all of the water and cool slightly. Allow it to cool to around 100°F before mixing the recipe.
- In the bowl of a stand mixer and on low speed, combine the hydrated and cooled 10-grain cereal, room temperature buttermilk, instant yeast, salt, melted butter, honey and eggs. Mix them with the paddle attachment until they are fully incorporated.
- Add the bread flour and whole wheat flour. Using the dough hook attachment combine until it’s fully mixed together and a soft dough forms. Stop the mixer and let is rest for about 10 minutes. Cover with plastic wrap or a kitchen towel to keep it from drying out. This rest time allows the dry ingredients to get fully absorbed before kneading.
- Knead the dough on low speed for 5 minutes. If the dough is not cleaning the sides of the bowl after about two minutes of kneading, stop the mixer and lightly tap on the dough with your finger. It should feel soft and pliable but not be excessively sticky or wet. Add 1-2 Tablespoons of flour if needed and mix on low speed until fully incorporated. Stop the mixer and check the dough with your fingers again. As soon as it feels right, continue kneading on low speed. *You really want to avoid adding too much flour to your dough – it will cause your rolls to be dry and dense.
- After kneading, put the dough in a large bowl greased with olive oil or nonstick spray. Turn the dough to coat all surfaces with oil. Cover the bowl with a kitchen towel or plastic wrap, put it in a warm place in your kitchen and let it rise until doubled in size. Depending on how warm your kitchen is, it will take around 60-90 minutes.
- Remove dough from bowl. Divide the dough into 12-24 equal pieces (depending on how big you want your rolls). Round out the dough balls – be sure to watch my roll shaping video for my easy technique to make perfectly round, beautiful bread buns!
- Place them in a greased 9×13 baking pan (I use either a ceramic baking dish or metal deep dish baking pan – like a cake pan). Space them close, so that they are just barely touching each other – this will force them to rise and bake nice and tall!
- Cover with plastic wrap or a kitchen towel and let rise until doubled in size, about 45-60 minutes.
- Preheat the oven to 375°F.
- Brush the rolls with melted butter and, if desired, sprinkle on some sea salt flakes!
- Bake for 18-22 minutes, until they’re golden brown. Brush with more melted butter when they are hot out of the oven!
- Pull apart and enjoy!
Notes
- Store rolls at room temperature in a bread bag or airtight container for up to three days.
Time Saving Tips
Baking from scratch gives the yummiest, best breads! There are times where I want to serve homemade rolls but don’t have time to make them from start to finish. Here are a couple of things I do that save me time and allow me to serve homemade!- Mix your dough and place in a large bread bag, plastic ziplock bag or airtight container. Make sure there is room for it to double in size. Place it in your refrigerator for up to 24 hours. In the refrigerator, it will puff up and rise, but the colder temperature will slow the rise process and give you some extra time to use up your dough. When you are ready to make your rolls, remove the dough from the refrigerator, divide and shape your rolls, rise and bake. This process will save you some time and is a great option if you like to prepare things ahead of time.
- Shape your rolls and place on a metal baking sheet. Before they rise, place the baking sheet with the rolls in your freezer. Freeze the rolls for 24 hours. Once frozen, remove and place the frozen rolls in a ziplock freezer bag. Store them in your freezer for up to 4 weeks. When you want freshly baked rolls, remove them from the freezer, place on your baking sheet, cover and let rise. The rise time will be about twice as long as when you are baking freshly made rolls, so keep that in mind. I love this option for dinner! I’ll usually start thawing/rising my rolls around 3 hours before I want to bake them.
- Bake your rolls, let them cool completely, bag them in a ziplock freezer bag and freeze them. They will stay fresh in the freezer for up to 4 weeks. To serve, remove the rolls from the freezer, open the bag and microwave the rolls in the bag for 60-90 seconds.
I have made these several times for my family over the past 3 or so years and they are the best. They always turn out perfect and there are never any left. Thank you for sharing your recipes.❤️
So happy to hear it! Thank you for trying it out!
So i’ve tried many dinner roll recipes, I love the flavor of yours but with ALL i’ve tried (not only yours) my dinner rolls always turn out dense. I let them double in size but still dense. Am i overworking them to make them into a roll shape or what would cause this?
Hi Kari,
Typically dense rolls are caused by either too much flour in the dough, or under proofing for the final rise. Try addressing one of these issues at a time and see if that improves them. Also make sure your yeast is good. Here is a helpful article about yeast: Active Dry Yeast Vs. Instant Yeast.
Wonderfully fluffy & light. Instructions are superb! Our head chef in the 1970’s used totally cooked red river cereal, so I did too. I also doubled the amount of cereal, & did half honey, half molasses. Turned out as fabulous as our chefs were.
So glad you enjoyed it Lori!
Mine come out still a bit doughy, am I doing something wrong? Do they need to stay in longer or are they just that way?
Nina
Yes, if your rolls are coming out doughy, leave them in the oven a few minutes longer.
How do you recommend getting the butter milk to 85-90 degrees without curdling? The ingredient list indicates 85-90 degrees, however the instructions indicate room temperature which is normally considered 72 degrees? Thank you in advance for clarifying?
Hi Robin, thank you so much for catching that! The buttermilk should be room temperature. I updated the recipe in case you want to print it off again. Thank you! Enjoy!
Thank you making the rolls for Thanksgiving dinner!
I have made this recipe twice in the past two weeks. Super delicious! Very flavorful and tender rolls. They were a big hit with our whole family – from my one year old up to my grandparents.
Oh I’m so happy you loved them! Thank you for leaving me a message! That’s means a lot!
I am always wanting to try new recipes and I ran into your blog. Decided to give these enriched rolls a try. I have a mill and Bosch mixer and they turned out divine. I think they’re the best rolls I’ve ever made really fluffy and I made 12 and they’re like the size of small loaves of bread so good. However, I did end up having to add just a little bit more flour not much they’re definitely not dry they’re perfect. I made a double batch, and I’m cold proofing half of the batch in the fridge tonight to bake tomorrow for the holiday gathering. I used convection bake and lowered the temp 5 degrees. We like the way confection gives the tops a little bit of brown.
I did the first rise in my proofing box with the temperature at 75° doubled in size in about an hour.
Also, I think the grams are off on the flower measurement I think it’s a little bit on the shy side. One cup whole wheat flour weighs about 120 grams.
Thanks for sharing this successful delicious recipe.
So glad you enjoyed these! Thank you for letting me know how they worked for you!!
Hi, I just recently found your blog. I am wondering if this dough would work as a loaf. It sounds like it would be delicious as toast.
Hi Susan! So glad you found me! These rolls are so good! I’ve never tried this dough as a loaf, but give it a try and see how it works. I have a Multigrain Bread recipe that I offer as one of my virtual baking classes that is so delicious! Let me know if you try it!
Just made these today and they were WONDERFUL! I used Bob’s Red Mill 8 grain cereal and it worked quite well. Thank you for a delicious roll recipe! I was able to put my flour mill to good use!
So glad you liked them!