The Best Homemade Sourdough English Muffins Recipe
These delicious English Muffins have the taste of sourdough, without the time commitment of maintaining a starter. Cooked in a cast-iron skillet, they’re rich and fluffy and deliciously full of nooks and crannies! This English muffin recipe is one you’ll want to use again and again!

My love for English muffins runs deep! Here in the Phoenix area, we have an amazing local bakery called Le Grande Orange. They make the most incredible, huge, buttery sourdough English muffins! Our family has enjoyed them for years! One time, I had the courage to ask them if they’d share how they make them. To my surprise and delight, a member of their baking team took me back to the kitchen and showed me where they cook up these pillowy creations! What I saw amazed me – hundreds and hundreds of English muffins cooking on the biggest cook top I’ve ever seen. The smell was incredible and the entire operation blew me away!
After that day, I was on a mission to replicate this heavenly creation at home! My homemade sourdough English muffin recipe is one that I’ve spent countless hours perfecting! You’re going to love them and I’m so excited for you to experience them in your own home!
Ingredients
The unique ingredients in this recipe make it stand out as one of my most favorites of all time! They work together to create a culinary creation that will melt in your mouth!
- Biga – a pre-fermentation often used in Italian baking. It creates a rich, complex flavor – similar to sourdough, but without the commitment of maintaining a starter. You’ll make this about 24 hours before mixing your dough.
- Clarified Butter – since it has a higher smoke point, it’s useful for slow cooking the English muffins on a low to medium-low temperature. It also adds amazing flavor! When you clarify butter, you are removing the milk solids and water and are left with just the butterfat. You’ll refine it just a bit more by straining it through some cheesecloth.
- Bread flour – used in the Biga to create a chewier texture and a strong foundation for the eventual fermentation of the English muffin dough.
- All purpose flour – used in the English muffin dough to allow a softer texture. If we used bread flour for both, the English muffins would be a bit too chewy and bread-like. If you like baking with whole wheat flour, you could substitute up to half of your all purpose flour with it.
- A cast iron skillet – yes, I know this isn’t an ingredient! But it’s oh-so important to creating a seasoned, rich flavor! If you have one, use it! You want a pan or griddle that will allow a shallow pool of butter to sit at the bottom. When cooking the English muffins, you’ll want the pan to always have a generous layer of clarified butter to cook in (about 1/8 of an inch deep).
How to make an easy sourdough flavor
One of the reasons I love this recipe, is because you can create that delicious, complex flavor of a sourdough bread, without having to us an active sourdough starter. To get that amazing flavor, we’re going to use a Biga – a pre-fermentation often used in Italian baking. Biga is a simple mixture of equal parts flour and water with a small amount of instant yeast.
Make the Biga 12-24 hours ahead of time and allow it to cold proof in the refrigerator. Placing it in the refrigerator will slow down the fermentation process – yielding a more complex flavor in your English muffins.
If you are lucky enough to have an active sourdough starter, you can absolutely use it to replace the Biga called for in the recipe. It’s a great way to use your sourdough discard!

Know your Dough
Working with yeast doughs can be intimidating at first. Whether you’re using instant yeast or a sourdough starter, getting to know your dough will take some time and experience. But don’t let that steer you away from trying! Bread making is not an absolutely straight forward process – it takes some experience to really get to know how your dough should be looking and feeling when you’ve mixed it successfully. If you don’t get stellar results the first time, don’t give up! Change ONE thing and try again – eventually you will get the hang of it! Consistent results comes from lots of practice! You will be so happy with the results when you get that pillowy soft dough that bakes up beautifully!
One of the most important tips I can give you for mixing up any type of yeasted dough is to be guided by how it looks and feels. Before you knead it, you’ve got to decide if you’ve added enough flour. Stop your mixer and lightly tap the dough with your finger. It should feel soft and moist, but it shouldn’t be an excessively sticky or wet dough. A little bit of dough stuck to your finger is fine, as long as it’s not feeling wet. When in doubt, it’s always better to go lighter on the flour. You can always add more later if needed, but you can’t take flour away! Too much flour in your dough will give you dry bread! Fight that urge to add more flour. When you let your dough rise, the volume and texture of your dough will improve and become easier to handle.
Shaping your English Muffins
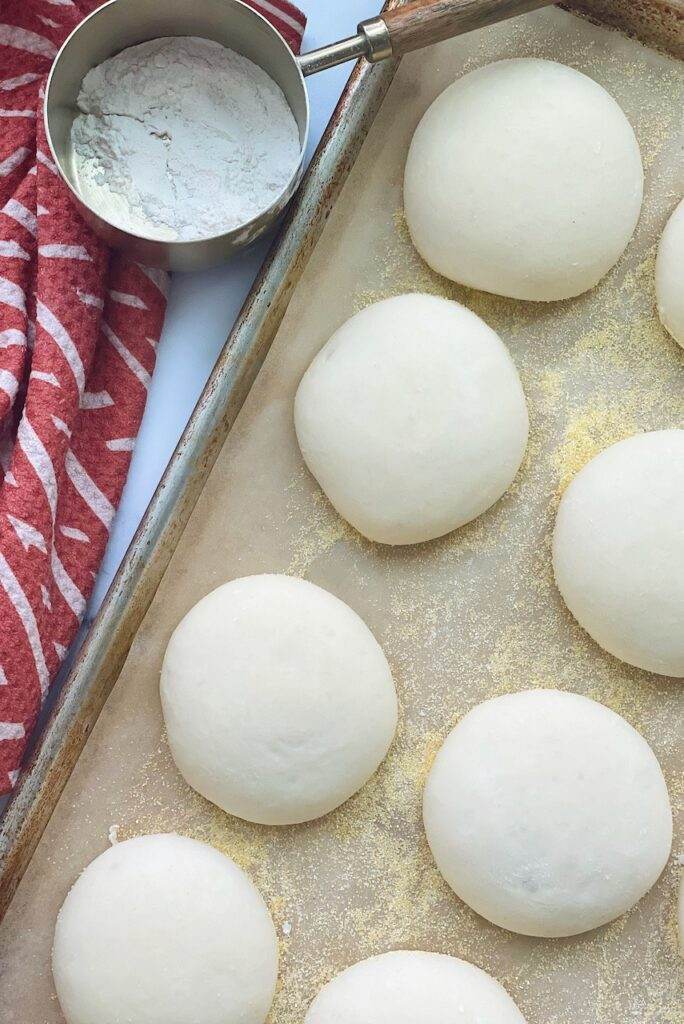
Your dough has been rising in a large bowl in a warm place in your kitchen. It’s time to divide and shape the english muffins. Turn your dough onto a floured surface. Divide them into 12 equal pieces, about 2.5 ounces each. You won’t need a rolling pin, biscuit cutter or english muffin rings to shape these! It’s all happening by hand! On your work surface, round out each ball of dough. I’ve found the best way to do this is by cupping the dough ball with your hand and gently rotating it in a circular motion. If you have sticky dough, flour your hands and not the countertop. You want to keep the work surface clean so that you can work the dough without it sliding around on the counter. You will feel the surface of the dough tighten. This creates a smooth dough ball that you can now flatten out and place on your prepared baking sheet. After you have them all on the baking sheet, cover them with a tea towel for one final rise.
How to make Clarified Butter
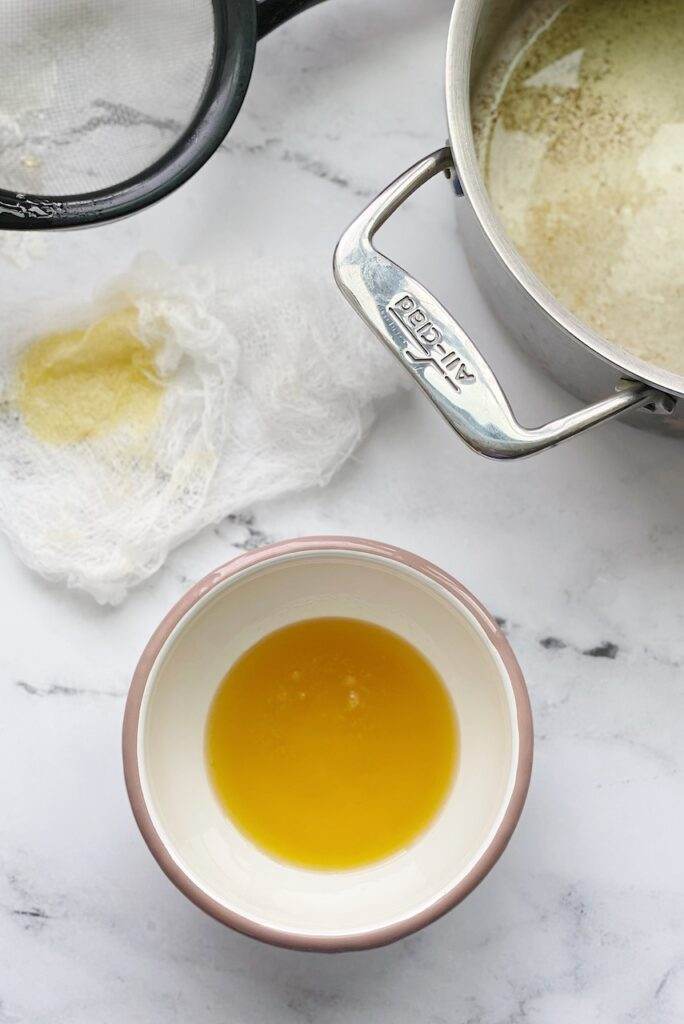
Making clarified butter is a super simple process. Be sure to make it a few hours ahead of time – you’ll want to refrigerate it to turn it back into a solid form. This makes it easier to scoop and add to the frying pan.
- Cube your butter and melt it in a sauce pan over medium-low heat. Resist the urge to stir it!
- Bring the butter to a light simmer, without browning it.
- Allow it to simmer until you see a white, foamy layer form on the top. This is the milk solids separating from the butterfat.
- Remove the pan from the heat.
- With a spoon, skim the foamy layer off of the top until all you have left is a clear, golden yellow butter. (You can reserve the white, foamy milk solids for brushing on tops of homemade bread and rolls.)
- Allow the butter to cool for 5 minutes.
- Place a wire sieve over a medium bowl. Line it with a dampened, wrung out piece of cheesecloth.
- Pour the clear, yellow, melted butter into the lined sieve. This will strain out any bits of milk solids that you might have missed.
- What you have left is a beautiful, golden yellow clarified butter (something you should consider liquid gold!)
- Place it in a container, cover and refrigerate for at least 4 hours before making your English muffins.
- Store any leftover clarified butter in the refrigerator and use for other things like sautéing veggies or making pancakes! It’s so great to have some on hand!
Cooking the English Muffins
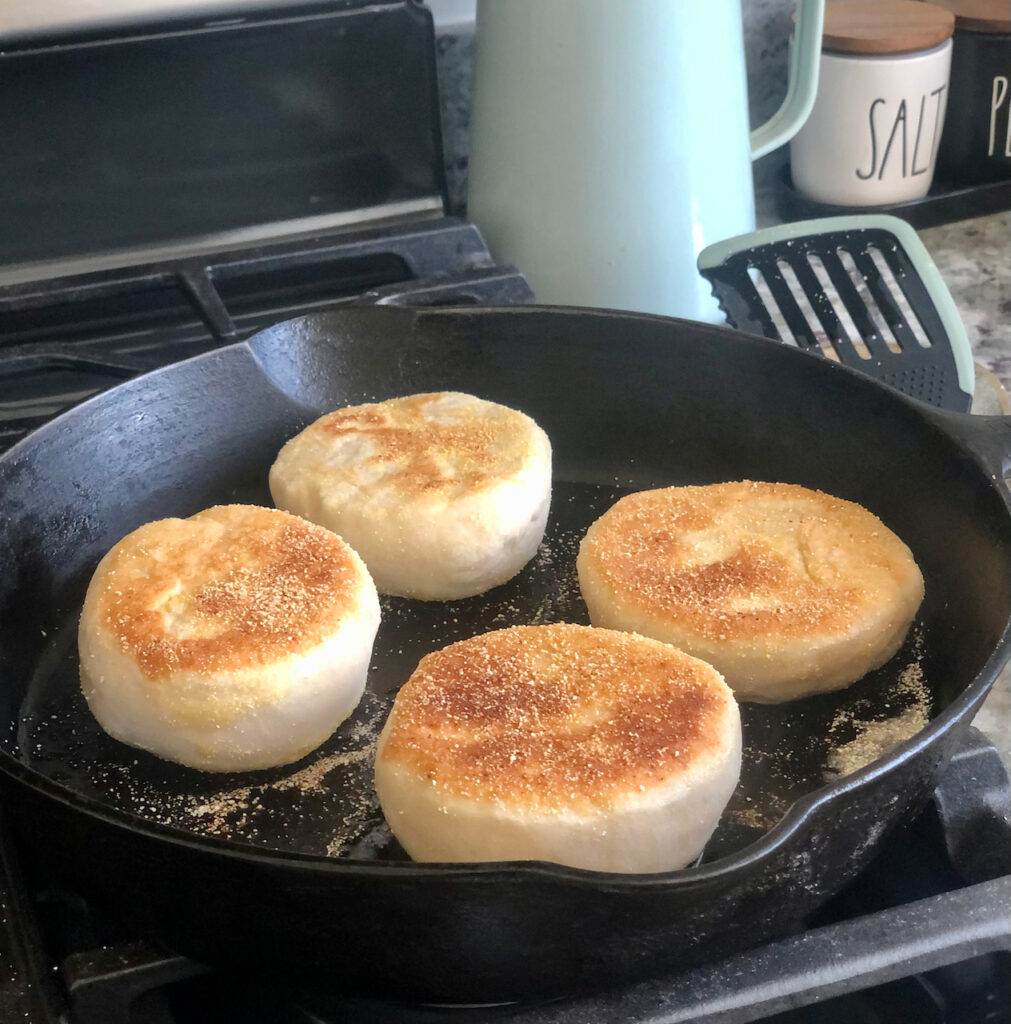
There’s a certain way I’ve found that these English muffins need to be cooked, and yes, I said NEED. If you can, use a cast iron skillet. Be sure it’s deep enough to maintain a layer of clarified butter about 1/8 an inch. Using cast iron creates a deliciously seasoned flavor. It also heats really evenly!
Before you cook them, heat your pan on a low to medium-low heat. Add a generous helping of clarified butter and gently place your pillowy risen English muffins into the buttered pan. Keep the butter at a low sizzle and cook them about 3-5 minutes each side, until they are a beautiful golden brown.
Place them on a baking sheet lined with paper towels to drain and cool a bit before opening them up.
A Timeline for making Homemade Sourdough English Muffins
You’ve probably noticed there are a few steps that need to be timed just right. This recipe requires some preparation, but don’t let that fool you into thinking it’s complicated. Most of the preparation is inactive, resting time in the refrigerator. To help you break it down, step by step, I’m going to provide you with a suggested timeline for making these deliciously rich English muffins! Let’s say you want to serve them on a Sunday morning:
- Friday, 6:00pm – Make the Biga, cover and refrigerate.
- Saturday, anytime – Make the Clarified Butter, cover and refrigerate.
- Saturday, 6:00pm – Mix the dough, using the prepared Biga, cover and let rise until double in size.
- Saturday, 8:00pm – Divide and shape the English muffins, place them on a baking sheet lined with parchment paper and sprinkled with corn meal. Lightly cover with plastic wrap and a tea towel. Place in the refrigerator to cold proof overnight.
- Sunday, 7:00am – The next morning, remove the English muffins from the refrigerator. Keep them covered. Let them come to room temperature in your kitchen and proof more if needed. They should rise about 50% in size before cooking them in the frying pan.
- Sunday, 8:00am – Cook the English Muffins, drain on a paper towel, let them cool and continue to cook internally for about 30 minutes. Serve and enjoy!
Letting the shaped English Muffins proof overnight in the refrigerator and cooking them the next morning is an option but not a requirement – it’s a suggestion if you’d like to get ahead of the game and be prepared to cook them first thing in the morning. You can adapt this recipe to fit a timeline that works for you.
If you’re new to bread making
I know baking with yeast doughs can be intimidating! Believe me – we all have to start from somewhere, and I’m no exception! I am a self-taught baker and tackling bread for the first time absolutely terrified me. It’s taken me years of practice, research, trial and a whole lotta error! If you find yourself in this beginner space right now, you might find my baking classes helpful! I have pre-recorded videos, showing you how to make different recipes from start to finish. It is something I wish I had when I was a less confident baker. Check out my class for Sourdough English Muffins!
Storing
It’s always best to enjoy these when they’re freshly cooked! If by some crazy chance you have any leftover, you can store them in an airtight container for up to 2 days. There are so many ways you can serve and enjoy them!
Ideas for enjoying your Sourdough English Muffins
It’s always a good day when I have a freshly made batch of these in the kitchen! Somehow, my family is just a whole lot happier when they get a whiff of these cooking! We’ve enjoyed them so many different ways!
- Make a build your own breakfast sandwich! Have things prepared like bacon, sausage patties, Canadian bacon, eggs and hash browns. My kids love when they get to pick their favorite things and build their own – choices matter!
- You could also assemble a bunch of breakfast sandwiches, wrap them and freeze them for later! If you go this route, wrap them in plastic wrap, then foil and store in a ziplock freezer bag – this will keep them nice and fresh until you reheat them. Take them out of the freezer the night before and let them thaw overnight in the refrigerator. In the morning, remove the wrappings and reheat in your microwave for one minute! It’s so nice to have these on hand on those mornings you have less time to make breakfast from scratch!
- Take a classic route and toast them! Top them with plain ol’ butter and let it melt into all of those nooks and crannies! I mean, you really couldn’t go wrong with that! Top them with my Homemade Strawberry Jam!
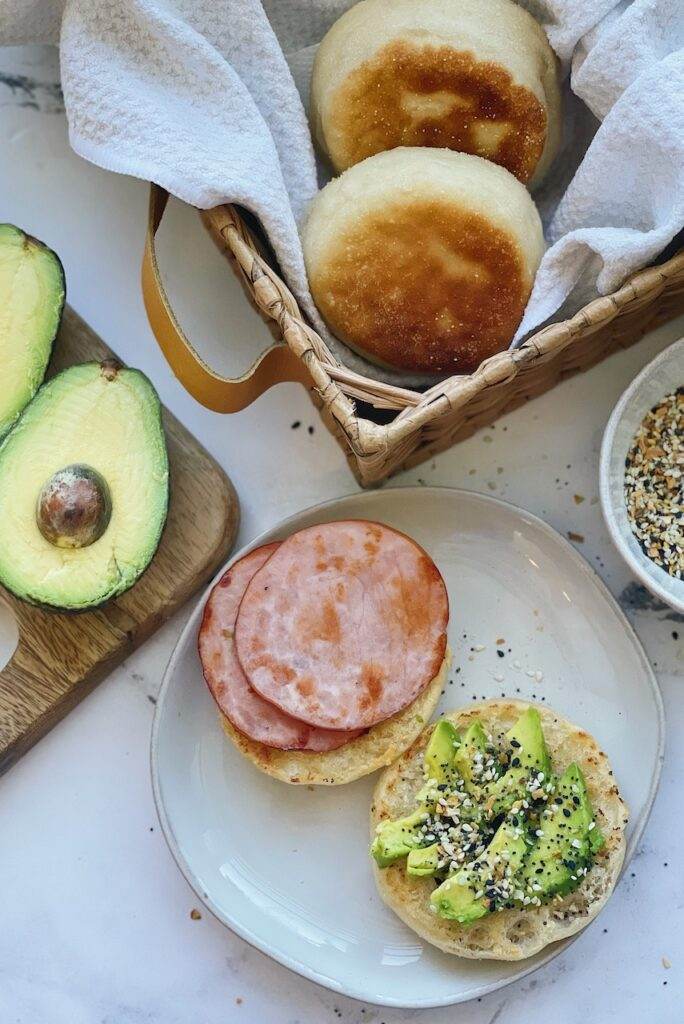
- One of my favorites is to make a sandwich with a spread of avocado, sprinkle on some Everything Bagel Seasoning and pile on a few slices of ham! It’s the best sandwich!
However you enjoy them, I know you’re going to love them! I’m confident this will become a family favorite in no time!
Other recipes to try!
Baked Pumpkin Doughnuts with Cinnamon Sugar
How to Create a Sourdough Starter
Be sure to leave a comment and tell me how you’re enjoying your English muffins! I’d love to see your creations on Instagram too! Tag me @thatbreadlady so that I can see and share what you’re baking up in the kitchen!

The Best Homemade Sourdough English Muffins Recipe
Ingredients
Biga:
- ½ cup bread flour
- ¼ cup water
- ¼ teaspoon instant yeast
Dough:
- 1 ⅓ cup water
- ¾ teaspoon instant yeast
- 1 Tablespoon plus 1 teaspoon olive oil
- 1 ½ teaspoon fine sea salt
- 3 ½ cups all purpose flour plus up to 1 cup (120g) as needed
Additional ingredients:
- ¼ cup yellow cornmeal
- 6 Tablespoons clarified butter
Clarified Butter:
- 1 cup unsalted butter cubed*
Instructions
- Make the Biga: Around 12-24 hours before mixing the dough, combine the flour, water and yeast in a small bowl. The dough should be a slightly sticky dough ball. Cover the bowl with plastic wrap and refrigerate for 12-24 hours. A 24 hour chill will give you more of a sourdough flavor. The biga will rise slightly.
- Make the Clarified Butter: This should be made and chilled at least 4 hours before cooking the english muffins. Melt the cubed butter in a saucepan over low to medium-low heat. Without stirring, melt butter until a white foamy layer forms on top. Remove from heat. With a spoon, skim off the top foamy layer, leaving the clear yellow layer of butter underneath. Avoid browning the butter. Let sit for 5 minutes. Line a wire sieve with a dampened, wrung out piece of cheesecloth and set sieve over medium bowl. Pour the clear, yellow, melted butter onto the lined sieve. Leave any milky residue behind in the sauce pan. Discard the residue. Store the strained, melted butter in a covered container and refrigerate until it becomes a solid form, about four hours.
- Make the Dough: In the bowl of a stand mixer and using the paddle attachment, combine the biga, water, yeast, olive oil, salt and 3 and 1/2 cups (420g) of flour. Mix on low speed until the mixture fully combines, about 1 minute. It will be a sticky, wet dough. Cover the bowl with a towel and let stand for 20 minutes.
- Affix the mixer with the dough hook attachment. With the mixer on low, add enough of the remaining flour to get a soft cohesive dough that clears the sides of the bowl. It should be soft but not sticky. Add up to one more cup of flour as needed. Knead in mixer until smooth and elastic, for 8 minutes.
- Place dough in medium greased bowl. Turn so all sides are covered with the nonstick spray. Cover and let rise until doubled in size, about 2 hours. (At this point, the dough could be refrigerated for up to 12 hours. Allow it to stand at room temperature for one hour before using.)
- Prepare baking sheet by lining with parchment paper and generously sprinkle with cornmeal.
- Place the dough onto a lightly floured work surface. Divide into 12 equal pieces (about 2.5 ounces each). Shape each piece into a round ball and flatten to a small disc, around 4 inches in diameter. Place each dough disc on the parchment and flip so each side is coated with cornmeal. Cover with a towel and let stand in a warm place until the rounds have increased in volume by 50%, about one hour.
- Melt 2 Tablespoons of clarified butter into a large (preferably cast iron) skillet on low to medium-low heat. Add the dough rounds to the pan and cook until they are a medium golden color on each side. Typically, this will take about 3-5 minutes on each side. If they are browning too quickly, lower the heat. Brown on both sides and place on a baking sheet lined with paper towels to drain. Add more butter to the skillet and repeat until all of the English muffins are cooked. Allow them to cool for at least 30 minutes – they are continuing to cook internally.
- To split in half, use a fork to poke holes around the center of the outer edge of the English muffin and pull apart with your thumbs – this will give you all of those delicious nooks and crannies!
- Toast or enjoy fresh! They’re best served hot! English muffins will stay fresh in an airtight container for 2 days.
Notes
- Refrigerating dough overnight is a great way to time having fresh English Muffins in the morning!
- You could shape the English Muffins and let them cold proof in the refrigerator overnight. Take them out about an hour before cooking to allow them to come to room temperature and puff up more if needed.
- You will have extra clarified butter leftover. Keep in the refrigerator and use as needed.
- This recipe can be easily doubled.
- You can substitute the Biga for 120g ripe sourdough starter.
[…] Sourdough English Muffins […]
[…] Sourdough English Muffins […]
If we have our own sourdough starter… how much do we use? And we can use discard?
Hi Jenny, Yes, you can definitely use your own starter! I’d suggest using 1/2 cup ripe starter/discard. Let me know how that turns out! Happy baking!
[…] Sourdough English Muffins […]
I found Ghee with sea salt at Aldi. Can I use it instead of making clarified butter? If so, do I reduce or leave out the salt called for in the recipe?
Ghee will work but it has a slightly different flavor. I really prefer the flavor of clarified butter. They are very similar, but I’ve substituted with ghee before and didn’t care for the flavor.
If you do use ghee with sea salt, I’d consider reducing the salt in the recipe by half. But…I’ve never tried that before so it may take some experimenting. Let me know how it turns out!
If you use active sourdough starter, do you still need to add yeast to the dough?
Hi Rachel,
I am working on getting a set of sourdough instructions ready to share to add to this recipe, but in the meantime, I would sub the biga for 140g active starter and just add it to the dough recipe and remove the instant yeast. Rise times will be longer. You could mix the dough, let it proof for about 1 hour and then place in the refrigerator overnight before shaping the next day. Or you could make these same day.