Homemade Jam
It’s sweet and tastes so fresh! It’s amazing when topped on your favorite things, especially homemade bread and rolls!! Homemade jam is so yummy and I love being able to control what goes into it, as well as make new delicious flavor combinations! Watch my video below for my fun jam making session with my mom, a jam expert!
Bread and jam is one of the most comforting foods! I was raised enjoying homemade versions of each. I can remember bread days – when my mom would make homemade bread for our family of eleven! Yes! Eleven! I don’t know how she found the time to do it, but growing up with that big of a family, a lot of things were homemade! Canning and preserving fruits, jams and vegetables were routine and we usually had a good supply on the pantry shelf.
This will probably really show you my age, but those were the days where it was more economical to make your own bread, sew clothes for your kids and can your food supply. For us, it was also about being self reliant and prepared with a food supply in case of any type of emergency. Now, it seems those things are a novelty, almost a lost art. It’s definitely more economical now to buy your kids clothes from the store. It’s for sure less work to just buy a jar of jam in the grocery store than to make your own – another reason I admire all that my mom did! She could’ve easily bought bread and jam, and sometimes she did. But I think my mom knew, and perhaps because she was raised this way too, that homemade bread and jam is a form of love language. When I make my mom’s bread and put some fresh, fruity, strawberry jam on there, it takes me back to those sweet days, and it’s like a hug from my mom!
Freezer Jam vs. Water Bath Jam
There are a couple of different ways you can make jam. The type we’re doing here, is called the water bath method. You can also make freezer jam, which has less steps and equipment. There are pros and cons to each. I prefer making jam with the water bath method – after you read the pros and cons, you’ll probably understand why.
Freezer Jam
Some pros of freezer jam are:
- less steps
- less equipment
- it retains the bright color of the fruit
- you can put it in a freezer safe container
- it has a more natural fruit taste
Some cons of freezer jam are:
- it takes up precious freezer space
- it’s got a thinner consistency, almost more of a sauce than a well set jam
- it can have a grittier texture from the sugar/pectin not fully dissolving
Some pros of water bath jam (also known as “preserved” jam or “canned” jam) are:
- it sets up better – more spreadable
- it has a smoother consistency – no grittiness like the freezer jam
- you can store it, unopened, on the pantry shelf for up to a year
- it doesn’t take up precious freezer space (I need every inch of my freezer!)
- it’s easier to give away to people you love – homemade bread and jam is such an appreciated gift!
Some cons of canned jam are:
- you’ll need to invest in some extra equipment (but you could share it with a friend and jam together!)
- there are extra steps – you have to make sure the lids seal properly
- the color of the fruit is a little darker than it is in its fresh version
I like to make both types of jam for different purposes. Freezer jam can be really yummy for pancakes, waffles or as an ice cream Sunday topping. Canned jam is perfect for spreading and just easier to store.
Equipment
I purchased all of my equipment at Walmart. They have a food canning section near their kitchen aisles that have everything you’ll need. You could also find these on Amazon and I’m providing you with links if you’d rather order them.
- water bath canner (pictured)
- wire rack that fits inside the canner – this is how you get the jars in and out of the hot water. It also keeps the glass jars from touching the bottom of the pan. This usually comes with the pot.
- glass preserving jars, lids and rings – always use NEW lids. I like to use “regular mouth”, 8 ounce jars for jam.
- jar lifter
- home canning funnel
- magnetic lid wand (not necessary, but very convenient)

You can reuse jars. Just be sure to check the rims for any nicks. The slightest chip in the rim of your jar will result in your jams not sealing. Keep your jars warm, either in warm water on the stove or in your dishwasher. Putting hot fruit into a cold jar may cause the jar to shatter. You can also reuse the rings, as long as they are not dented or rusty. You need to use new lids each time.
Also keep your lids in a pan of hot water on the stove. The lids, jars and rings should all be cleaned ahead of time. Keeping the lids in hot water will keep them sterilized right up until the time you place them on top of the jar. This is where the magnetic lid wand comes in handy – it’s the green stick shaped tool pictured. It makes it so easy to get those lids out of hot water and straight onto the top of the jar.
Pectin
Pectin is a type of starch that occurs naturally in the cell walls of fruits and vegetables and gives them structure. When combined with sugar and acid, it’s what gives jams and jellies that thickened texture when they cool. In the video below, I’m showing you how to make strawberry jam using the Pomona’s Pectin. I like using this pectin because it’s made for lower sugar jams. Another popular pectin brand is Sure Gel. This pectin also works great, but you’ll be using more sugar with it.

Jam Recipes
My mom is a jam making pro and has come up with all sorts of different flavors: Apricot Pineapple, Blackberry Basil, Triple Berry, Cinnamon Pear, the list goes on! There’s lots of ways to get creative and make a flavor combination that speaks to what you love!
- I could type out a long detailed recipe here, but the best direction I can steer you toward is to refer to the recipe in your pectin box. Whichever brand of pectin you use will have a slightly different process or recipe for making the jam with that specific pectin. They really have done such a great job at providing a detailed guide in how to make several different kinds of jams! Choose which brand of pectin you’re using first and then refer to the recipe that comes in the box.

How to make homemade jam
- Wash all jars, lids and rings. Keep jars warm either in the dishwasher or on the stove in hot water. Keep lids in hot water in a small pan on the stove.
- Fill canning pot with water and keep to a low simmer on the stove.
- Prepare the strawberries – cut off stems and hull them. Chop them in a blender or food processor. I like mine a little chunkier so I don’t completely puree them. Remember, the strawberries will break down as they are cooked.
- Cook strawberries, sugar and pectin on stovetop as recommended by your pectin recipe. (Pomona’s also uses a calcium water)
- Fill the jars
- Carefully wipe the rim of the jars clean – they must be clean or they won’t seal.
- Lightly screw on the rings, keeping the lids centered on top of the jar.
- Load the wire rack with the jars and lower it into the canner filled with water – the water should be a couple of inches over the tops of the jars.
- Bring the water to a boil and set timer for 10 minutes. (Add 1 minute for each 1,000 ft in altitude)
- Lift rack out of canner and rest on a towel on your counter.
- Using the jar lifter, take the jars off of the rack and let them cool on a towel.
- Allow the jams to cool for 24 hours – you will hear popping noises (that’s the lids sealing)
- Push on the lids with your finger. When it does not bounce back, the jam has been properly sealed.

Having an extra set of hands always makes this process go smoother. Can you do it on your own? Of course! But I’ve found that canning with your mom, sister or friend is always easier and it’s a lot more fun! You could also find a friend that is interested in canning too and share the cost of the equipment!
I recently did a LIVE class on Instagram with my sweet mom, making jam. See that video below for a step by step visual, and for a good laugh!
Video Tutorial
For even more detailed instruction, I’ve created a Homemade Jam course for my Baking Academy members. It’s very helpful and perfect for visual learners. Included in my course is a prerecorded video tutorial and recipes for Triple Berry Jam and Blackberry Basil Jam. Go here for more about my Baking Academy and learn to make the most amazing breads, jams, and pastries!
Troubleshooting
If you’ve waited 24 hours and your jams still have not sealed, you can empty them out and try to reseal them with clean jars, rings and new lids. There are a few things you should look for when trying to figure out why your jam didn’t seal.
- There may be a tiny nick on the rim of the jar.
- The lid wasn’t properly centered. Sometimes this can occur if you screw the ring on too loosely.
- You didn’t boil the jams long enough – follow the altitude guidelines on the pectin recipe.
- The rings are rusty or dented, causing poor contact
- The rim of the jar wasn’t cleaned properly
When you’re making jam, you only need a few ingredients – another thing I love about homemade jam…you know exactly what is in it. For strawberry jam, you’ll need strawberries, granulated sugar, fruit pectin and just a 1/2 teaspoon of butter. You can use frozen fruit, but you’ll need to thaw it before using it. I like to use fresh fruit when it’s in its peak season – it always tastes the best and it’s usually cheaper!
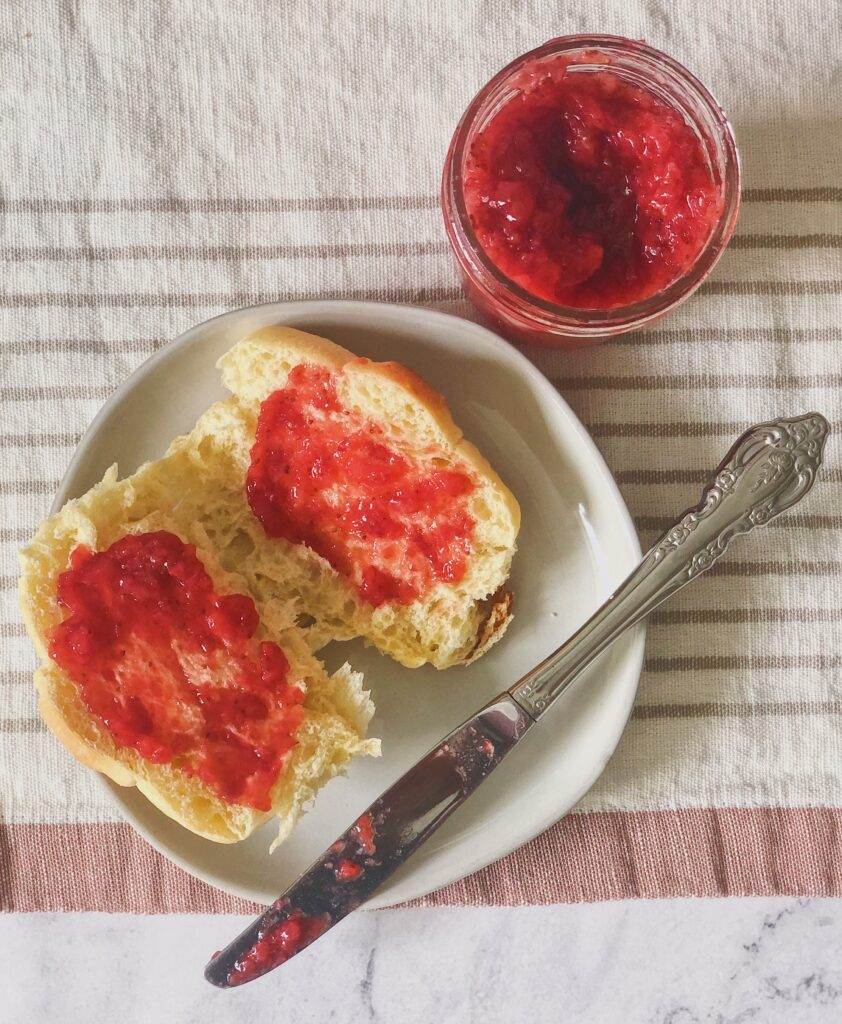
Top your homemade jam with one of my homemade breads! My favorite way to enjoy fresh jam is smothered on top of my famous Crescent Dinner Rolls!! They’re rich, fluffy and buttery – the perfect companion to this fruity goodness!
2 Comments