This recipe is so basic and easy. If you’re a beginner, or just want to save time, this is the perfect bread recipe for you. It takes 5 minutes to mix up by hand. No kneading necessary. Keep it in your refrigerator for up to two weeks to use when needed.
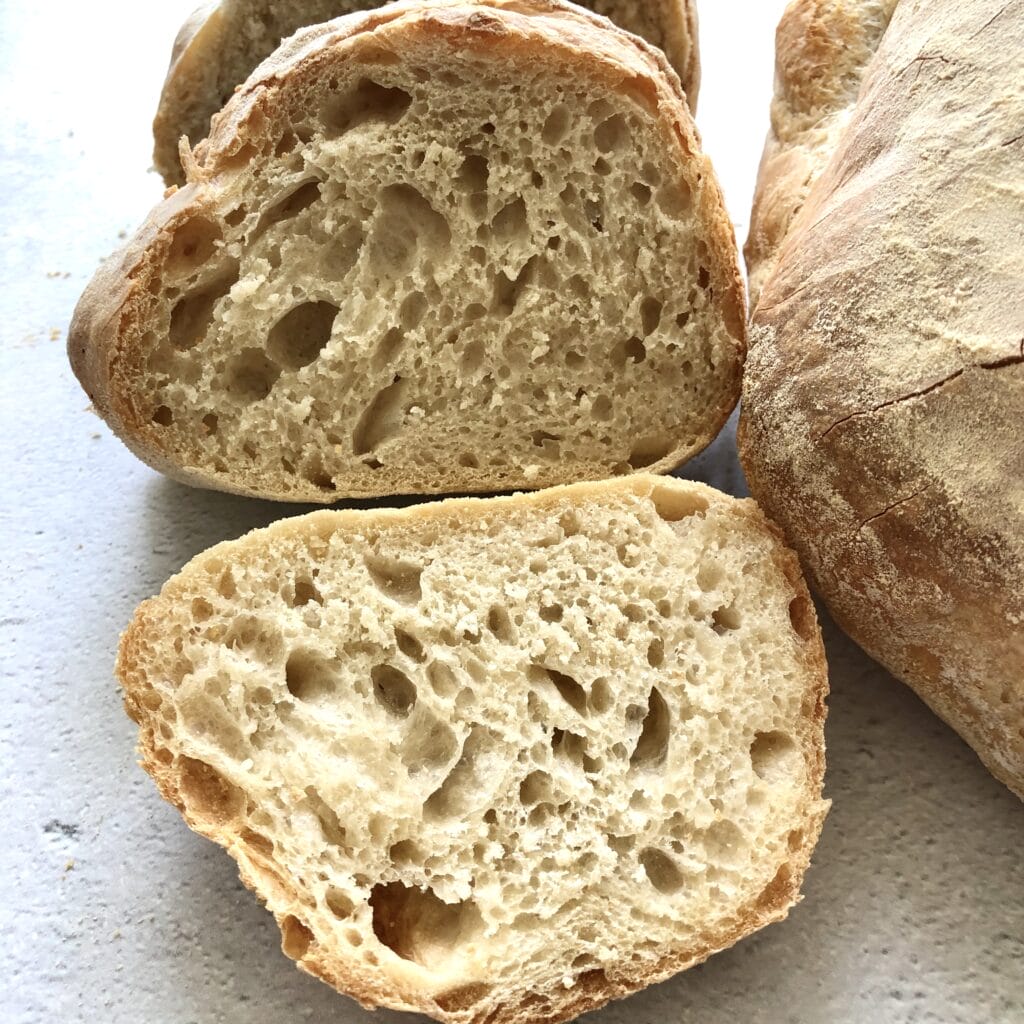
This amazing recipe comes from artisanbreadinfive.com. This method is such a simple, fast easy way to have homemade bread. I love many things about it, but maybe what I love most about this bread is the longer you leave the dough in the refrigerator, the more that delicious flavor will deepen.
Are you new to bread baking or not familiar with baking with yeast?
Here is a quick bread science lesson:
Traditional sourdough bread is an entirely different process from this recipe and honestly, can take years of practice until you get it just right. Sourdough is a biological leavening agent, made by a mixture of flour and water that must be “fed” daily. It takes time to develop its healthy bacteria and natural yeast. Over time, that sour flavor develops. I could talk more about sourdough, but that’s the basics for now.
Commercial yeast, also known as active dry yeast or instant yeast is what you buy in the grocery store and can be used more easily in your bread recipes. Active dry yeast has to be “proofed” before using…meaning it has to be dissolved in 1/4 cup warm water. Once it bubbles, you know it’s good and “active” and you can add it to your recipe. Instant yeast is the most convenient yeast to work with, because you don’t have to proof it and can simply add it to your dry ingredients.
Now that you know a bit about sourdough versus commercial yeast, you’ll understand and appreciate this recipe a bit better. This method is a great way to get that artisan, sourdough flavor without having to do all the work!
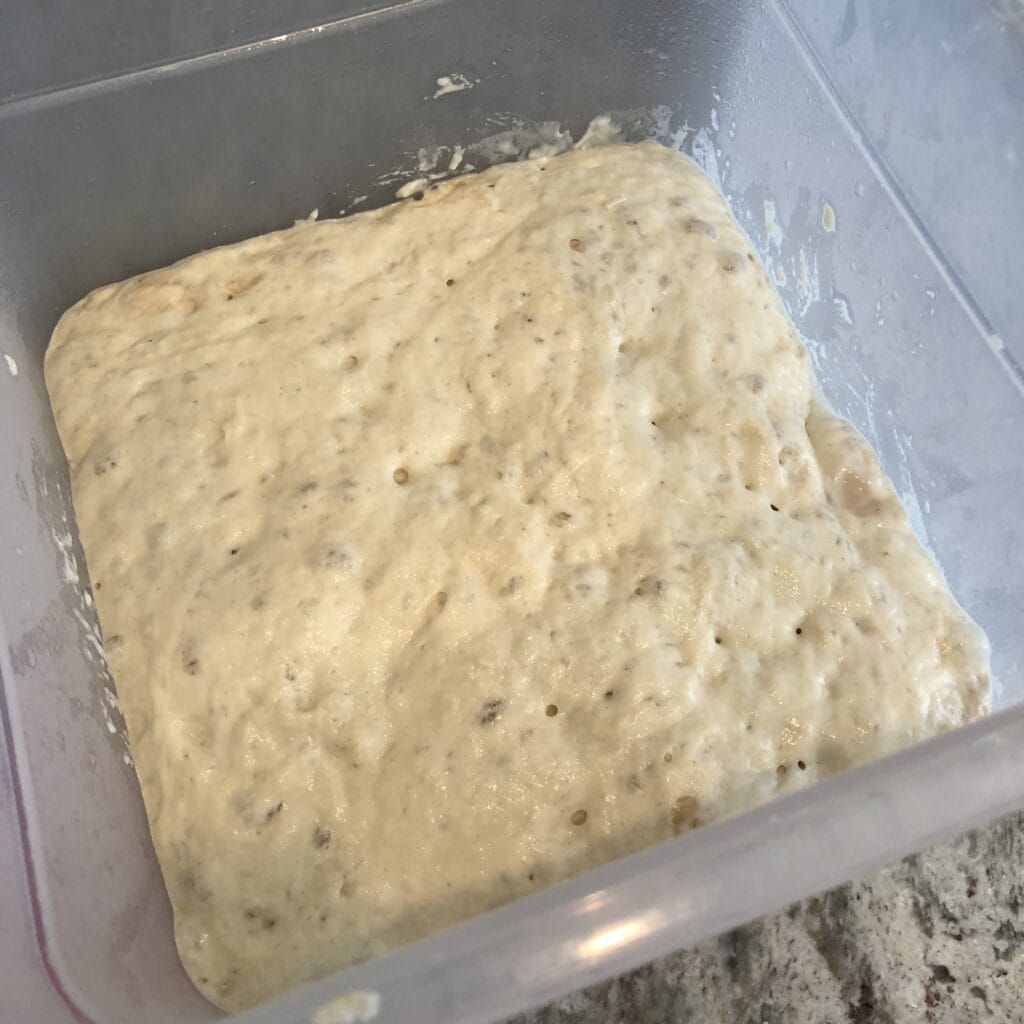
It really does only take five minutes to mix it up. Lightly cover your container and allow the dough to rise for two hours. It will nearly triple in size. The top will be flat and you’ll start to see it bubbling.
Place in the refrigerator over night. The next day, you have artisan bread dough that is ready to use whenever you need it. It’s THAT easy!
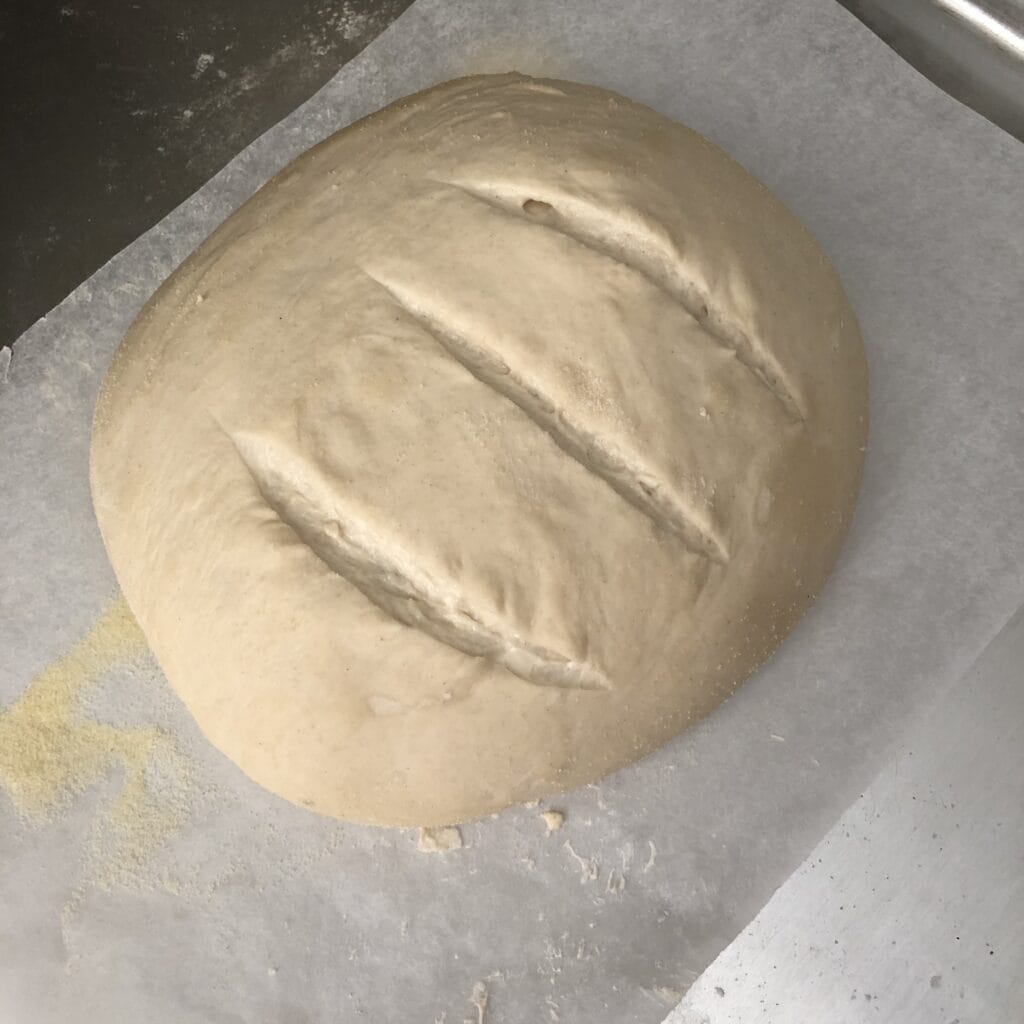
Form the loaf and let it rest. Before baking use a sharp serrated knife to make three slashes in the loaf. This will allow it to expand when it puffs up in the oven.
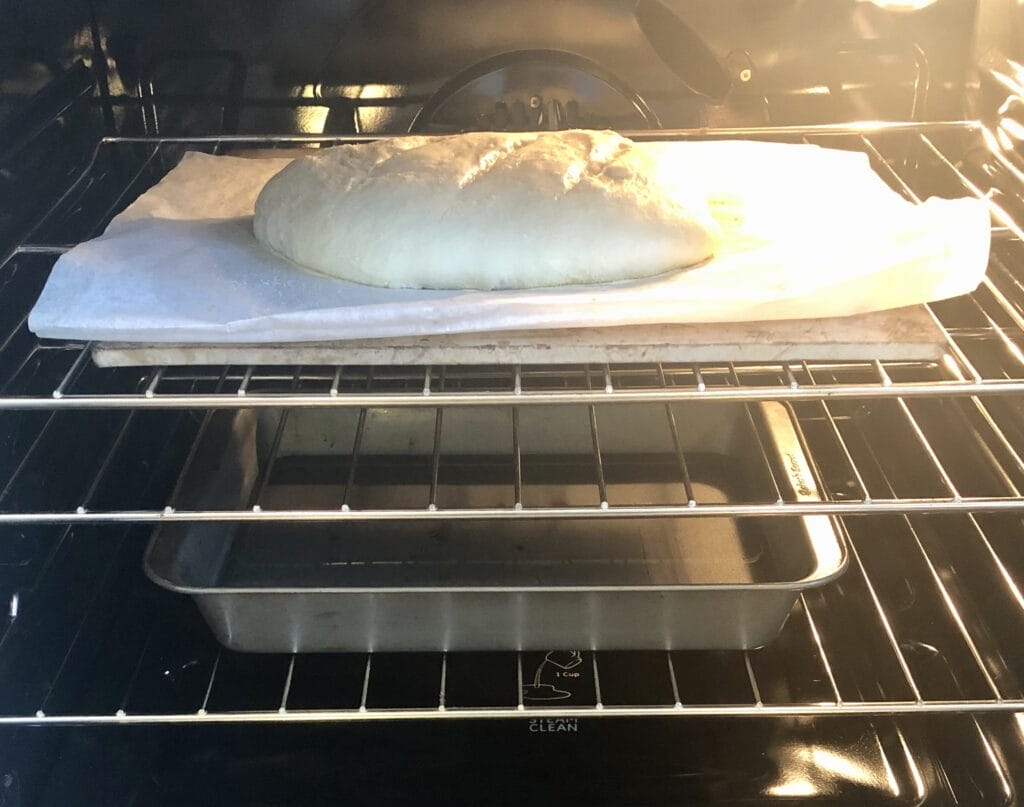
Baking on a baking stone gives this bread a nice crispy crust. A broiling pan on the bottom rack with an inch of water in it will create steam as it is baking. This is an important step because it helps the bread puff up in the oven and creates a flakier crust.
Not only is this bread easy to make, it is really so delicious. The crust is crunchy and flakey and the bread is tender and chewy…just what we love about artisan bread! This method is the perfect simple bread recipe and a big time saver!
PrintBeginner Artisan Bread
This recipe is so basic and easy. If you’re a beginner, or just want to save time, this is the perfect bread recipe for you. It takes 5 minutes to mix up by hand. No kneading necessary. Keep it in your refrigerator for up to two weeks to use when needed.
- Prep Time: 10 minutes
- Cook Time: 40 minutes
- Total Time: 50 minutes
- Yield: 4 one pound loaves 1x
- Category: Bread
- Method: hand mix
- Cuisine: European
Ingredients
- 3 1/3 cups lukewarm water
- 1 1/2 Tablespoons instant yeast
- 1 1/2 Tablespoons fine salt
- 6 1/2 cups (2 lbs) bread flour
- cornmeal for baking
Instructions
- In a large lidded bowl, pour in the water and add the yeast and salt.
- Add the flour and stir. A Danish dough whisk makes this job so much easier. Stir until all the flour is incorporated. The dough will be rough and “shaggy”.
- Put the lid on the container but don’t snap all the way shut. The gases from the yeast need to escape.
- Let rise on the counter for 2-3 hours. It will nearly triple in size. Do not punch the dough down. It will be flat on top and you should see it start to bubble.
- Snap the lid on all the way and refrigerate over night. When you remove the dough after chilling, you may notice that it has fallen. That is totally normal. Use dough as needed. Keep in the refrigerator up to 2 weeks. The longer it chills, the more the flavor will deepen to more of a sourdough flavor.
- To use dough, prepare a baking sheet by lining with parchment paper and sprinkle cornmeal on the paper. Flour the countertop. Flour your hands. Pull your desired amount of dough out and clip it off with kitchen scissors. Form the dough into a ball and place on the prepared parchment. Let is rest for at least 40 minutes and can go as long as 90 minutes. During this time, it may not puff up much. It may actually spread a bit, but don’t worry. It will puff up in the oven.
- Preheat oven to 450°F with a baking stone on the center rack (or cast iron pan), with a metal broiler pan on the bottom rack (at least 4-5 inches away from the baking stone or it will crack). Do not use a glass pan as it may shatter.
- With a serrated knife, make three 1/4 inch deep slashes in the loaf. Transfer the parchment with the loaf onto the baking stone.
- Carefully pour 2 cups water into the broiler pan, keeping face at a distance as it will produce steam. The steam in the oven will create that crispy crust and aid in puffing up the loaf.
- Bake for 20 minutes and carefully remove the parchment paper. Bake another 10-15 minutes or until deep golden brown.
- Cool completely before slicing. The bread is still baking inside as it cools. If you slice it before it totally cools the bread will be doughy inside. Be patient! It will pay off!
Notes
- You can substitute the bread flour with all purpose flour. Decrease the water by 1/3 cup. Bake as instructed.
- Using a Danish dough hook makes mixing this dough so much easier.
- Baking the bread on a baking stone will give it a nice crispy crust.
- If you have a pizza peel, you can sprinkle that with the cornmeal and let the dough rest on the peel so you can place it directly on the pizza stone for the entire bake.

