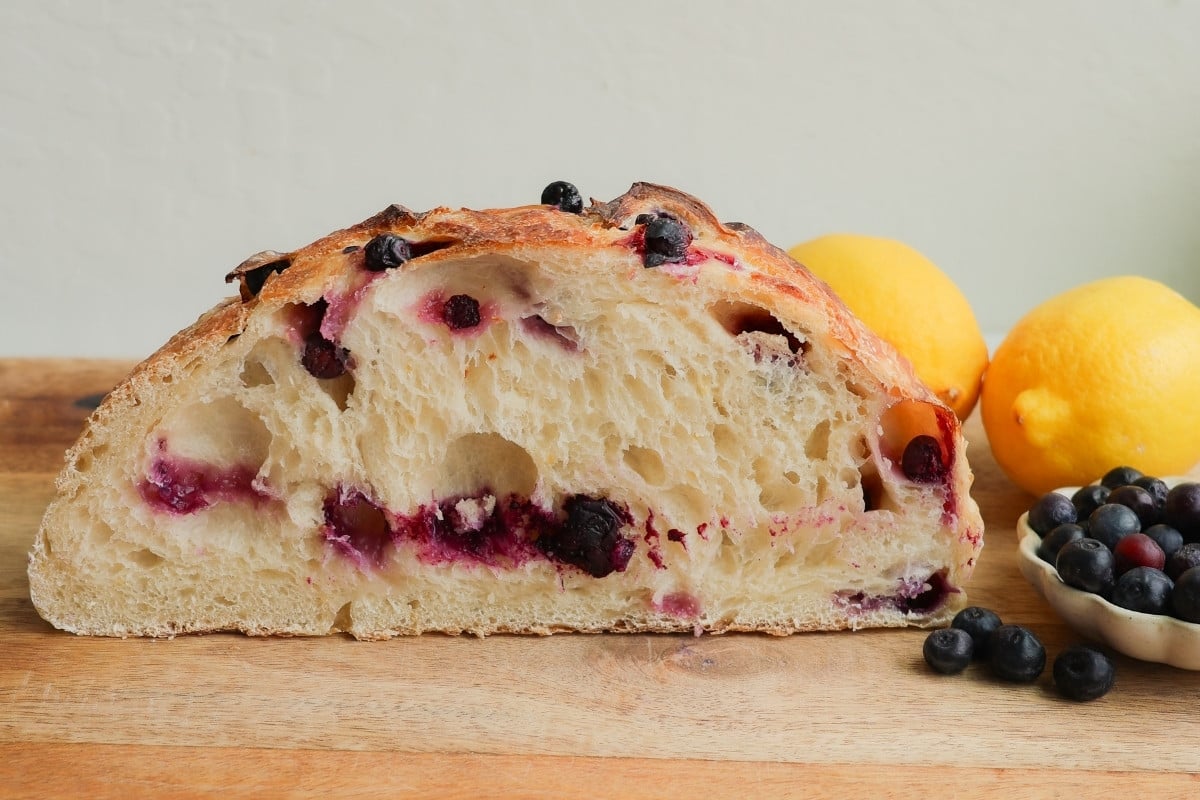
Lemon Blueberry Sourdough Bread
This lemon blueberry sourdough bread, full of fresh blueberries and lemon zest, a classic flavor combination you’ll love. If you’ve been looking for a new sourdough variation to make the most of your sourdough starter, you’re about to discover your new favorite twist to share with family and friends, or keep all to yourself.
A quick look at the recipe:
- Makes 1 loaf.
- based off of my Easy Sourdough Bread recipe.
- Rub the lemon zest and sugar together for the most lemon flavor.
- Blueberries added during Stretch & Fold.
Why you’ll love Lemon Blueberry Sourdough Bread
- Sweet with a twist – Just like in my Blueberry Scones with Lemon Glaze, it has a hint of lemon and a touch of berry sweetness.
- A breakfast favorite – Lemon Blueberry Sourdough is so yummy for breakfast, especially toasted and spread with cream cheese.
- Fun sourdough recipe – A playful way to experiment beyond traditional loaves – just like my Funfetti Sourdough Bread.
- Impressive yet simple – Like my Strawberry Cream Cheese Pastries, this bread looks bakery-worthy but is approachable enough for home bakers.
Table of contents
- Why you’ll love Lemon Blueberry Sourdough Bread
- Ingredients for Lemon Blueberry Sourdough Bread
- Ingredient Substitutions
- Lemon Blueberry Sourdough Timeline
- How to make Lemon Blueberry Sourdough Bread
- How to Store Lemon Blueberry Sourdough Bread
- Recipe Tips
- Frequently Asked Questions
- More Easy Sourdough Recipes
- Lemon Blueberry Sourdough Bread Recipe
Ingredients for Lemon Blueberry Sourdough Bread

- Sourdough Starter – Whenever using your starter as the “leavening agent” (the ingredient that makes it rise), make sure it’s bubbly and active. Use it at it’s peak, before it starts to deflate and fall.
- Lemon Zest and Sugar – Adding these together intensifies the lemon flavor in the sourdough bread.
- Fresh blueberries – They add fruity flavor and jucyness to each bite.
- Find the full list of ingredients in the recipe card below.
Ingredient Substitutions
- Lemon Zest – You can leave this out, but it really adds a complex sweet and zesty flavor. Lemon recipes are so flavorful, like my glazed lemon loaf.
- Blueberries – Fresh blueberries work best. Do not use frozen blueberries – it will make the dough too cold and add unwanted moisture to the dough.
- Flour – I would not substitute with all-purpose flour. Bread flour is best for sourdough bread. I suggest using a high protein bread flour with a 13% or higher protein content. However, you could also use a regular bread flour like King Arthur, which has 12.7% protein.
Lemon Blueberry Sourdough Timeline
This is a sample baking timeline to help you get an idea of how this recipe will go for you. Since this is a two day process, having a timeline can help you plan your baking. Note: You can also bake this loaf the same day instead of overnight cold proofing it. See the recipe notes for same day baking instructions.
| The night before: | |
| 9:00 pm | feed starter with 100% hydration |
| The next morning: | |
| 9:00 am | Fermentolyse: Mix together the lemon zest, sugar, water, and ripe sourdough starter. |
| 9:30 am | add salt and 20g water |
| 10:00 am | Stretch & Fold 1 |
| 10:30 am | Stretch & Fold 2- Add the blueberries |
| 11:00 am | Stretch & Fold 3 |
| 11:05 am – 2:30 pm | Complete Bulk Fermentation – let dough rise |
| 2:30 pm | Pre-Shape |
| 3:00 pm | Shape & cold proof |
| The next day: | shape & cold proof |
| 9:00 am | Score & bake |
How to make Lemon Blueberry Sourdough Bread
Mixing the Dough

Step 1: Combine the sugar and lemon zest by rubbing them together between your fingers. This releases the flavor of the lemon and makes it much more concentrated.
If you also love blueberry lemon: This is one of my favorite flavor duos! The sweet blueberries with the tart lemon goes well in so many recipes, including a few of my Top Rated Recipes like Lemon Blueberry Olive Oil Loaf with Ricotta, Lemon Blueberry Sweet Rolls, and Blueberry Scones with Lemon Glaze.

Step 2: Mix the starter and the lemon sugar mixture to the water. Mix it together with your fingers. Step 3: Add the flour and mix so no dry bits of flour remain. Cover and let rest 30 minutes. Step 4: Let the dough rest for 30 minutes. Step 5: Sprinkle the salt and an additional 20g of water over the dough. Pinch it together. Cover and let rest 30 minutes.
On a side note, if you keep a discard jar, put your extra sourdough starter in there after mixing your bread so you can make my Brown Butter Sourdough Chocolate Chip Cookies later!
Stretch and Folds
Stretch & Fold: After the dough has been mixed, you’ll spend the next 90 minutes developing the dough through a total of 3 series of stretching and folding. It’s a small action that has a big result. This gentle form of kneading develops the gluten in the dough, which results in a bread that holds its shape as it rises and bakes.

Step 6: To perform your stretch & folds, take one side of the and stretch it up.

Then, take that dough and fold it over itself.

Perform this stretch and fold on all four sides of your dough. This is Fold 1. Cover the dough and let it rest 30 minutes.

Step 7: Add the blueberries to the sourdough in the second stretch and fold. This will help to distribute the blueberries all throughout the dough. Cover and let rest 30 minutes. Step 8: Perform a third and final set of stretch and folds to the dough.
Bulk Fermentation
Bulk Fermentation is perhaps one of the most difficult steps for sourdough baker’s to conquer. It requires baker’s intuition and getting to know your dough. The most obvious signs that bulk fermentation is done:
- the dough has risen 30-40% in volume
- it pulls away from the bowl easily
- there are bubbles throughout and on top of the dough
- the dough jiggles when you slide the bowl back and forth
Since temperature can affect how fast or slow your sourdough rises, it’s alway better to watch your dough, rather than the clock. The warmer the environment, the faster your dough will rise.

Step 9: Cover the dough and let it bulk ferment (rise) until it has risen about 50% in volume. It should be domed with a few bubbles on top and throughout the dough. At a dough temperature of around 78°, bulk fermentation can take 2-4 additional hours, depending on the warmth of your kitchen.
Shaping and Final Proof

Step 10: Shape a round loaf by pulling opposite sides of the dough towards the center and overlap them. Repeat all around the dough, forming a tight, round loaf. Turn the loaf over and round it out a few times, tightening the outside of the loaf.

Step 11: Place the lemon blueberry sourdough loaf into a floured proofing basket and refrigerate it for 12 to 24 hours before baking. Cold proofing slows down the fermentation process, while also increasing the acidic bacteria that develop the tang we love about sourdough.
Baking

Step 12: Score the lemon blueberry sourdough loaf before baking in a preheated Dutch oven. Bake it with the lid on for the majority of the bake time. Since it has sugar and blueberries in it, it can burn faster, and more easily if it’s baked uncovered. Bake another 5-10 minutes without the lid until it’s golden brown and 200°F internally.
How to Store Lemon Blueberry Sourdough Bread
- On the day of baking, keep the sourdough loaf cut-side-down on your cutting board.
- After day 1, store the sourdough in an airtight container or sealed bread bag for up to 3 days.
- Slice and freeze your sourdough in a freezer zip top bag for up to 6-8 weeks. You can toast frozen slices directly from the freezer.

Recipe Tips
- Don’t skip rubbing the lemon zest and sugar together with your fingers. It really does bring out the flavor of the lemon.
- Just like in my Easy Sourdough Bread recipe, if you slice the bread before it has completely cooled, it will have a gummy texture. As it’s cooling down, it’s continuing to bake internally. Give it at least two hours to cool.
- To keep the color from the blueberries from bleeding while ensuring they are evenly distributed throughout the dough, add them gently in the second of the three sets of folds – do not add them before that.
Frequently Asked Questions
I get the best results from using fresh blueberries. You can use frozen blueberries. Let them thaw first and drain any extra juices.
Place a baking sheet on the oven rack directly below your Dutch oven. This can block direct heat from the heating element, preventing the bottom crust of your sourdough from burning. You can also place a folded up piece of extra parchment paper on the bottom of your Dutch oven to put more space between your loaf and the pan.
When you’re baking with natural yeast, your recipes will take longer to rise than when baking with a commercial dry yeast. Temperature plays a key role in how quickly or slowly your sourdough rises. The warmer the temperatures, the faster it will ferment. Monitor the temperature of your sourdough with an instant read thermometer. You should aim for a target dough temperature of around 78-80°F. If your dough isn’t rising, try placing it in a warm place in your kitchen. Put it in the oven with the oven light on. The warmth from the light will help warm up your dough.
It’s also important that you use a mature, ripe and healthy sourdough starter. It’s the foundation of every good loaf.

More Easy Sourdough Recipes


Lemon Blueberry Sourdough Bread Recipe
Lemon Blueberry Sourdough Bread
Equipment
Ingredients
Levain
- 12 g sourdough starter
- 60 g bread flour (½ cup)
- 60 g water, room temperature, 74°F/23°C (¼ cup)
Lemon Blueberry Sourdough Bread
- 4 g lemon zest (2 teaspoons)
- 50 g sugar (¼ cup)
- 350 g water, divided, room temperature, 74°F/23°C (around 1½ cups)
- 500 g bread flour (around 4¼ cups)
- 10 g fine sea salt (2 teaspoons)
- 130 g fresh blueberries (1 cup)
Instructions
Prepare the Levain (the night before)
- To a clean jar, add the ingredients for the Levain. Mix until combined and no dry bits of flour remain. Cover and let rise at room temperature, overnight, for about 12 hours or until it has reached its peak. It should more than double in size and be thick and bubbly when using it for mixing the bread.12 g sourdough starter60 g bread flour60 g water, room temperature, 74°F/23°C
Mix the Dough (the next morning)
- To a small bowl, add the lemon zest and granulated sugar. Rub it together with your fingers to release the lemon flavor. Set aside.4 g lemon zest50 g sugar
- In a large bowl, add 100g of the levain and 330g of the water (reserve the remaining 20g of water for later). Mix it together with your hands to break up the levain. Add the lemon sugar mixture and the bread flour. Mix with a Danish dough whisk or pinch it together by hand. Make sure no dry bits of flour remain. Cover and let rest 30 minutes.330 g water, divided, room temperature, 74°F/23°C100 g levain500 g bread flour
- Sprinkle the salt and the remaining 20g of water over the dough. Pinch it together with your fingers to fully incorporate. Cover and let rest 30 minutes.10 g fine sea salt20 g water
Stretch and Fold
- Fold 1: Remove the cover from the bowl. Wet your fingers with water to prevent the dough from sticking as you handle it. Stretch one side of the dough up and fold it over. This is called a stretch and fold. Rotate the bowl a quarter of a turn and repeat. Continue until you’ve performed a stretch and fold on all four sides of the dough. Cover the dough and let it rest 30 minutes.
- Fold 2: Add the blueberries over the dough and perform a second set of stretch and folds. This will help to distribute the blueberries all throughout the dough. Cover and let rest 30 minutes. 130 g fresh blueberries
- Fold 3: Perform a third and final set of stretch and folds to the dough.
Bulk Fermentation
- Cover the dough and let it bulk ferment (rise) until it has risen about 50% in volume. It should be domed with a few bubbles on top and throughout the dough. At a dough temperature of around 78°, bulk fermentation can take 2-4 additional hours, depending on the warmth of your kitchen.
Shape
- Prepare a 9-inch round proofing basket with a linen liner. Lightly dust with flour. Set aside.
- Lightly flour your work surface. Turn the dough out of the bowl. Shape a round loaf by pulling opposite sides of the dough towards the center and overlap them. Repeat all around the dough, forming a tight, round loaf. Turn the loaf over and round it out a few times, tightening the outside of the loaf. Scoop it up and flip it over, into the proofing basket. The seam side is now facing up.
Final Proof (overnight)
- Cover the loaf with a plastic shower cap or bread bag and let cold proof in the refrigerator for 12 to 24 hours.
Bake (the next day)
- Place a Dutch oven on the middle rack of the oven and preheat to 450°F. Preheat for at least 30 minutes. Remove the loaf from refrigerator. Uncover and place a piece of parchment paper over top. Holding the parchment with the bowl, flip it over, releasing the loaf from the basket. The loaf should now be smooth side up on the parchment paper.
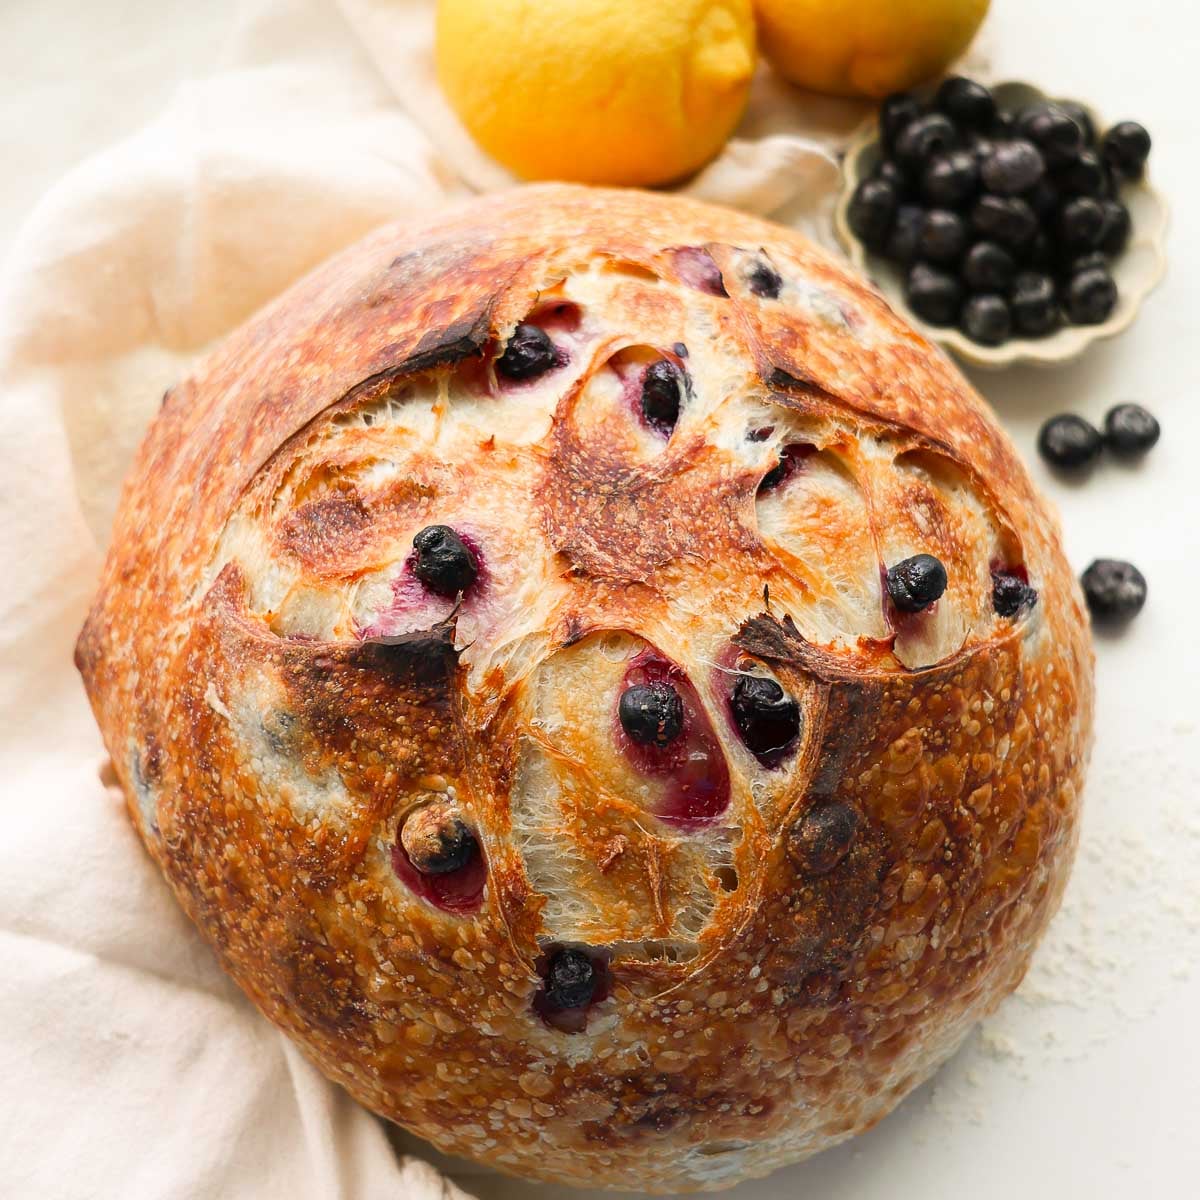
- Using a bread lame or sharp knife, cut an X on top of the loaf, about 1/2-inch deep. Lift the loaf with the parchment into the hot Dutch oven. Replace the lid and place it in the oven.
- Bake with the lid on for 35 minutes. Reduce the oven temperature to 425°F and remove the lid. Bake an additional 5-15 minutes, until the loaf is lightly golden brown. It should have an internal temperature of 205°F. Remove the loaf and place it onto a wire cooling rack. Let the loaf cool completely before slicing, at least 2 hours.
Notes
- See my blog post for a recipe timeline and detailed images for this recipe.
- Baking without a Dutch oven: You can bake sourdough without a Dutch oven. The main idea is to create steam in your oven to help it rise nice and tall. You can bake it on a baking sheet or preheated baking stone. Place a deep pan on the bottom of your oven and preheat it with your oven. Carefully add boiling water to the hot pan and close oven door. Let the oven steam up for about 5 minutes before baking the loaf. Bake with the steam for all but the last 10 minutes of the bake time. *To be safe, place a towel over the glass oven door while adding and taking out the hot water.
- Stretch and Folds: You can do coil folds instead of stretch and fold – use whichever technique you prefer.
- Ripe Sourdough Starter: Make sure you use your starter when it’s bubbly and active. For me, I use my starter in the morning at feeding time – I add what I need to my recipe, making sure I have enough left over to feed with.
- Temperature: Both dough temperature and climate temperature play a big role in how your dough develops. My kitchen is usually around 76°F. I use room temperature water…so my dough is typically around 76-78°F. My recipe is written taking these factors into account. Warmer temperatures speed up the fermentation process and colder temperatures slow it down. Depending on your kitchen and water temperature, your dough may develop at a different rate than mine. Use your baker’s intuition to look for the signs of the completion of bulk fermentation.
- Same Day Baking: You can bake this loaf the same day. Instead of chilling after shaping, let it rest at room temperature for about 1-2 more hours. It should rise a bit more and when pressed with your fingertip, it should leave an indent that slowly springs back.
- Burnt bottom? You can place a baking sheet on the rack below the Dutch oven to prevent the bottom of your sourdough loaf from browning too much.
can i use dehydrated blueberries?
Hi Gayle,
I haven’t tried this recipe with dehydrated blueberries, but if you want to try it, I would soak them first to get them hydrated. Otherwise they will pull moisture from the loaf if you use them in their dehydrated state. Let me know how it turns out! Thanks!