Easy Focaccia Recipe
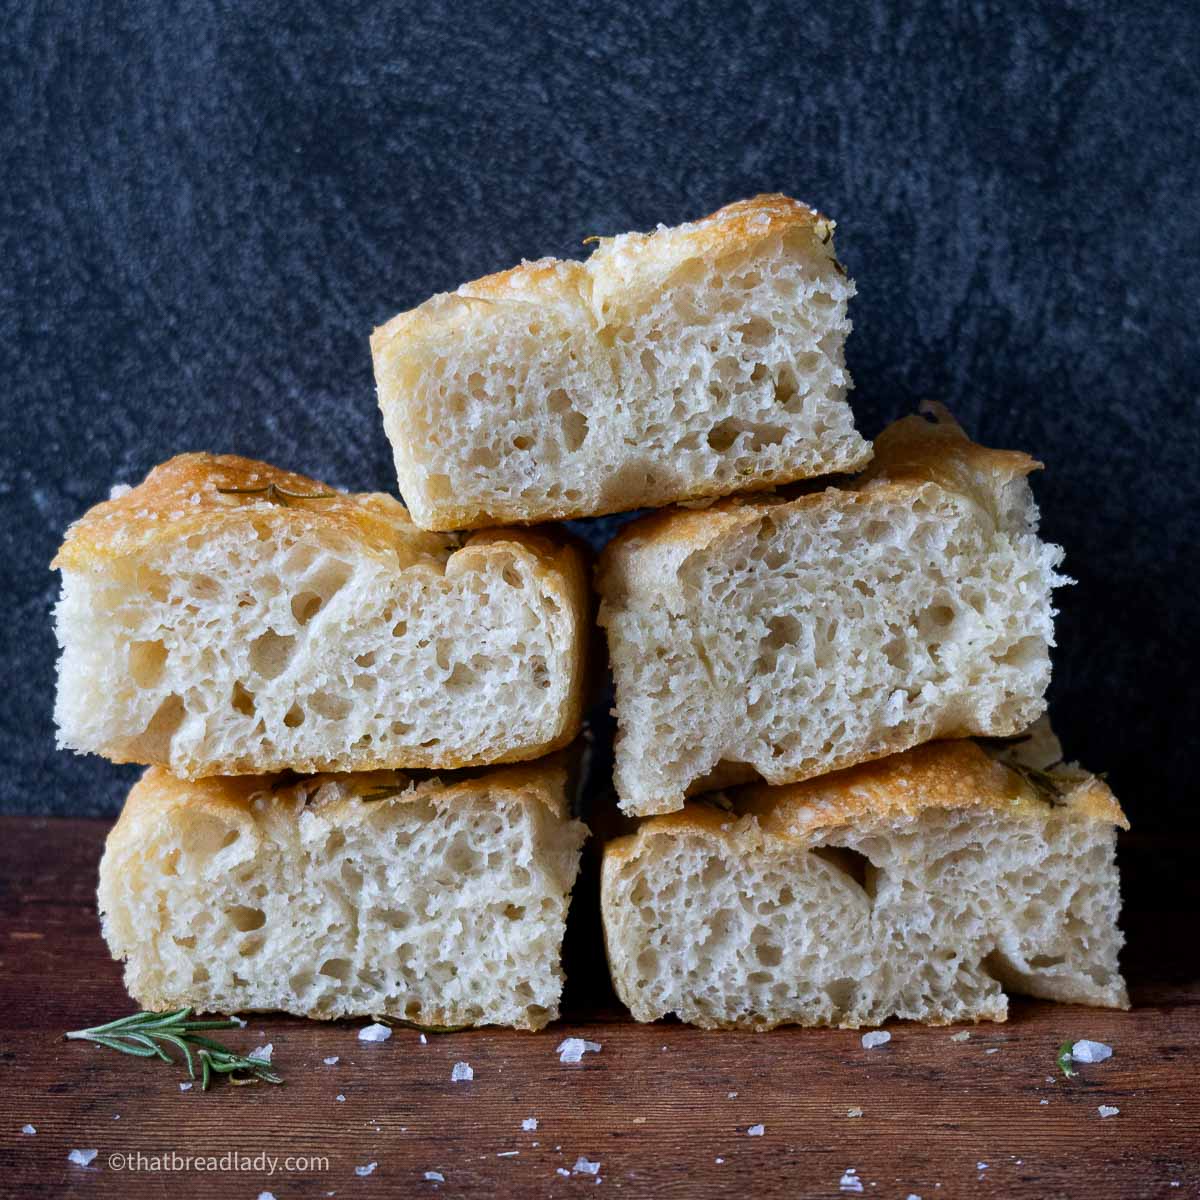
This easy focaccia recipe makes soft, bubbly bread with crisp, golden edges using just 5 ingredients and 5 minutes of hands-on time. There’s no kneading or stretch-and-folds required. Simply mix the dough, let it rise, and bake it the same day, or let it rise overnight in the refrigerator for even more flavor.
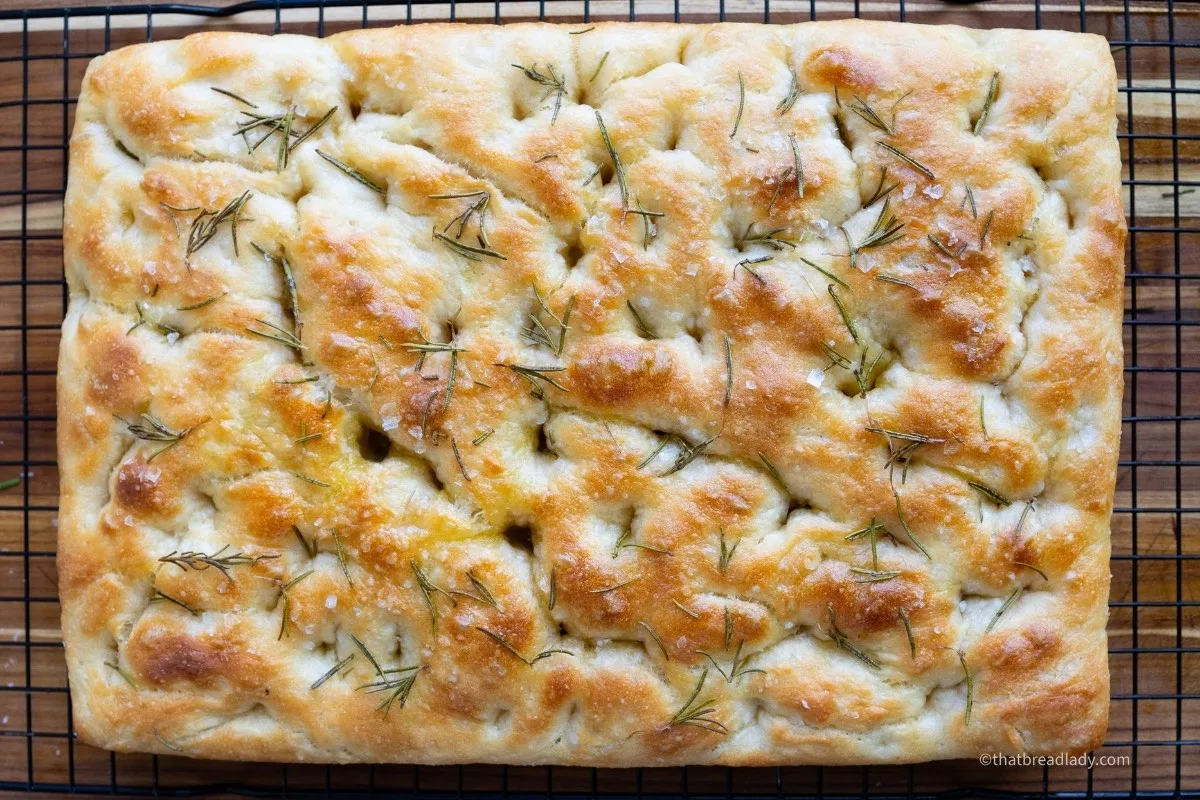
If you’ve always wanted to learn how to make focaccia, this is a great place to start. The wet, sticky dough does most of the work for you, with no complicated shaping or bread-making techniques required. I’ve recently updated this reader-favorite recipe to fit perfectly in a 9×13-inch pan, with plenty of tips to help you know when your dough has risen enough and how to get those beautiful airy pockets every time.
Quick Look: Easy Focaccia Recipe
- Prep Time: 5 minutes
- Fermentation Time: 3 hours (with optional overnight focaccia instructions)
- Bake Time: 18 minutes
- Total Time: 3 hours
- Servings: 12
- Calories: 227 kcal
- Cook Method: Baked at 450°F
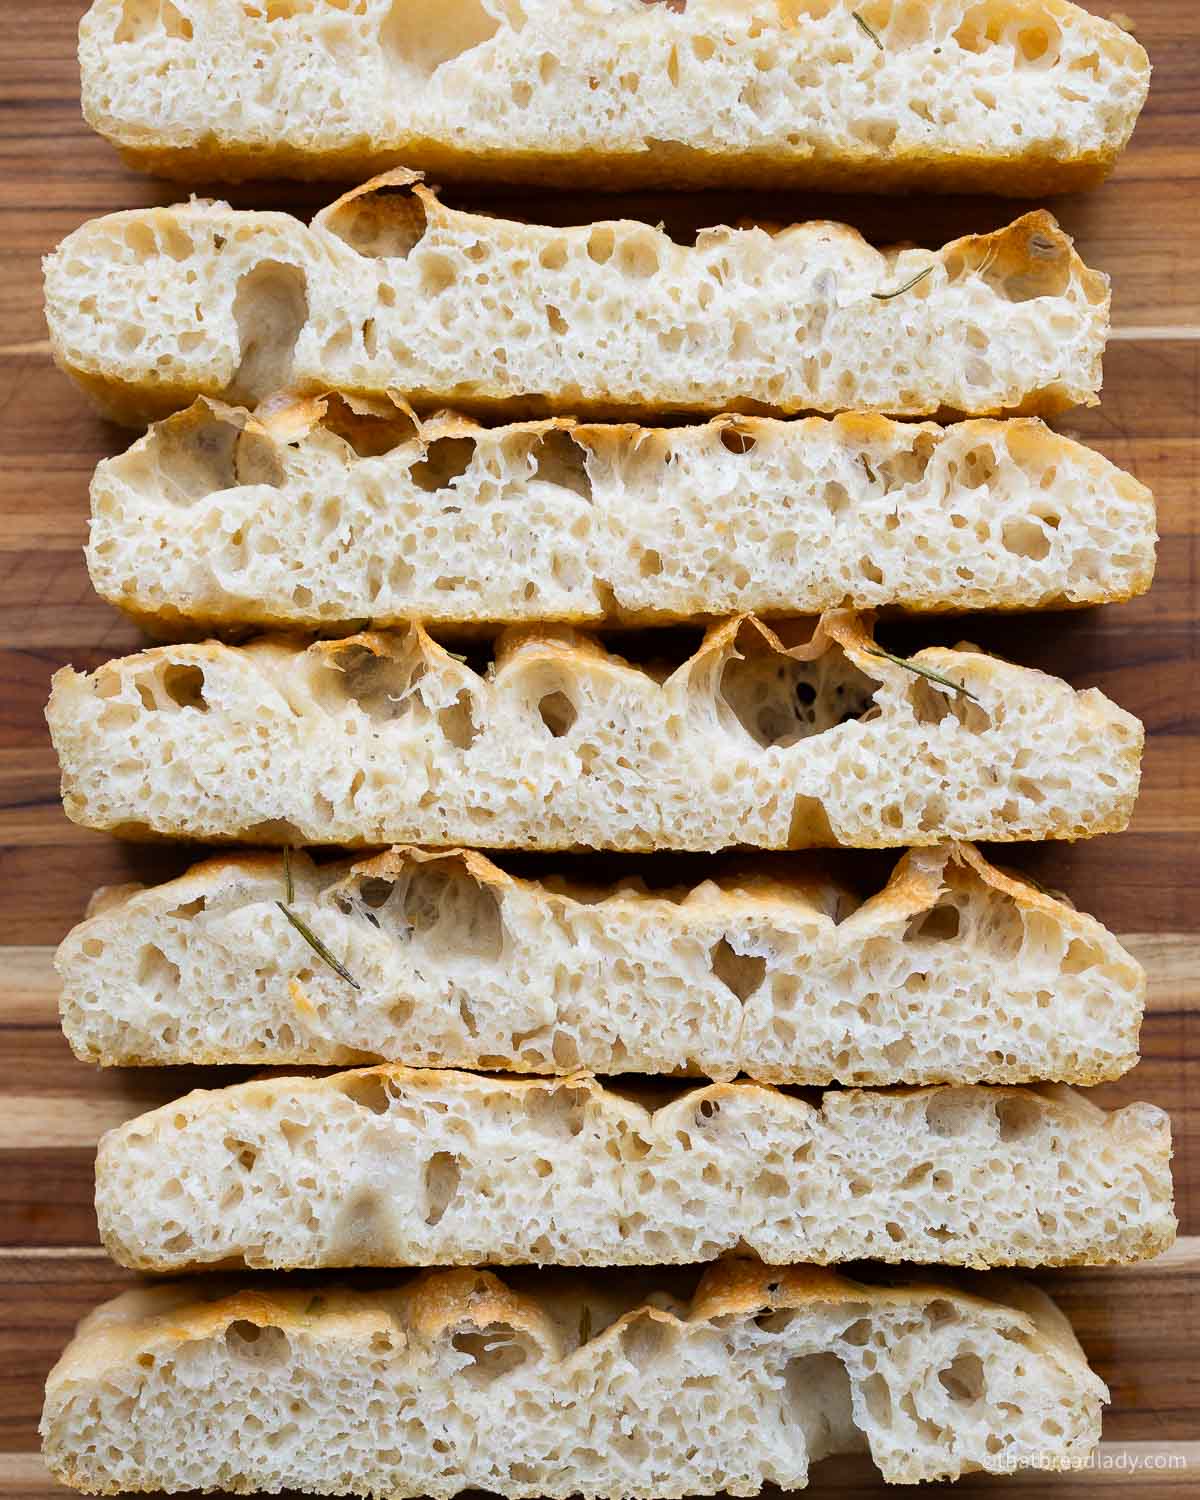
- Flavor & Texture: Focaccia has a fluffy crumb with airy pockets and a crispy crust.
- Difficulty: Easy
SUMMARIZE AND SAVE THIS RECIPE CONTENT ON:
Table of contents
- Quick Look: Easy Focaccia Recipe
- How to make Focaccia
- Important Ingredients for Easy Focaccia Recipe
- Substitutions and Variations
- The Secret to making the Best Easy Focaccia
- Step-by-Step Tips for How to Make Focaccia
- Overnight Focaccia Option
- Storing and Reheating Focaccia
- Frequently Asked Questions
- Other recipes you’ll love
- Easy Focaccia Recipe
How to make Focaccia
The steps are so simple, it’s hard to believe how delicious bread can be without much work. You’ll find detailed images and extra tips below, but here’s a quick overview of how you’ll make the best focaccia:
- In a large bowl, mix flour, water, yeast, and salt into a wet, sticky dough.
- Drizzle olive oil into a separate large bowl and place the dough in there to rise until it doubles in size, or in the refrigerator for up to 48 hours.
- Coat a pan with olive oil and stretch the dough to fill the pan. Cover and let it rise.
- Dimple the risen dough.
- Bake until golden and crispy. Slice and enjoy!
Important Ingredients for Easy Focaccia Recipe
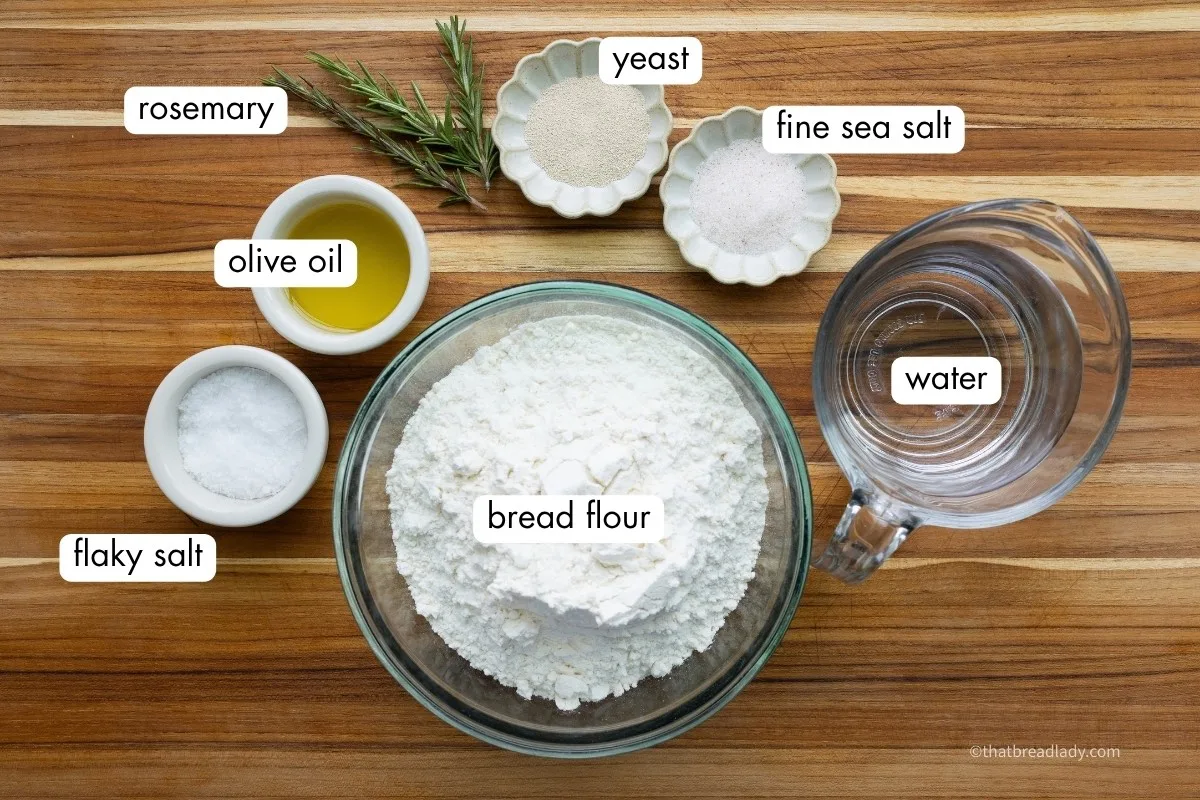
- Water – Use warm water (around 100°F/37°C) to help the dough rise efficiently. Make sure it isn’t too hot, which can damage or kill the yeast.
- Instant Yeast – When using instant yeast, you can add it directly to the recipe without having to proof it first. It’s also called “fast acting yeast”, which describes exactly what it does in bread recipes.
- Bread flour – Using a flour with a higher protein content, like bread flour (12–15% protein), helps build a strong gluten structure. This is especially helpful in a no-knead focaccia, since we’re relying on time rather than kneading to strengthen the dough.
- Olive oil – Since a lot of the flavor in focaccia comes from the olive oil, use a high quality extra virgin olive oil. It will give the focaccia a richer flavor.
See the recipe card at the end of the post for a full list of ingredients and measurements.
Substitutions and Variations
- Flour – Bread flour will give you the best results, but if you’re in a pinch, you can swap out the bread flour with all-purpose flour. Since bread flour is more efficient at absorbing liquids, I’d suggest decreasing the water by about 10% (45g).
- Sourdough – To substitute the yeast with sourdough starter, use 180 g (1/2 cup) ripe starter, and decrease both the flour and water by 90 g each. Perform 3 sets of stretch and fold, spaced 30 minutes apart. Then let it rise until doubled in size. With a dough temperature around 80°F, this will take around 4-5 hours. Then continue with the recipe as written.
- Toppings – There are so many different variations of focaccia – too many to list. That’s one of the best things about it, you can make it anything you want it to be. Switch up the toppings, or add things to the dough like cheese, herbs, nuts, dried or fresh fruit. My Cinnamon Roll Focaccia and Chocolate Chip Banana Bread Focaccia are two examples of how you can get really creative with focaccia!
The Secret to making the Best Easy Focaccia
Step-by-Step Tips for How to Make Focaccia
Mix the dough
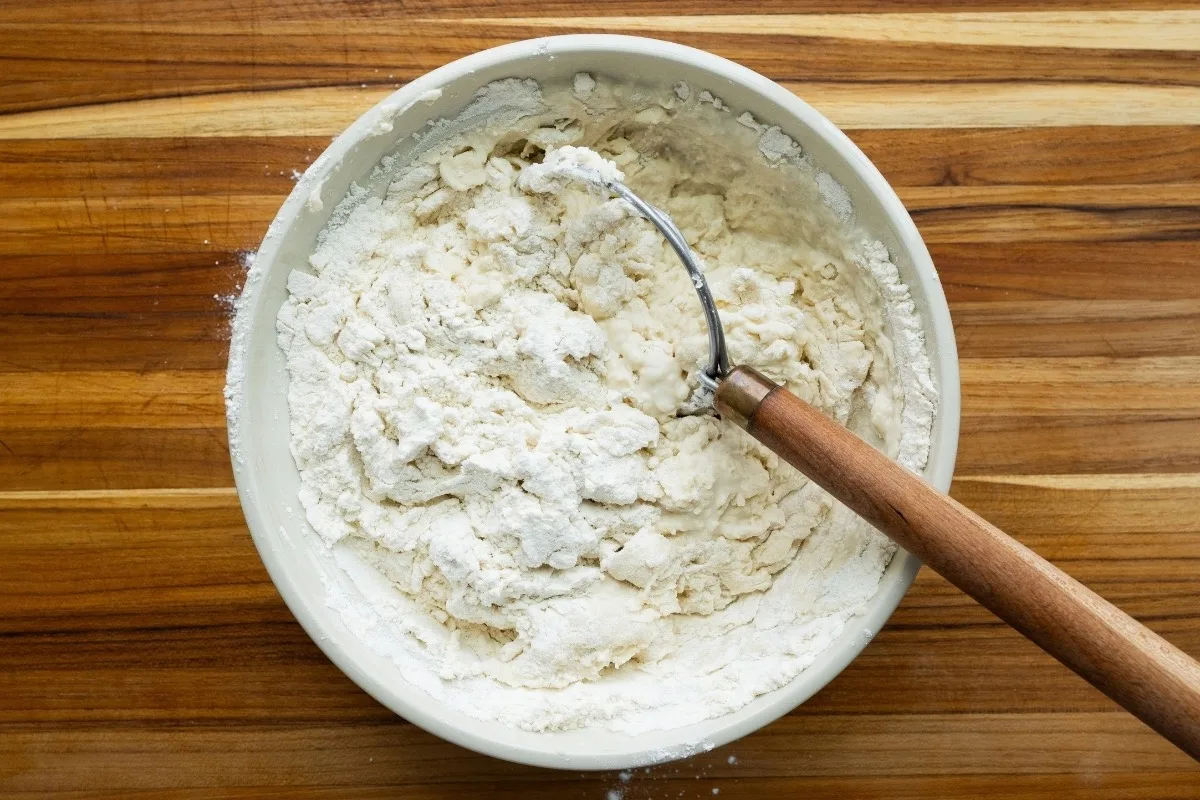
Step 1: Mix the water, yeast, flour, and salt in a mixing bowl. A Danish whisk works really well for this. Scrape the sides of the bowl and make sure there are no dry bits of flour remaining.
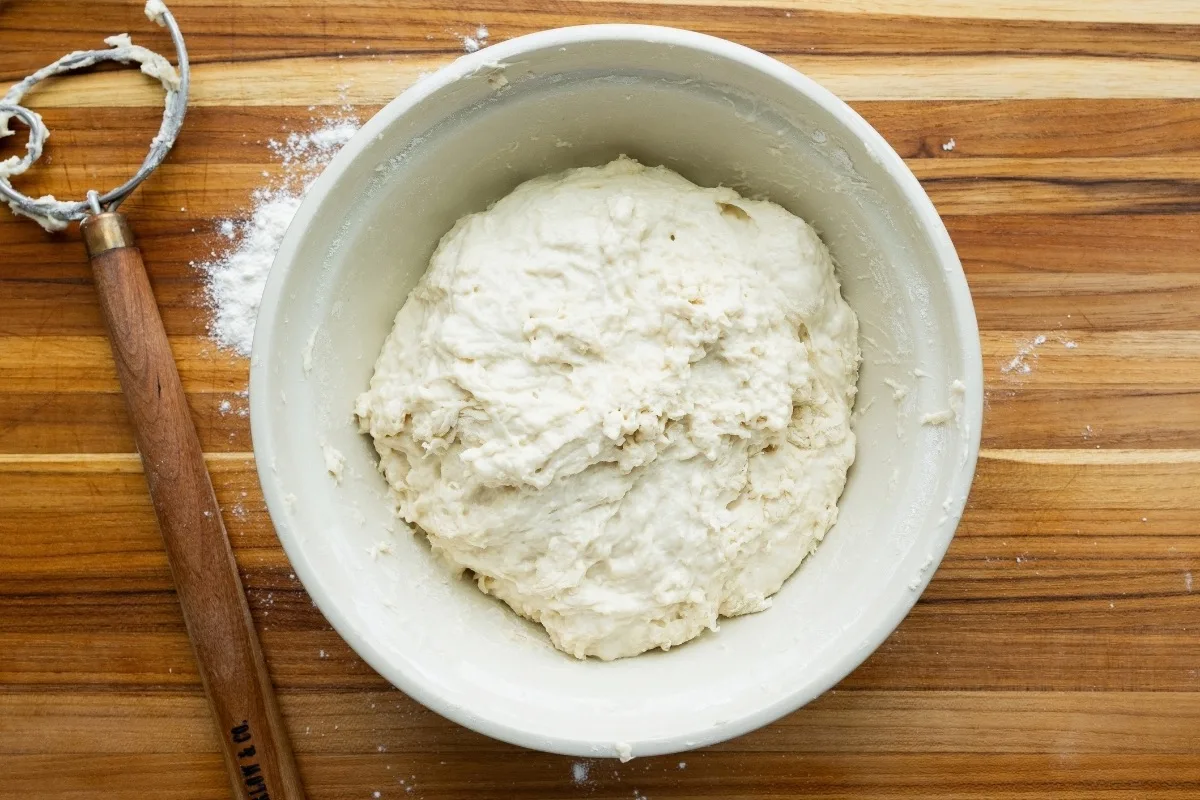
Finish mixing the dough by hand. It will be messy, but this is the best way to make sure there are no dry pockets of flour left. Give the dough several firm pinches as you mix, squeezing it between your fingers to help bring everything together and start developing the gluten. When you’re done, the dough should look sticky and shaggy (rough and shapeless). That’s exactly what you want!
Why Focaccia doesn’t need kneading
As I mentioned before, focaccia is a very wet dough, a high-hydration dough. Because it has so much water, the dough is sticky and can be difficult to knead. The good news is, you don’t need to! As the dough rests and rises, it naturally builds strength and structure. A quick mix at the beginning is all this focaccia dough needs.
When I was developing this recipe with instant yeast, I tested it with and without stretch and folds to see which method gave me the best focaccia. I found that the extra step wasn’t necessary. In fact, I preferred the focaccia without it. The dough was easier to dimple, allowing the olive oil to settle into those little pockets and add even more flavor.
Sourdough focaccia is a little different. When making focaccia with a natural sourdough starter instead of instant yeast, I recommend doing a few sets of stretch and folds to help strengthen the dough. This technique is commonly used in my sourdough recipes, especially my Sourdough Bread.
And if you have time, an overnight rise in the refrigerator makes this easy method even better. When flour and water are mixed together, they begin forming gluten—the stretchy structure that helps dough hold onto air. Giving the dough a long, slow rest allows that structure to develop on its own. With an overnight focaccia, you’ll get more flavor with very little extra work.
Let the Dough Rise
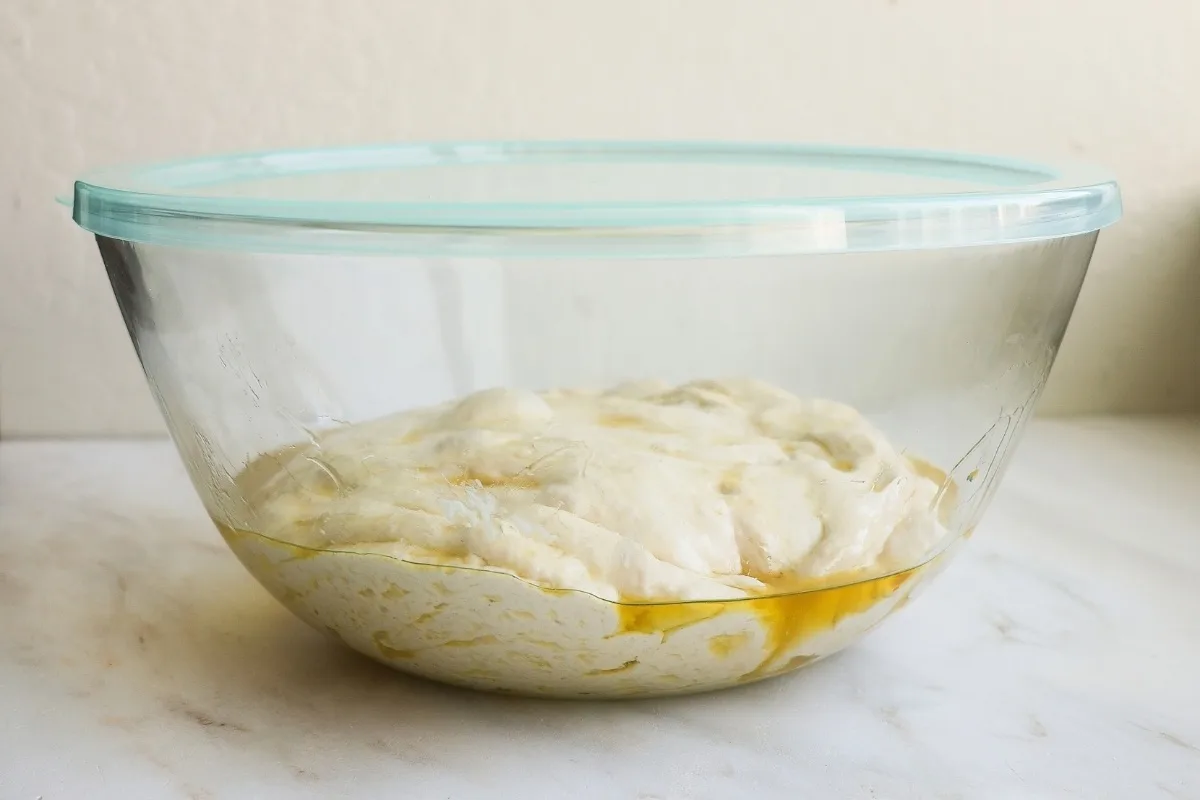
Step 2: Coat a bowl with olive oil, place the dough in it, and cover the bowl. It’s helpful to use a clear bowl, like a glass bowl, for the rise – it allows you to see the progression of the dough.
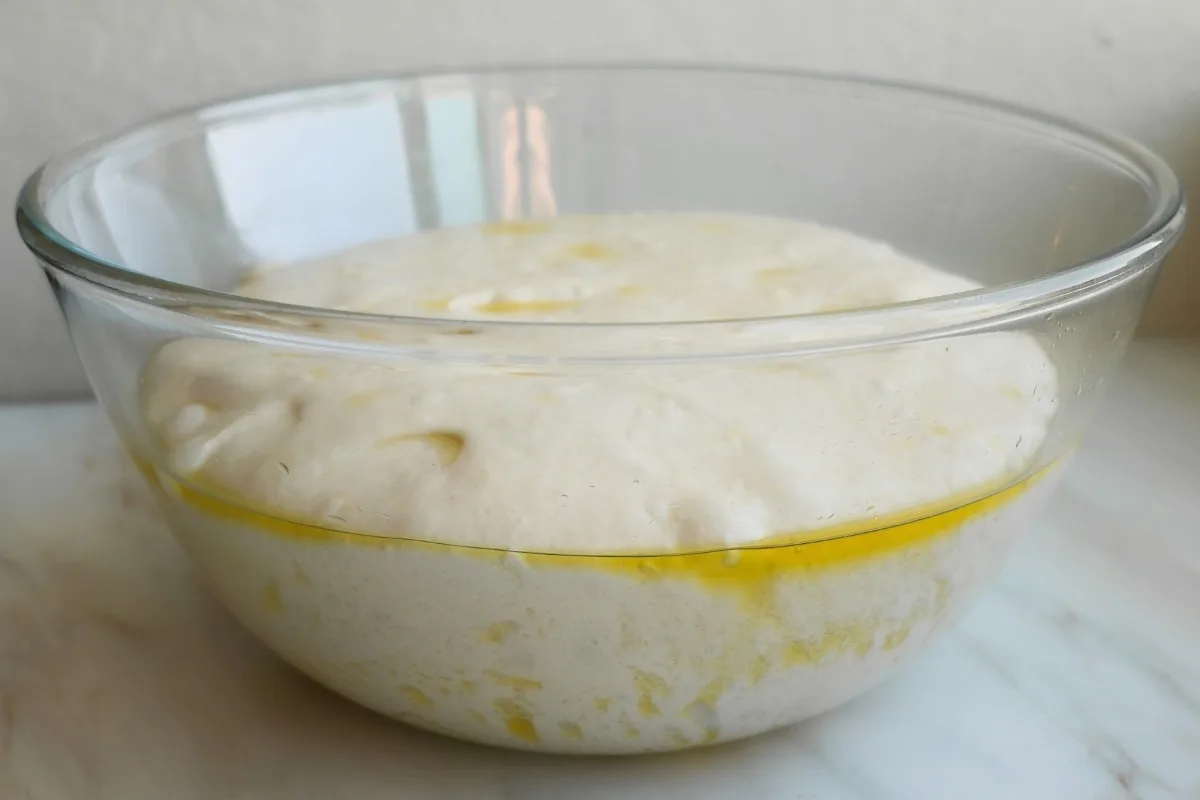
Let the dough rise to double in size. Depending on the warmth of your kitchen and dough, this could take around 2 to 3 hours. The dough will be puffy and have bubbles on top. There’s also an option to make overnight focaccia and refrigerate the dough (my favorite option). Keep on reading!…
Overnight Focaccia Option
The overnight method is my favorite because the slow rise in the refrigerator gives the dough more time to develop flavor. It also makes this recipe incredibly convenient—you can prepare the dough the day before, then shape, rise, and bake it when you’re ready.
- Mix the dough.
- Transfer the dough to a bowl coated with olive oil. Cover and let it rise for 30 minutes—it doesn’t need to double in size.
- Place it in the refrigerator for at least 12 hours and up to 48 hours.
- About 3 hours before you want it baked, remove it from the refrigerator and let it sit 20 minutes before placing it into an oiled pan. Then continue with the recipe as instructed.
- Note: Proofing overnight focaccia will take longer than same day focaccia. Depending on how warm your kitchen is, it could take 2 to 3 hours.
Shape and Rise the Focaccia Bread
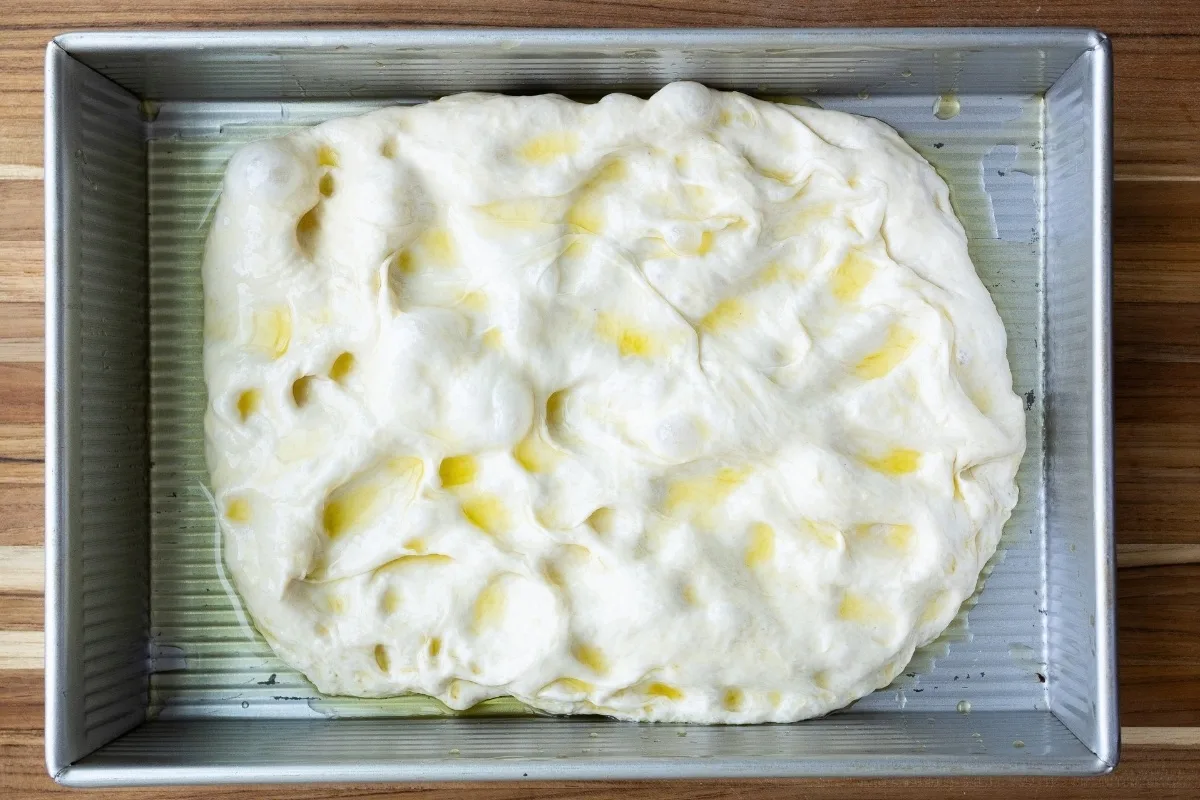
Step 3: Add the focaccia to a pan coated with olive oil. Cover it and let it rise until doubled in size. The dough is ready when it looks puffy and bubbly and has spread to fill the pan. When you gently shake the pan, the dough should jiggle. Non-stick pans work best to keep focaccia from sticking to the pan.
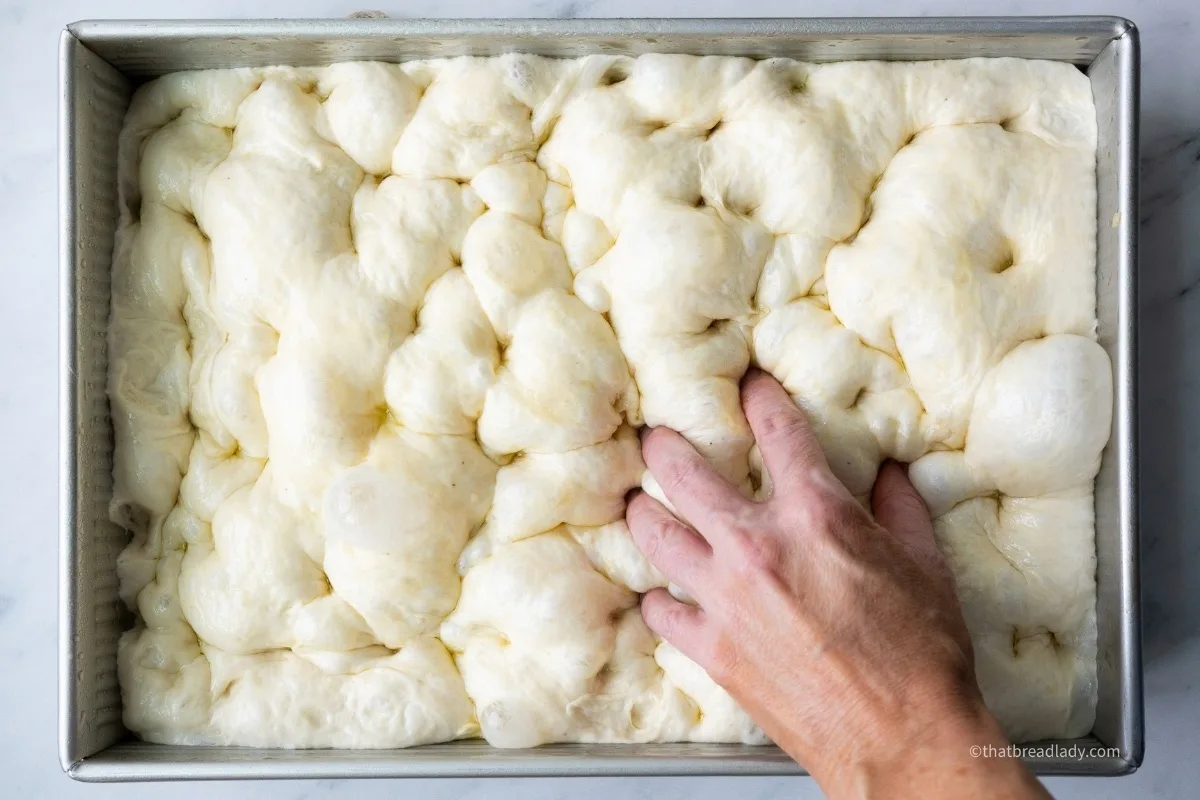
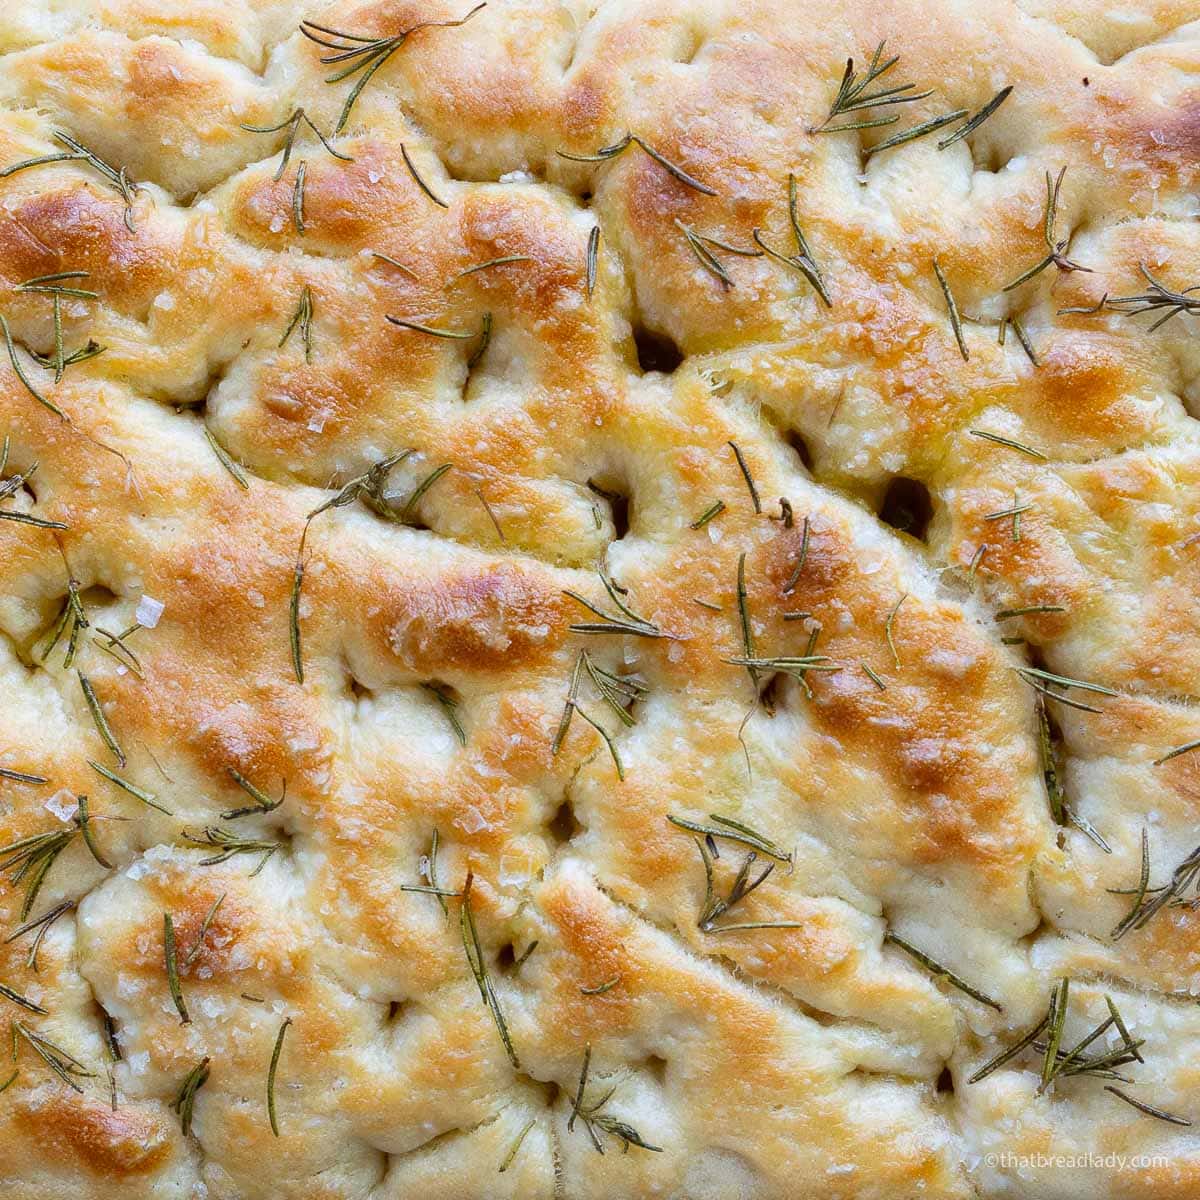
Step 4: Rub some olive oil onto your fingers and dimple the risen dough. Dimpling focaccia is an important step; it gives it that signature airy structure, and keeps it from baking puffy like a cake.
Bake the Focaccia
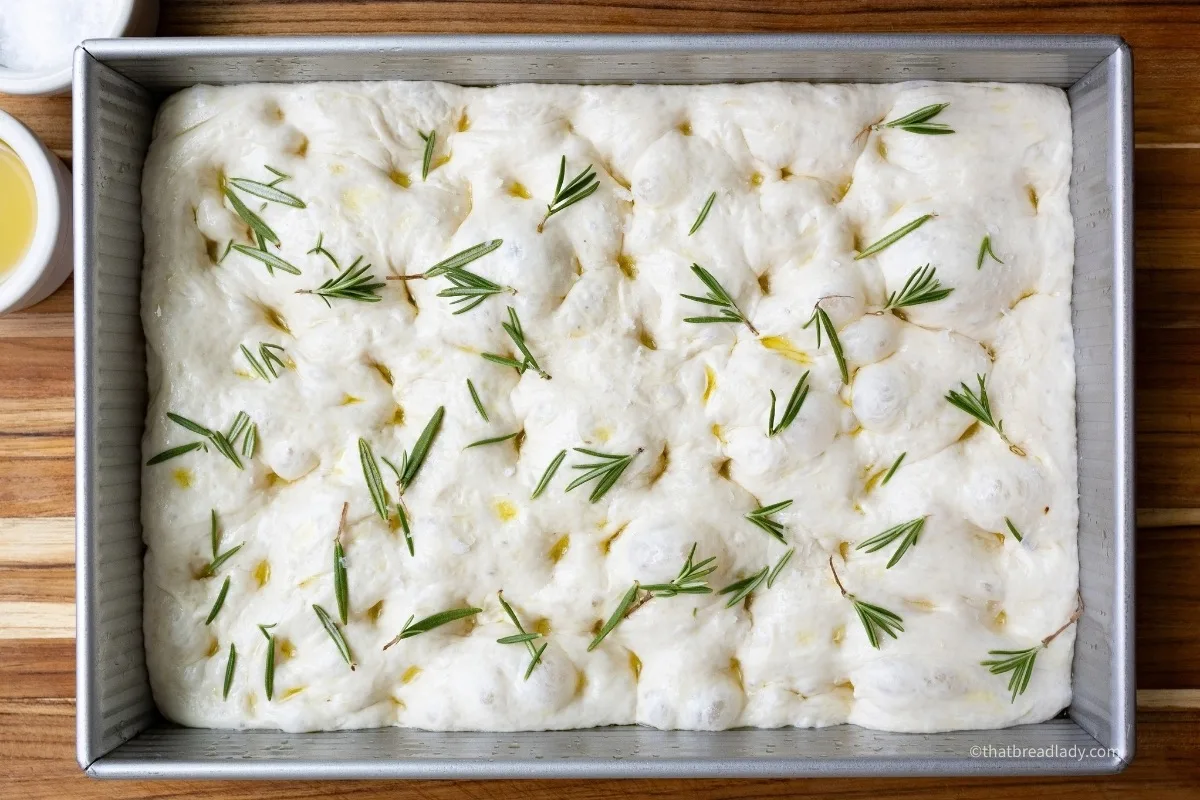
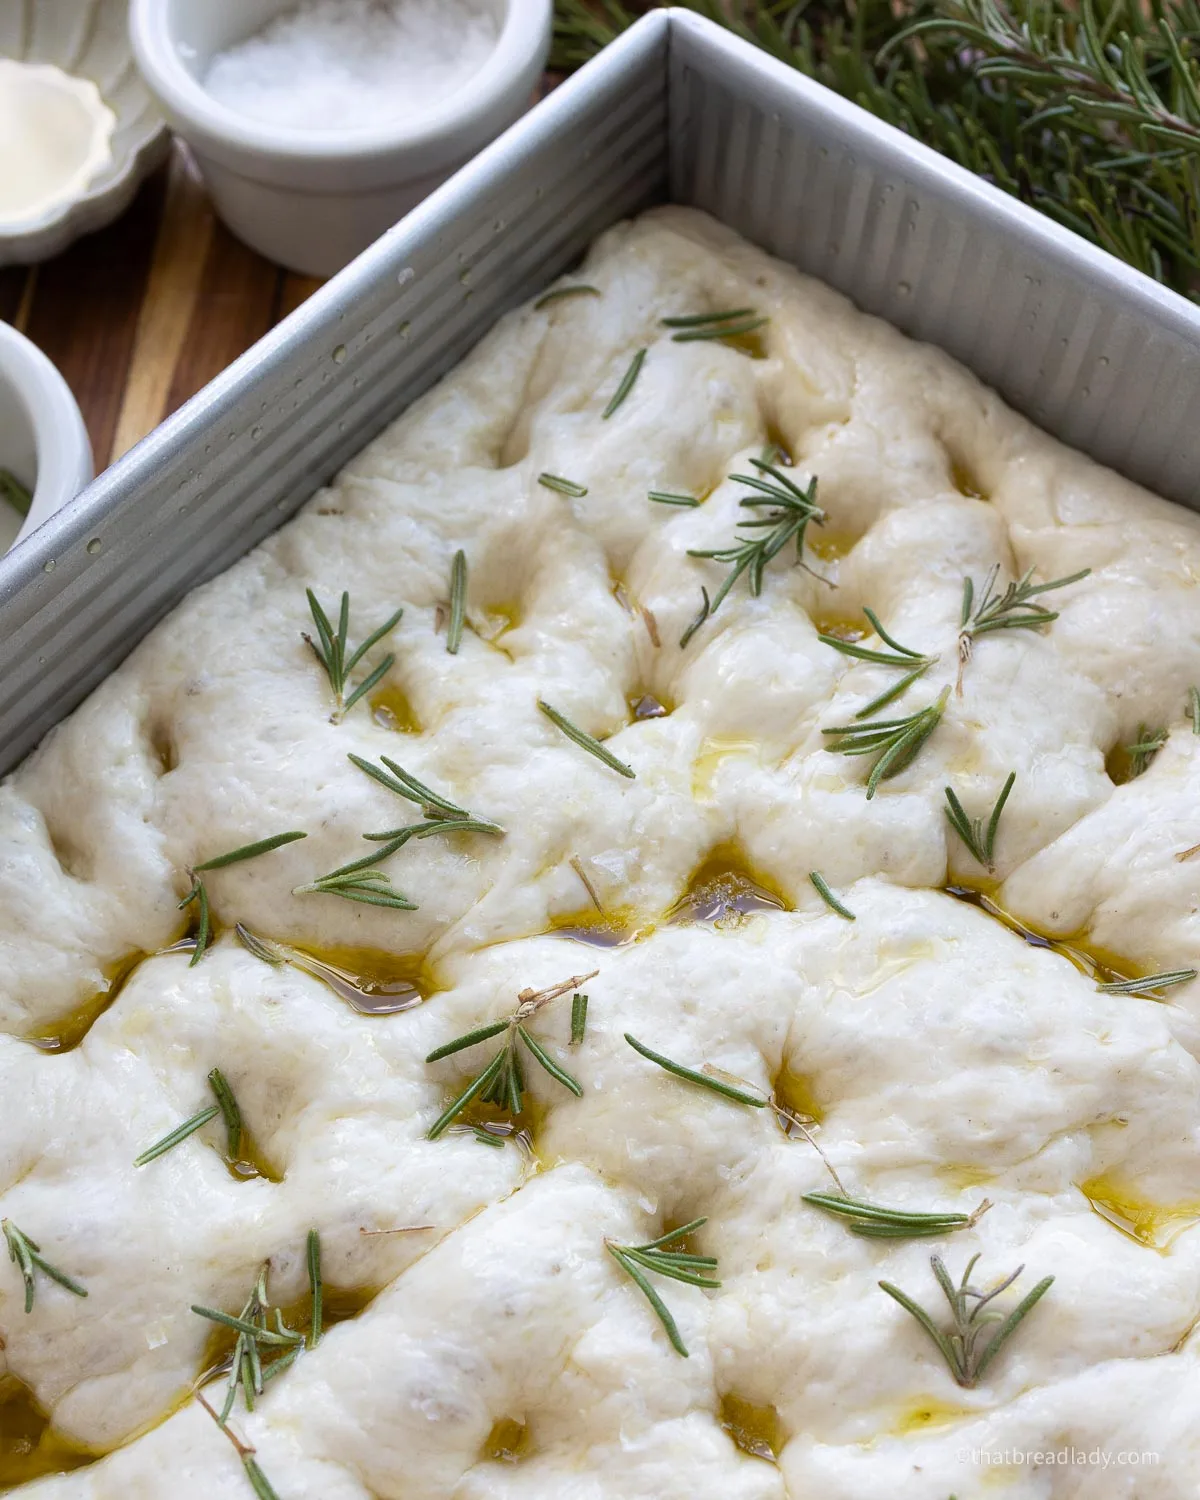
Add any toppings you like! For a classic focaccia, I love using rosemary (fresh or dry) with some flakey sea salt.
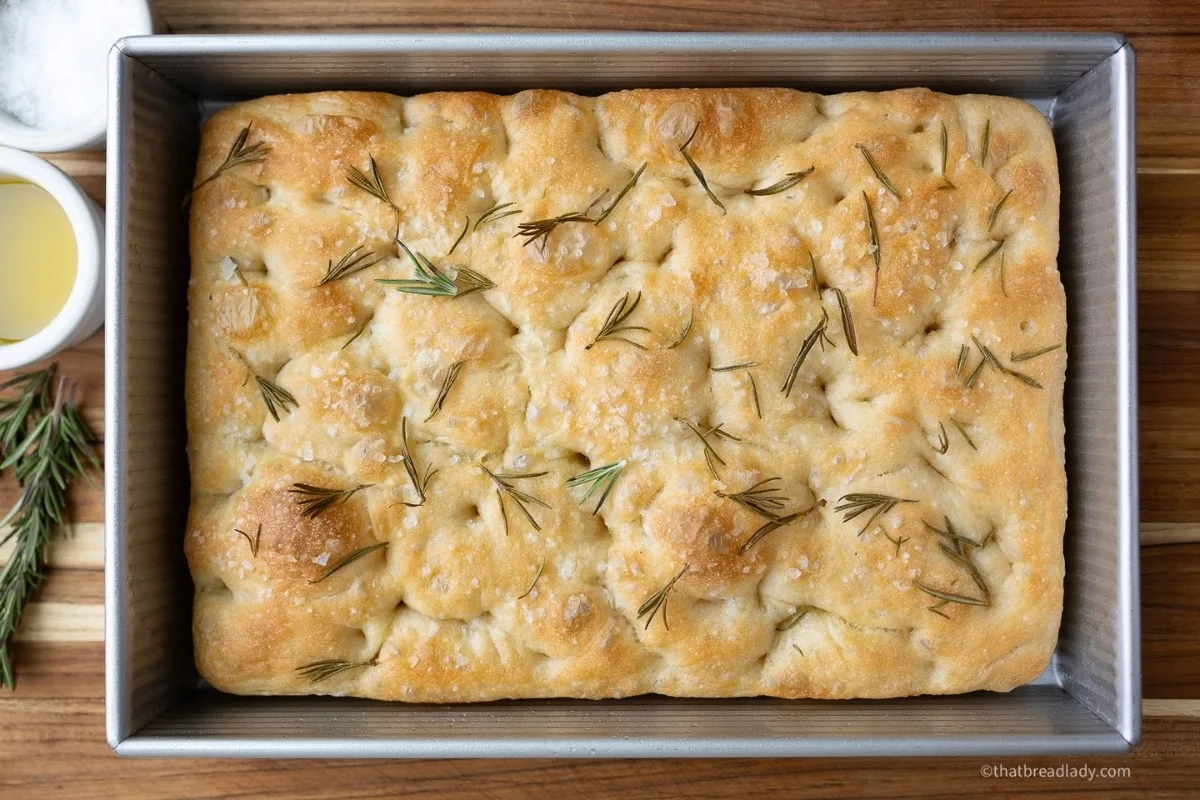
Step 5: Bake focaccia at 450°F for about 18-24 minutes, until it’s golden and toasty. Once it comes out of the oven, brush a bit more olive oil for extra shine and flavor. Remove it from the pan and let it cool on a wire cooling rack, about 15 minutes before slicing.
Storing and Reheating Focaccia
Focaccia is best enjoyed warm and freshly baked. If you have any leftovers, let it cool completely and place it in an airtight container – I prefer to use zip top storage bags. It will stay fresh for up to 3 days.
To reheat sliced focaccia, microwave individual pieces for about 30 seconds, or until warmed through. For several slices, wrap them in foil and warm in a 350°F oven for 10–15 minutes—the foil helps keep the focaccia soft and prevents the cut edges from drying out.
Frequently Asked Questions
MADE THIS RECIPE AND LOVED IT? 🤎 Please leave a 5-star⭐️ rating and comment below! I love hearing how my recipes turned out for you! It impacts my blog so much and allows me to keep sharing helpful tips and delicious recipes with you!
Easy Focaccia Recipe
Easy Focaccia Recipe
Video
Equipment
- 1 9×13-inch non-stick pan see notes for other options
Ingredients
Dough
- 455 g warm water 100°F/37°C (1¾ cups)
- 1½ teaspoons instant yeast (7g) *see notes
- 554 g bread flour (4½ cups, plus 2 tablespoons)
- 1 tablespoon fine sea salt (15 g)
- 75 g high quality extra virgin olive oil divided (5 tablespoons)
Topping
- 1 tablespoon flaky sea salt (I like Maldon brand or Fleur de Sel)
- dry or fresh rosemary leaves to taste
Instructions
- In a large mixing bowl, combine the water, yeast, flour and fine sea salt. You can mix initially with a wooden spoon or Danish dough whisk but will need to finish up by hand. Scrape the sides of the bowl. Pinch the dough together several times to build some dough strength and also make sure no dry bits remain. Mixture will be thick and sticky. 455 g warm water1½ teaspoons instant yeast 554 g bread flour1 tablespoon fine sea salt
- In a separate large bowl, drizzle 1 tablespoon olive oil to coat the bottom. Transfer the dough to the oiled container. Turn the dough coating all the sides in olive oil. Cover with plastic wrap or lid. (I like to use a clear container so I can see how far my dough has risen.)For overnight focaccia, let the dough rise for 30 minutes, and then place the dough into the refrigerator for 12-48 hours. For same day focaccia, let the dough rise at room temperature until doubled in size, about 90 minutes to 2 hours. 15 g (1 tablespoon) olive oil
- Prepare a 9×13-inch nonstick metal baking pan by coating the bottom with 2 tablespoons olive oil. Turn the risen dough onto the oiled pan and flip it over so that the smooth side is facing up and both sides are oiled. (If using refrigerated dough, allow it to rest for 30 minutes at room temperature before placing in the pan.)20 g (2 tablespoons) olive oil
- Gently stretch the dough to fill the pan. Use the backs of your hands and knuckles to stretch the dough without tearing it. If the dough is springing back and not staying in place, let it rest 10 minutes and come back to it. Cover the pan with plastic wrap. Let it rise until it doubles in size, about 1-2 hours. Towards the end of the final rise time, preheat the oven to 450°F/230°C.
- Uncover the pan and drizzle 1 tablespoon olive oil over the focaccia (If you have an olive oil sprayer, it works great for this!). Lightly oil your fingertips. Gently dimple the dough by pressing into it with your fingertips. Press all the way to the pan. Create a moderate number of dimples throughout the dough without depressing too many of the air bubbles. Sprinkle 1-2 tablespoons of sea salt flakes on top and dried or fresh rosemary leaves.15 g (1 tablespoon) olive oil1 tablespoon flaky sea saltdry or fresh rosemary leaves
- Bake 18-20 minutes or until golden brown. After it comes out of the oven, brush the top of the focaccia with 1 tablespoon olive oil.15 g (1 tablespoon) olive oil
- Remove focaccia from the pan with a large spatula and slide onto a wire cooling rack. If the focaccia is slightly sticking to the pan, loosen it around all the edges with the spatula and then slide it out. Allow to cool at least 10 minutes before slicing and serving.
- Focaccia is best served warm, freshly baked. Store any leftover focaccia in an airtight container for up to 3 days.
Notes
- I prefer using a nonstick metal pan for focaccia. If your pan is not nonstick, add 1-2 more tablespoons olive oil to the bottom of the pan. Use your fingers to rub the bottom and sides with olive oil, making sure all the surface is coated.
- *You can use active dry yeast instead of instant yeast. If using active dry yeast, add the yeast to the water first and let it sit for 10 minutes until it bubbles. Then add to the rest of the recipe.
- Sourdough Version: Decrease the amount of water by 90g and decrease the amount of flour by 90g. Add 1/2 cup ripe starter (180g) to the water and break it up with your fingers. Add the mixture to the flour and salt and mix. You may want to complete 2-3 sets of stretch and fold before bulk fermentation. Continue recipe as instructed. Rise times will be at least doubled but will vary.
I tried this out for a Christmas dinner party last Friday. The guests raved about it! We paired it with my husband’s potato soup.
I used King Arthur bread flour and instant yeast. I think my pan must have been too small because my bread was very thick, and parts very dense–still fluffy and yummy though! My toppings of choice were grape tomatoes cut into halves to be flower petal shaped, rosemary sprigs for stems, thyme sprinkled over it, with Cajun seasoned white cheddar bits baked into it. Definitely should have just grated and sprinkled it on. I went heavy handed with the olive oil and still took it out of the oven halfway through to add more onto it. No such thing as too much oil on a focaccia!
So glad you enjoyed it! Sounds delicious!
I dont have bread flour. Can I use All Purpose?
Yes, you definitely can. You may not get as chewy of a texture, but it will work just fine. I would cut back on the water by about 3 Tablespoons.
nice information and good article thank you
I made this and it was GREAT! However, in an effort to make this a little healthier, I’m wondering if anyone has made this recipe with half bread flour and half Sprouted Wheat? If so please advise.
Thank you!
I’m so glad you enjoyed it! Yes, definitely work in some whole grains whenever you can! When I’m trying to incorporate whole grains in a new recipe, I usually start by swapping out 20% of the white for whole grain. Then gradually increase if I like the results. It’s important to keep in mind, the more whole grains you add, the denser your dough will be – since you’re using a heavier flour. But it’s a trade off for taste and nutrition. Let me know if you try it and how it turns out!
This was my second attempt at bread. The first time was a disaster and had no flavor. This go-around, the flavor was great! However it seems too dense for focaccia! What did I do wrong? Did I not let it rise enough? Any advice would be great!
Hi Cody,
Focaccia is one of those bread recipes you can really push that final rise. The more, the better. If you’re using a baking sheet pan, let it rise about 1/2 inch above pan level. Also, look for the dough to “jiggle” when you slide the pan back and forth. That’s a great visual to help you know when it’s ready. Warmer temperatures will speed up the rise time, colder temps slow it down – so make sure it’s in a warm spot in your kitchen.Try letting it rise longer next time and let me know how it turns out.
So yummy!!! This was the easiest bread I’ve ever made and so flavorful! Thanks for including the grams. Makes it so much easier to get the measurement correct. Already can’t wait to make this recipe again!
So glad you loved it!!
This is a wonderful focaccia recipe! I specifically searched for a “same-day” focaccia as it was a last minute idea. I didn’t have time to make the sourdough one I usually do. The focaccia was fabulous! I loved being able to do it in one day. The dough was wonderful to work with. It went over so well that I made another one the next day, as requested! Thank you for this great recipe!
So glad you enjoyed it!
If I cut the recipe in half should I cut the yeast in half too?
Yes, cut the yeast in half.
I wrote to you on the tortilla site about milling flour. How do I make bread flour from fresh milled. I want to make this focaccia and tortillas first then follow your bread recipe. Thanks for this great site. Dawn cuts my hair and she told me about you.
What would happen if you didn’t use a half sheet pan and instead used a normal sheet pan? I want to try making this, but I don’t own a half sheet pan.
A half sheet pan is a 13-inch by 18-inch baking sheet pan. That’s the size that this recipe will fit in. You can always cut the recipe in half if you want to use a quarter size sheet pan (which is 13-inches by 9-inches).
Hi Heather,
Thanks for this. I just made the dough and will be putting it in the fridge as soon as that first rise is done. My question is: Would you recommend freezing the focaccia after it is cooked to preserve the freshness or is that not a good idea?
Thanks again!
JB
I would not suggest freezing the focaccia. It’s really best enjoyed the same day. A good option would be to keep the dough in the refrigerator until you’re ready to bake and enjoy it. The dough can be kept in the refrigerator for up to 48 hours before baking.
OK, thank you! One more question: My focaccia did not rise like yours. It was a bit thin in some places, but even the thickest parts seemed only to be half as think as in your video. Do you know what would have limited its spring height? Should I leave it sit out longer before baking? Thanks!
Yes, I would let it rise a bit longer. You want it to rise to at least the height of the baking sheet. Rise times can vary – colder temperatures cause it to rise slower. Conversely, warmer temperatures will help it rise faster.
Hi, I am very excited to try this recipe..did so tonight, but found that the dough looked more wet than yours in the video, I almost threw out the dough but decided to put it in the bowl, and try it anyway…let it rise for 30 min and it is now in the fridge until tomorrow…will let you know if it turns out.
I’m curious to hear how it turned out. Many factors can play into how your bread turns out…flour type (how high the protein content is), water temperature, ambient temperature, rising time. Keep at it. The more you practice, the better you’ll get at understanding your dough.
I’m so excited to make this focaccia bread. Doing it tomorrow.