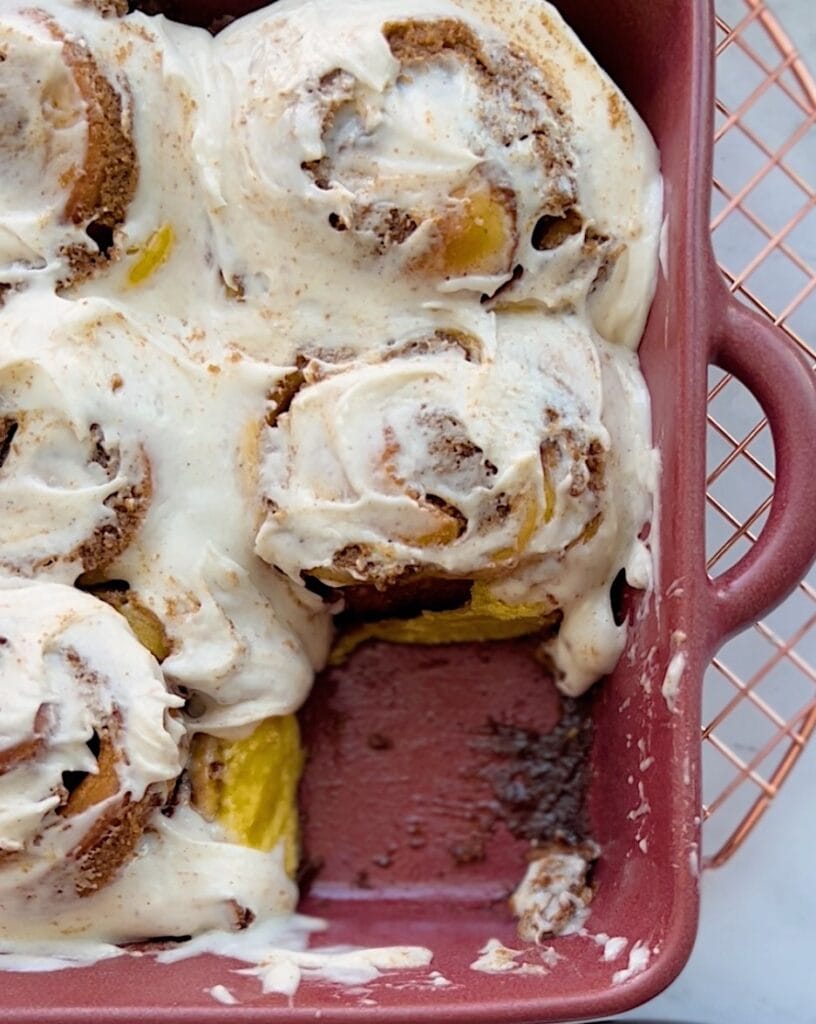
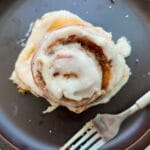
These super soft, fluffy cinnamon rolls are made with pure pumpkin and pumpkin spices! Filled with a rich, Biscoff cookie butter filling and topped with Brown Butter Cream Cheese Frosting, you won’t be able to resist this perfectly spiced pumpkin roll!
What I love about this recipe
- The pumpkin spiced roll: This dough is made with pure pumpkin puree and pumpkin pie spices. It’s incredibly soft and full of flavor!
- The Biscoff cookie butter filling: Mixed with butter, brown sugar and cinnamon, this spiced filling bakes up so rich and gooey – you’ll be in your happy place with every bite!
- The Brown Butter Cream Cheese Frosting: Brown butter elevates any recipe! This is no exception! With its slightly nutty and caramel flavor, this frosting is a perfect match for these pumpkin rolls!
How to make the dough
You’ll love how easy this dough is to throw together! I’m providing you with two options for making the roll dough – one with instant yeast and one with sourdough starter. The main recipe is the instant yeast version, but be sure to check the recipe notes for the sourdough variation. I’ve enjoyed them both ways and wanted to give you a sourdough option, just in case that’s your preference.
- Using your stand mixer with the dough hook attachment, add all of the dough ingredients but only half of the flour. Gradually add the remainder of the flour. The dough should be pulling away from the sides of the bowl. If it’s not, add up to another 1/2 cup of flour, 1 Tablespoon at a time.
- Knead dough in the mixer, on low speed, for 5 minutes.
- Gradually add the softened butter and continue to knead the dough for an additional 4 minutes.
- Place dough in a large greased bowl and cover. Allow it to rise until doubled in size, about 90 minutes. (at this point, you may also refrigerate the dough for up to 48 hours to use later).
Tips for rolling up cinnamon rolls
With my background in running a home bakery for 10 years, to say I’ve made a lot of cinnamon rolls is an understatement! I’ve got a very specific way I like to roll them out and divide them – I can’t imagine doing it any other way. Here are a few things to try when rolling up cinnamon rolls:
- Slightly tug and pull on the dough as you roll it up. This helps keep the roll nice and tight, which is good for a couple of reasons. It’s much easier to work with and divide. Also, tightening up the roll will allow you to create more rotations…thus giving you more delicious swirls of Biscoff filling!
- Using dental floss to cut the cinnamon rolls is not only quick and easy, but creates the cleanest cut – giving you the most beautiful cinnamon rolls. (by the way, you CAN use mint floss – it doesn’t affect the taste of your cinnamon rolls at all!) To cut them with floss, wrap a long piece of floss around your two index fingers, just as you would to floss your teeth. Slide the floss under the roll, bring the ends up and cross them over. Tug on both ends, creating a clean cut and dividing the cinnamon rolls. If you’ve never done it this way, give it a try – practice a few times and you’ll soon love it too!
- Place the cinnamon rolls about one-inch apart. It’s okay to let them rise and bake into each other. In fact, if they do touch, the lack of space for them to expand will force them to bake more vertically – and what’s better than a tall, fluffy cinnamon roll?!
- Be sure they are slightly golden before taking them out of the oven. Over baking can cause your cinnamon rolls to be doughy in the center and if they are slightly golden, that’s the best indicator that they are done.
Frosting the pumpkin rolls
An important note is that you’ll need to prepare your Brown Butter Cream Cheese Frosting ahead of time. It takes at least two hours of chill time to make this irrisistible icing and you’ll need to have it ready as soon as those pumpkin rolls come out of the oven!
As soon as the cinnamon rolls come out of the oven, spread the Brown Butter Cream Cheese Frosting over them. Since they are warm, the frosting will ooze into all of the cracks and crevices of the sweet rolls and will set smoothly. This rich, almost caramel flavored frosting is so perfect for these pumpkin cinnamon rolls! It creates such a cozy dessert! Visit my post about this frosting for a step-by-step video!
Time Saving Tips
I have a couple of ways you can prepare ahead of time so that you can have freshly baked cinnamon rolls without having to start from the very beginning!
- You can freeze rolls to bake for later: After rolling up and placing the rolls on a nonstick cookie sheet, put the entire pan in the freezer and allow the rolls to freeze for 24 hours. Once frozen, remove the sheet pan and you can pop them off and place them in a ziplock bag and store in the freezer for later use. When baking frozen rolls, remove them from the freezer bag and place on a baking sheet. Allow them to rise and bake as usual. Rising frozen rolls could take 3-5 hours, depending on how warm your kitchen is.
- Make the dough the night before and roll up in the morning: Make the dough the night before and refrigerate: This can be a better option than rolling them up the night before IF your overnight cinnamon rolls tend to over proof. After you finish rolling them up, they should rise within an hour and be ready to bake and frost!
These Pumpkin Cinnamon Rolls with Biscoff Filling are just beyond words! They’ve got all of the much-loved Fall spices and flavors! You’re going to love them!
Leave a comment, Follow and Share
Leave a comment below if you have any questions about this recipe, or just let me know how much you enjoyed it! This really helps me out and helps others making this recipe!
Be sure to follow me on Instagram for more insights and videos about my recipes and bread making techniques.
And share your baking creations with me, by tagging me @thatbreadlady! I love to see how you are enjoying my recipes and share them with my Instagram friends!
(This post contains affiliate links, which means I make a small commission on products purchased from these links. Good news – I only recommend products that I love!)

Want more help with your bread making?
Baking with yeast may seem intimidating and confusing, but I promise it doesn’t have to be! The more you practice, the easier it gets! I love to help bakers get amazing results in bread and baking through my Baking Academy classes. These pre-recorded videos help to take a lot of the guess work out of working with yeasted doughs! They are perfect for visual learners!
There is so much information out there that can make bread making so confusing, causing you to maybe hold back from tackling lots of recipes you want to make. My classes make it easier for you to understand how and why baking with yeast can be so rewarding!
Check out my Baking Academy
Explore amazing recipes & get my personal help with bread making through my step-by-step, pre recorded virtual baking classes!
Get ALL-ACCESS to my classes for one low price! Click HERE for more information!
Other recipes you’ll love
Brown Butter Cream Cheese Frosting
PrintPumpkin Cinnamon Rolls with Biscoff Filling
These super soft, fluffy cinnamon rolls are made with pure pumpkin and pumpkin spices! Filled with a rich, Biscoff cookie butter filling and topped with Brown Butter Cream Cheese Frosting, you won’t be able to resist this perfectly spiced pumpkin roll!
- Prep Time: 3 hours
- Cook Time: 28 minutes
- Total Time: 3 hours 28 minutes
- Yield: 18 sweet rolls 1x
Ingredients
For the dough:
- 1 and 1/3 cup (300g) warm milk, 2% or whole (around 90°F)
- 1/2 cup (115g) pure pumpkin puree
- 1/2 cup (100g) granulated sugar
- 1 Tablespoon instant yeast
- 1 & 1/2 teaspoons fine sea salt
- 1 large egg, room temperature
- 1 teaspoon pumpkin pie spice
- 5 cups (600g) bread flour, plus up to 1/2 cup (60g) as needed*
- 4 Tablespoons (56g) unsalted butter, softened and cubed
For the Filling:
- 2/3 cup (200g) Biscoff cookie butter
- 1/3 cup (75g) unsalted butter, softened
- 3/4 cup (160g) dark brown sugar, packed
- 1 Tablespoon ground cinnamon
1 batch of my Brown Butter Cream Cheese Frosting
Instructions
Make the dough:
- To the bowl of a stand mixer, with the dough hook attachment, combine the milk, pumpkin puree, sugar, instant yeast, salt, egg, pumpkin pie spice and 2 and 1/2 cups (300g) of the bread flour until fully incorporated. Gradually add the remaining 2 and 1/2 cups (300g) bread flour, mixing thoroughly. Once dough is smooth and incorporated, increase speed to medium low (Speed 2 for a Kitchenaid mixer). Add up to 1/2 cup (60g) more flour as needed – dough should be pulling away from the sides of the bowl and concentrated around the dough hook.
- Knead dough in the mixer, on low speed, for 5 minutes.
- Gradually add the softened butter and continue to knead the dough for an additional 4 minutes.
- Place dough in large greased bowl and cover. Allow it to rise until doubled in size, about 90 minutes. (at this point, you may also refrigerate the dough for up to 48 hours to use later).
Prepare the Frosting:
- See my recipe and instructions for making the Brown Butter Cream Cheese Frosting (link in notes). This will need to be started at least two hours before baking the cinnamon rolls. It can be prepared up to one week in advance and refrigerated. If refrigerated, allow it to come to room temperature before icing the cinnamon rolls.
Prepare the Filling:
- With an electric mixer, cream together all of the ingredients for the filling. Cream for 3 minutes until smooth and light. Set aside.
Roll out dough:
- Punch down the risen dough and turn it out onto a lightly floured work surface.
- Divide the dough into two equal pieces, each about 22 ounces.
- Roll one piece of dough out into a rectangle, about 10 x 18 inches.
- Spread half of the filling onto the dough, leaving a clean 1-inch border along the top of the the dough.
- Start with the long side closest to you, and working from left to right begin to roll dough up. You can tug and pull as you go which will tighten the roll and make more swirls.
- Once it’s all rolled up, you should end it at the side with the clean border. Pinch the seam shut by pinching the dough together to the roll.
- Using a piece of dental floss or baker’s twine, cut 9 equal sized cinnamon rolls. Place on a greased baking sheet about 1 inch apart.
- Repeat steps 3-8 with the second piece of dough.
- Cover and allow cinnamon rolls to rise a final time until increased about 75% in size, around one hour.
Bake:
- While cinnamon rolls are rising, preheat oven to 350°F. Uncover and bake on middle rack of oven for 24-28 minutes. Edges should be slightly golden.
- Spread Frosting over warm rolls, right out of the oven.
- Serve and enjoy!
Notes
(recipe updated 11/13/2023 to suggest using warm milk instead of room temperature)
- *Add any additional flour beyond the initial 600g of flour until dough feels soft to the touch but not sticky. The dough should be pulling away from the sides of the bowl and concentrated around the dough hook.
- To make the dough with sourdough starter, reduce milk to 250g and replace instant yeast with 125g starter. Mix dough the night before (8-10 hours before rolling out), cover and let rise on countertop. Roll out, fill and bake in the morning as instructed in the recipe.
- Find Brown Butter Cream Cheese Frosting recipe and instructions at this link: https://thatbreadlady.com/brown-butter-cream-cheese-frosting/
- This recipe was updated 4/23. I found that instead of letting the cinnamon rolls cool slightly before icing, that the frosting goes on much smoother if you spread it onto the cinnamon rolls right out of the oven. You’ll love the results from this slight adjustment!
These look amazing! Will be making this weekend!
Yay! Can’t wait for you to enjoy these!
Where do you grill your Biscoff Cookie Butter?
Hi Mary, I get mine in the grocery store. It’s usually next to the peanut butter. However, there is a link in the post to get it from Amazon if you can’t find it locally. Other brands work fine too. You’re looking for a “cookie butter”. Hope that helps!
I would like to make these for Sunday morning. When I’m going to refrigerate the dough do I let it rise for 90 minutes and then put it in the fridge or put it in the fridge once it’s combined?
Hi Holly, I’m excited for you to make these! Put it in the refrigerator right after mixing it up. It will continue to rise, but the colder temperature will slow it down. Hope you enjoy!
Thank you…so excited to make them. It’s made up of so many of my favorite things.
You’ll love them! Hope you enjoy!
I made these this weekend and I’m blown away. I love a good cinnamon roll and these are next level. The pumpkin flavor is subtle and the biscoff filling has cinnamon in it so it is very similar to the traditional cinnamon roll. Even if you are not a fan of pumpkin I believe you will love these. Browning the butter for the frosting is another flavor enhancement that amps up the flavor.
I made a large cookie sheet of rolls, froze them to be baked off this coming weekend and set aside 5 rolls that I baked in a cast iron skillet. I was amazed at how much I love them. I will definitely make these again….they are SO good. Great recipe Heather!!!
Wow Cindy! I’m so glad you enjoyed them! They definitely are a favorite in my home too. Thanks for the great review!
Hello! At what point did you freeze them?
Hi! You can either freeze the rolls right after you shape them (before they rise) or you can freeze them after they’ve baked and cooled.
I am excited to make these!
Can I use all-purpose flour? Would I need to make any adjustments?
Hi Christy. You could use all-purpose flour however, you might find that you’ll need to add up to another 1/4 cup as it may end up a bit stickier. Bread flour is best here, but if needed, use all-purpose in a pinch. Hope you enjoy!
Is the milk whole milk or 2%
Either will work!
I made these this weekend and they were a huge hit! So delicious and the browned butter frosting was just so good! Thank you for sharing!
So glad you loved them Jackie! They’re a big hit with my family too!
[…] Pumpkin Cinnamon Rolls with Biscoff Filling […]
My 14 yr old son and I made these this weekend. He wants to be a baker so we have been trying recipes to increase his skills. They taste great however our filling didn’t hold and ran under them. What did we do wrong?
I’ve never had that happen, but here’s a few things to try next time. Make sure you are letting the first rise completely double before rolling out. Use a little less of the filling on the inside. Try a shorter proof time before baking. Also, make sure you are keeping them away from warm temperatures while they rise. Choose one thing to change when you make them and see how it turns out. Keep at it! Baking is all about practice!
Curious how you place these for 18 rolls… is there a size of pan that fits all of them or do you put 12 on one and 6 on another? What pan do you usually use?
I use a half size sheet pan. Make 6 rows of three across. It is ok for the sides of the rolls to be touching. That will help them to bake upwards, nice and tall.
I couldn’t get my dough to rise. This has literally never happened to be before. I even added more yeast as a solution when looked how how to fix. I was a bit worried the yeast may not work since it wasn’t added to anything warm. I’ll have to try it again another day.
Did you test your yeast first? Next time, try warming your milk slightly (about 90°F) and sprinkle the yeast in there to proof before adding the rest of the ingredients. The yeast should foam up after 5-10 minutes. I’m actually updating this recipe and will suggest using warm milk. Let me know how it turns out! Thank you for trying it out!